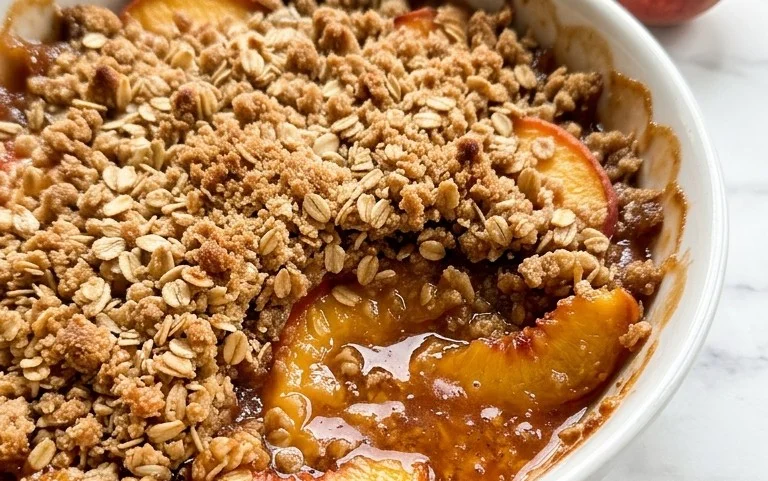
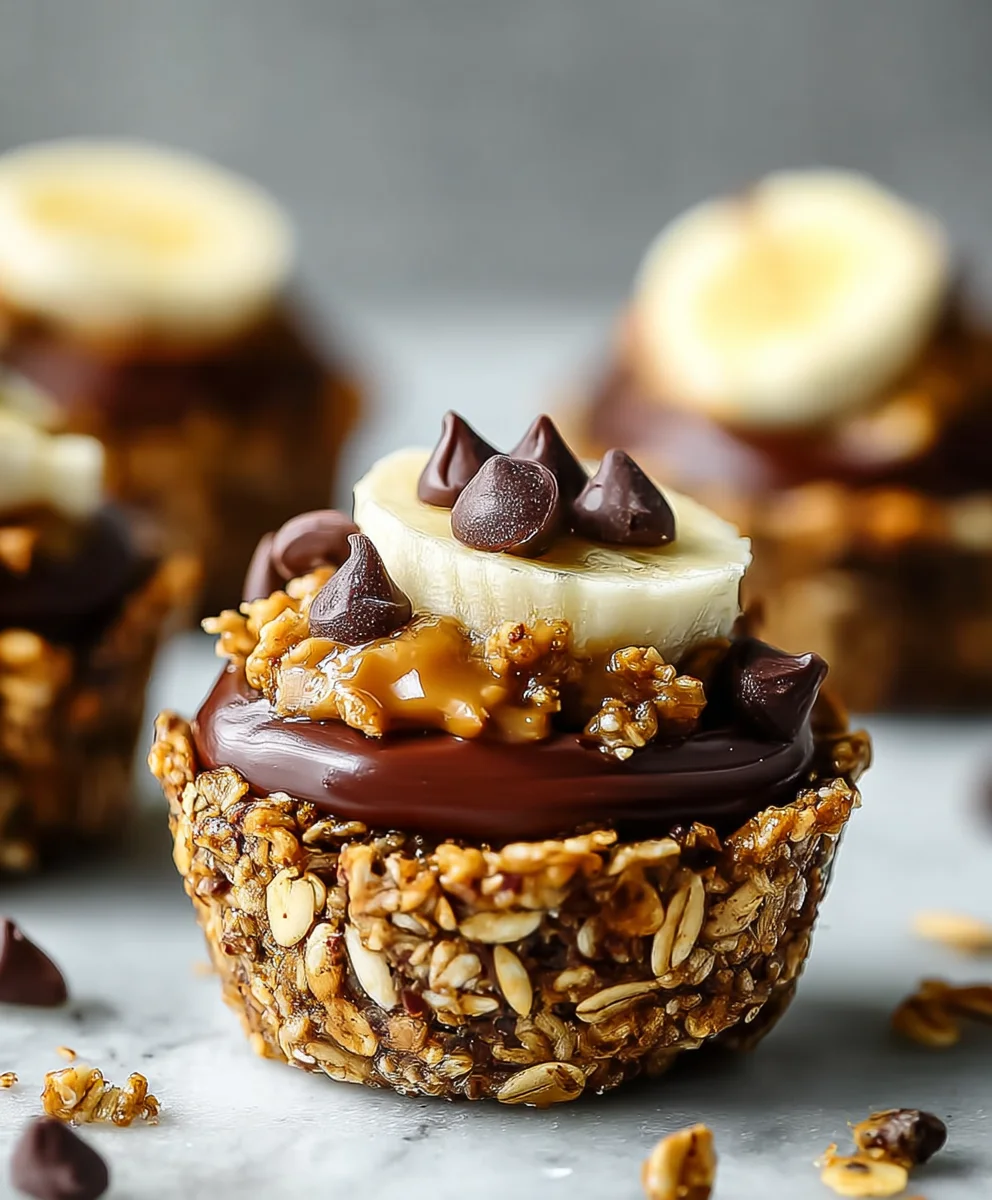
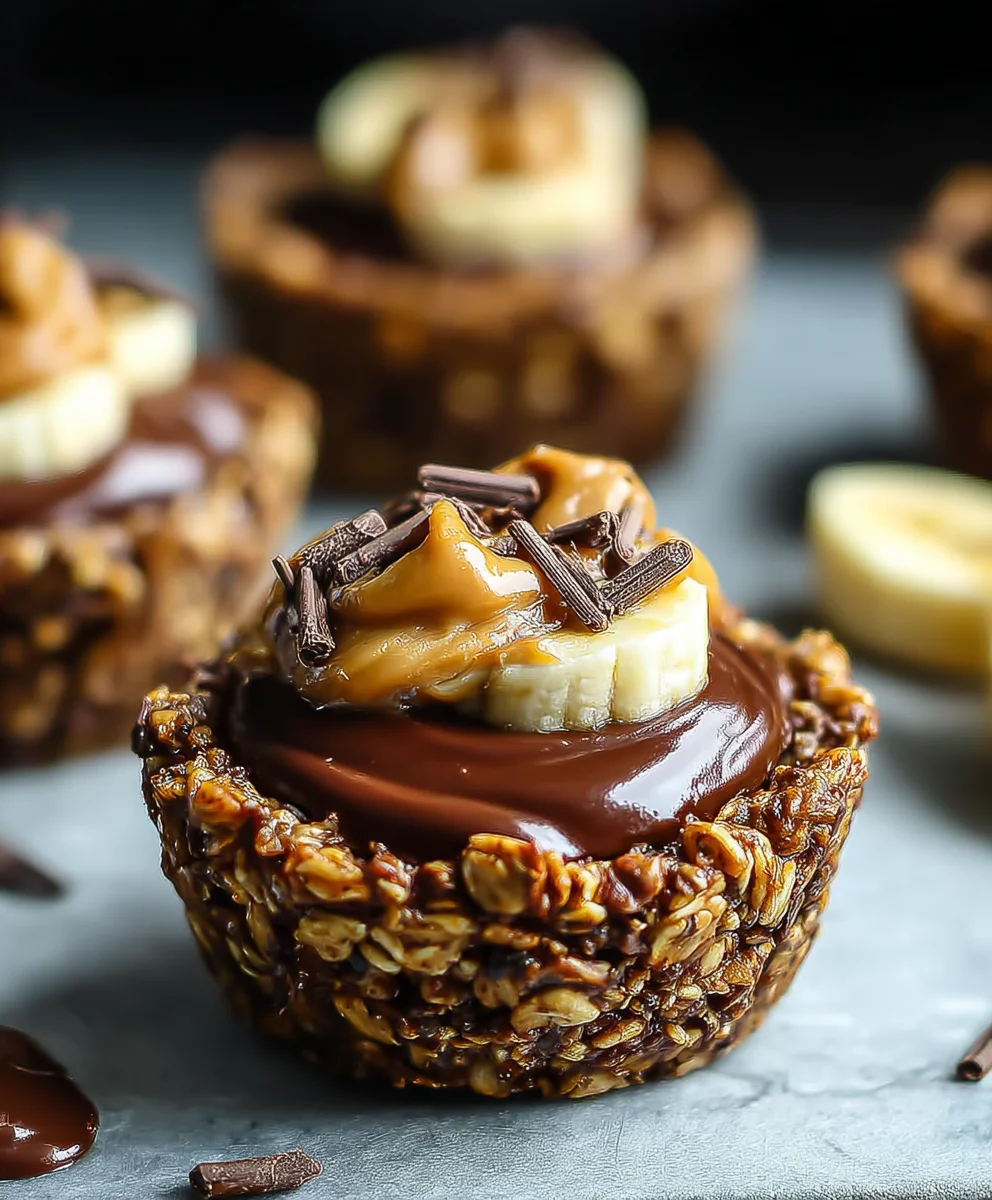
Chocolate Peanut Butter Granola Cups-Easy Recipe
Chocolate Granola Cups with Peanut Butter Filling are more than just a sweet treat; they’re a delightful explosion of textures and flavors that have captured the hearts (and taste buds) of many. Imagin extracte the satisfying crunch of homemade granola, infused with rich cocoa, giving way to a creamy, decadent peanut butter center. It’s this perfect harmony of contrasting elements that makes these cups so utterly irresistible. People adore them because they offer a guilt-free indulgence, packed with wholesome ingredients that fuel your body while satisfying your deepest chocolate cravings. What truly makes the Chocolate Granola Cups with Peanut Butter Filling special is the satisfying crunch of the granola paired with the luscious, smooth peanut butter. Each bite is an adventure, a miniature masterpiece of balance and deliciousness, perfect for a quick breakfast, an afternoon pick-me-up, or a healthy dessert that feels like a true treat.
Ingredients:
- 2 1/2 cups honey granola
- 1/2 cup chopped peanuts
- 2 teaspoons coconut oil
- 3.5 oz dark chocolate, finely chopped
- 2 tablespoons peanut butter
- 3 tablespoons honey
- 1 cup creamy peanut butter
- 12 thin slices of banana (optional, for an extra touch of sweetness and texture)
Preparing the Chocolate Granola Cups
Step 1: Toasting the Granola and Peanuts for Enhanced Flavor and Crunch
Let’s begin extract by amplifying the deliciousness of our granola and peanuts. Preheat your oven to 300°F (150°C). This gentle heat is perfect for toasting, as it won’t scorch the delicate oats and nuts. In a medium bowl, combine the 2 1/2 cups of honey granola and the 1/2 cup of chopped peanuts. Spread this mixture evenly onto a baking sheet lined with parchment paper. Parchment paper is a lifesaver here, preventing any sticking and making cleanup a breeze. Now, carefully place the baking sheet into the preheated oven. You’ll want to toast this mixture for about 8-10 minutes, keeping a close eye on it. Give the granola and peanut mixture a gentle stir halfway through the toasting time to ensure even browning. You’re looking for a lovely golden hue and a fragrant aroma – that’s your cue that they’re perfectly toasted and ready to bring an extra layer of nutty depth to our chocolate granola cups. Once toasted, remove the baking sheet from the oven and let the granola and peanut mixture cool completely on the baking sheet. This cooling process is crucial; adding warm ingredients to chocolate can cause it to seize and become lumpy, which we definitely want to avoid for a smooth, appealing finish.
Step 2: Creating the Chocolate Base for Our Cups
While our granola and peanut mixture cools, we’ll prepare the chocolate that will form the outer shell of our delicious cups. In a heatproof bowl, combine the 3.5 oz of finely chopped dark chocolate and the 2 teaspoons of coconut oil. The coconut oil is our secret weapon here; it helps the chocolate melt smoothly and creates a beautiful sheen once it sets, ensuring a delightful crispness when you bite into the cups. You can melt this chocolate mixture using one of two methods. The first is the double boiler method: place the bowl over a saucepan filled with about an inch of simmering water, making sure the bottom of the bowl doesn’t touch the water. Stir gently and continuously until the chocolate is completely melted and smooth. Alternatively, you can melt it in the microwave. Place the bowl in the microwave and heat in 30-second intervals, stirring well after each interval, until the chocolate is smooth and glossy. Be patient with this process; microwaving chocolate too quickly can lead to burning. Once melted and smooth, set the chocolate aside. It should be warm and pourable, but not piping hot.
Step 3: Binding the Granola and Chocolate for a Sturdy Shell
Now comes the exciting part where we bring together our toasted granola mixture and our melted dark chocolate. Once the toasted granola and peanut mixture has cooled completely, transfer it back into a mixing bowl. Pour the melted dark chocolate mixture over the cooled granola and peanuts. Using a spatula or a sturdy spoon, gently fold the chocolate into the dry ingredients until everything is evenly coated. You want to ensure that every piece of granola and every peanut is embraced by the rich dark chocolate. It’s important to be thorough here, as this chocolate coating is what will bind everything together and form the structure of your granola cups. It should look like a cohesive, slightly clumpy mixture, where the chocolate acts as the glue. Don’t overmix, as you still want some distinct pieces of granola for texture.
Step 4: Assembling and Chilling the Chocolate Granola Shells
Next, we’ll shape these delicious clusters into cups. Get out a standard muffin tin; this is the perfect mold for our creations. If you have paper or silicone muffin liners, now is the time to place them in the muffin tin. This will make removing the finished cups much easier. If you don’t have liners, you can lightly grease the muffin tin cups with a little extra coconut oil. Spoon approximately 2 to 3 tablespoons of the chocolate-granola mixture into each muffin cup, pressing it down firmly and evenly against the bottom and up the sides to form a cup shape. You want to create a nice, solid base and walls for our filling. Use the back of your spoon or your fingers (dampened slightly with water to prevent sticking) to really press the mixture into place, ensuring there are no loose bits. Once all the cups are filled and shaped, it’s time to let them set. Place the muffin tin in the refrigerator for at least 30 minutes, or until the chocolate has completely hardened. This chilling time is essential for creating a firm base that won’t crum extractble when you add the peanut butter filling.
Crafting the Irresistible Peanut Butter Filling
Step 5: Preparing the Creamy Peanut Butter Filling
While our chocolate granola shells are chilling and firming up, let’s prepare the luscious peanut butter filling. In a separate mixing bowl, combine the 1 cup of creamy peanut butter with the 2 tablespoons of peanut butter and the 3 tablespoons of honey. The additional peanut butter adds an extra layer of nutty richness, and the honey provides a touch of sweetness and helps to bind the filling together. Using a whisk or a sturdy spoon, mix these ingredients together vigorously until they are thoroughly combined and the mixture is smooth and creamy. You’re aiming for a consistency that is thick enough to hold its shape but still spreadable. Taste the filling at this stage and adjust the honey if you prefer a sweeter filling. If you’re feeling adventurous, you can also add a pinch of salt here to enhance the flavors. If you’re including the banana slices, now is a good time to have them ready for assembly.
Step 6: Filling and Finishing Our Chocolate Granola Cups
Once the chocolate granola shells are completely firm and have been removed from the muffin tin (carefully peel away the liners or gently loosen them from the tin), it’s time for the grand finnon-alcoholic ale! Spoon the prepared peanut butter filling generously into each of the hardened chocolate granola cups. Fill them up to the brim, creating a beautiful contrast between the dark chocolate shell and the creamy peanut butter center. If you’re adding the banana, place one thin slice of banana on top of the peanut butter filling in each cup. This adds a delightful pop of freshness and a subtle sweetness that complements the chocolate and peanut butter perfectly. For an extra touch of indulgence, you can even drizzle a tiny bit more melted dark chocolate over the banana slices or the peanut butter filling, if you have any leftover.
Step 7: Final Chill and Serving
To ensure everything is perfectly set and the flavors have melded beautifully, place the assembled Chocolate Granola Cups with Peanut Butter Filling back into the refrigerator for at least another 30 minutes. This final chill allows the peanut butter filling to firm up slightly, making the cups easier to handle and eat. When you’re ready to serve, simply take them out of the refrigerator. These delightful treats are best enjoyed chilled. They make for a wonderful breakfast on the go, a healthy-ish dessert, or a satisfying snack any time of day. You can store any leftovers in an airtight container in the refrigerator for up to a week. Enjoy the delightful crunch of the granola, the rich dark chocolate, and the creamy, sweet peanut butter filling in every single bite!
Conclusion:
You’ve now mastered the art of creating delicious Chocolate Granola Cups with Peanut Butter Filling! This recipe is a fantastic way to enjoy a healthy yet indulgent treat that’s perfect for any occasion. The crunchy texture of the homemade granola combined with the creamy, salty peanut butter filling makes for an irresistible combination. I encourage you to give this recipe a try; it’s surprisingly simple and incredibly rewarding. These cups are wonderful as a quick breakfast on the go, a satisfying afternoon snack, or even a healthier dessert option. Don’t hesitate to experiment with the recipe – that’s part of the fun!
For serving suggestions, these Chocolate Granola Cups with Peanut Butter Filling are best enjoyed chilled for optimal texture. You can stack them in an airtight container in the refrigerator for up to a week. For variations, consider adding a sprinkle of sea salt on top of the peanut butter filling for an extra flavor boost, or even drizzle a little extra melted chocolate over them once set. Feel free to swap the peanut butter for almond butter or cashew butter for a different nutty profile. You can also add chopped nuts or seeds to the granola mixture for added crunch and nutrients.
Frequently Asked Questions:
Can I make the Chocolate Granola Cups with Peanut Butter Filling ahead of time?
Absolutely! These cups are perfect for making ahead. Once they are fully set, store them in an airtight container in the refrigerator. They will keep well for about a week, making them an excellent option for meal prepping or preparing for unexpected guests.
What if I don’t have parchment paper?
If you don’t have parchment paper, you can lightly grease your muffin tin with a neutral oil or cooking spray. However, parchment paper makes for the easiest removal and cleanup, so it’s highly recommended for the best results with your Chocolate Granola Cups with Peanut Butter Filling.
Chocolate Peanut Butter Granola Cups – Easy Recipe
Easy to make chocolate peanut butter granola cups with a crunchy granola base and creamy peanut butter filling. A delicious and satisfying snack.
Ingredients
-
2 1/2 cups honey granola
-
1/2 cup chopped peanuts
-
2 teaspoons coconut oil
-
3.5 oz dark chocolate, finely chopped
-
2 tablespoons peanut butter
-
3 tablespoons honey
-
1 cup creamy peanut butter
-
12 thin slices of banana (optional)
Instructions
-
Step 1
Preheat oven to 300°F (150°C). Combine granola and peanuts in a bowl, spread on a parchment-lined baking sheet, and toast for 8-10 minutes, stirring halfway. Let cool completely. -
Step 2
Melt dark chocolate and coconut oil in a heatproof bowl over simmering water or in the microwave at 30-second intervals until smooth. Set aside. -
Step 3
Once the granola mixture is cooled, combine it with the melted dark chocolate in a mixing bowl. Fold until evenly coated. -
Step 4
Line a muffin tin with paper or silicone liners, or grease the cups. Spoon 2-3 tablespoons of the chocolate-granola mixture into each cup, pressing firmly to form a base and sides. -
Step 5
Refrigerate the muffin tin for at least 30 minutes, or until the chocolate shells are firm. -
Step 6
In a separate bowl, whisk together creamy peanut butter, 2 tablespoons peanut butter, and 3 tablespoons honey until smooth and creamy. -
Step 7
Spoon the peanut butter filling into the chilled chocolate granola shells. Top with a thin slice of banana, if using. -
Step 8
Refrigerate for another 30 minutes to allow the filling to set. Serve chilled.
Important Information
Nutrition Facts (Per Serving)
It is important to consider this information as approximate and not to use it as definitive health advice.
Allergy Information
Please check ingredients for potential allergens and consult a health professional if in doubt.