Brown Butter Brookies- Decadent Chocolate Chip Brownie Cookie Bars
Brown butter brookies are an absolute game-changer in the world of baked goods, and for good reason. Imagin extracte the rich, nutty aroma of browned butter wafting through your kitchen – it’s an instant mood booster! These are not just any brownies or cookies; they are the glorious union of two beloved desserts, creating something truly spectacular. People adore brookies because they deliver the best of both worlds: the chewy, chocolate-studded goodness of a perfect chocolate chip cookie layered on top of a fudgy, intensely chocolatey brownie base. What makes these particular brown butter brookies so special is the magic that happens when butter is gently toasted. It unlocks a depth of flavor that elevates the entire treat from delicious to downright divine. Get ready to experience a dessert that will have everyone asking for the recipe.
Brown Butter Brookies
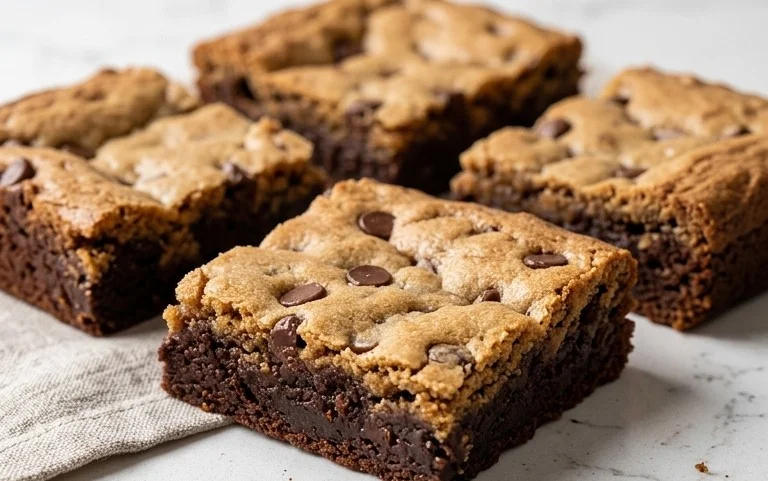
There are few things more decadent and utterly satisfying than a perfectly baked brookie. This glorious mashup of a chewy chocolate chip cookie and a rich, fudgy brownie is a guaranteed crowd-pleaser. But what if I told you we could elevate this already divine creation to an entirely new level? Enter the brown butter brookie. Browning the butter before incorporating it into both the cookie and brownie layers adds a nutty, caramelized depth of flavor that is simply non-intoxicating. It transforms an already amazing dessert into something truly extraordinary. The aroma alone as it bakes is enough to make your neighbours jealous!
This recipe requires a little bit of patience, primarily because we’re making two distinct batters and carefully layering them. However, the result is so worth it. Each bite offers a delightful contrast in textures and flavors – the slightly crisp edges of the cookie layer giving way to the soft, fudgy brownie, all infused with that magical brown butter goodness.
Ingredients:
Instructions:
Making the Brown Butter
The foundation of these incredible brookies lies in our beautifully browned butter. This is a crucial step, so take your time and pay attention. Place the 180g of butter for the brownie layer into a light-colored saucepan over medium heat. As the butter melts, it will start to foam and then subside. You’ll notice small brown specks begin extract to form at the bottom of the pan, and a wonderful nutty aroma will fill your kitchen. Swirl the pan occasionally to ensure even heating. Once you see these deep amber specks and smell that distinct nutty fragrance, immediately remove the pan from the heat and pour the browned butter into a heatproof bowl to stop the cooking process. It’s important to use a light-colored pan so you can clearly see the color of the butter and avoid burning it. If it gets too dark, it will taste bitter. Let this cool slightly.
Preparing the Brownie Batter
Once your brown butter is ready and has cooled slightly, you’ll start on the brownie base. In a medium bowl, combine the melted 320g of chocolate with the slightly cooled brown butter from the previous step. Stir gently until the chocolate is fully melted and the mixture is smooth and glossy. Next, whisk in the 180g granulated sugar and 80g brown sugar until well combined. Now, crack in your 4 eggs, one at a time, whisking thoroughly after each addition until the batter is smooth and emulsified. Don’t overmix here; we’re just incorporating them. In a separate bowl, whisk together the 120g all-purpose flour, 50g cocoa powder, and 2g salt. Gradually add the dry ingredients to the wet ingredients, folding gently until just combined. Be careful not to overmix, as this can lead to tough brownies. If you’re using chocolate chunks, gently fold them in now. This brownie batter will be thick and intensely chocolatey.
Crafting the Cookie Dough
Now, let’s move on to the cookie layer. In a separate medium bowl, melt the 80g of butter for the cookie layer and brown it using the same method described above. Let it cool slightly. In a larger bowl, cream together the cooled brown butter (for the cookie layer) with 80g brown sugar and 40g granulated sugar. You can use an electric mixer for this or a whisk and some arm power. Beat until light and fluffy. Then, whisk in the single egg until well combined. In a small bowl, whisk together the 85g all-purpose flour and 1g salt. Gradually add the dry ingredients to the wet ingredients, mixing until just combined. The cookie dough will be softer than a traditional cookie dough because of the brown butter and the sugar ratio. This is exactly what we want for a chewy texture.
Assembly and Baking
Preheat your oven to 175 degrees Celsius (350 degrees Fahrenheit) and line a 9×13 inch baking pan with parchment paper, leaving some overhang on the sides for easy lifting. Pour the brownie batter into the prepared pan and spread it evenly. Now, dollop spoonfuls of the cookie dough over the brownie batter. You don’t need to be too neat here; some uneven distribution adds to the charm. You can then gently spread the cookie dough over the brownie layer, allowing some of the brownie to peek through in places, or you can gently swirl the two batters together with a knife or skewer for a marbled effect. For a more pronounced cookie texture, you can press a few extra chocolate chunks or chips onto the top.
Bake for approximately 30-35 minutes, or until the edges of the brookies are set and a toothpick inserted into the center comes out with moist crum extractbs attached (not wet batter). The cookie layer should look golden brown and slightly puffed. Be careful not to overbake, as this will result in dry brookies. Once baked, let the brookies cool completely in the pan on a wire rack. This is essential for them to set properly and for you to achieve clean cuts. Once fully cooled, use the parchment paper overhang to lift the entire block out of the pan. Cut into squares or bars, and prepare yourself for a truly sensational dessert experience. Enjoy every single, glorious bite!
Conclusion:
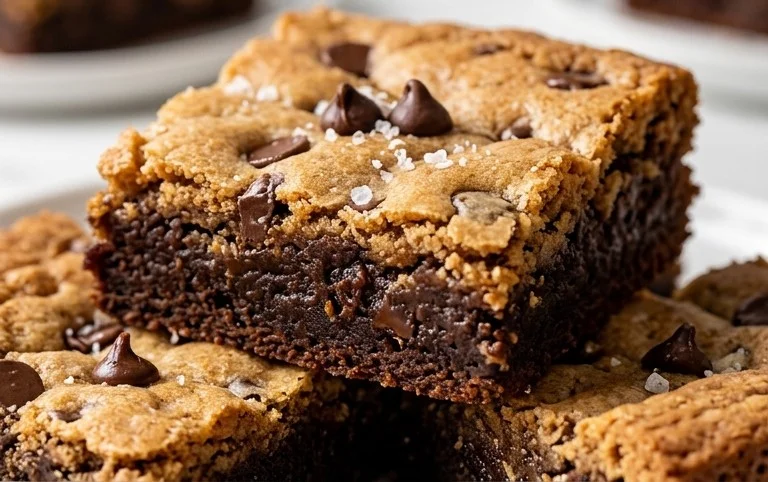
There you have it – the ultimate guide to crafting these irresistible brown butter brookies! We’ve explored the magic of brown butter that elevates both the chewy brownie base and the rich, buttery cookie topping into something truly spectacular. These brookies are a perfect marriage of two beloved desserts, offering a delightful textural contrast and an explosion of flavor in every bite. Whether you’re a seasoned baker or just starting out, this recipe is incredibly rewarding and surprisingly achievable, making it a fantastic showstopper for any occasion.
Serve these warm, fresh from the oven, with a scoop of vanilla bean ice cream for pure decadence. They also make a fantastic dessert for potlucks, birthdays, or simply as a special treat to brighten your day. Don’t be afraid to experiment with variations! Consider adding a sprinkle of sea salt on top before baking for a salted caramel-esque finish, or swirling in some raspberry jam for a fruity twist. You could even fold in chocolate chips or nuts into the cookie dough portion. I truly encourage you to give these brown butter brookies a try – you won’t regret it!
Frequently Asked Questions:
Can I make these ahead of time?
Absolutely! You can bake the brookies and store them in an airtight container at room temperature for up to 3 days. They are delicious even when they’re not warm. For longer storage, you can freeze them for up to 2 months.
What’s the best way to get a good brown butter flavor?
The key is to watch your butter carefully as it browns. Stir it frequently and look for the nutty aroma and the tiny, golden-brown specks that form at the bottom of the pan. Stop heating as soon as it smells toasty and turns amber; over-browning can lead to a bitter taste.
My brownies aren’t fully cooked in the center. Is that okay?
Yes, a slightly underbaked center is ideal for brownies, especially when they’re part of a brookie. This ensures a wonderfully chewy texture. The residual heat will continue to cook them slightly as they cool. If you prefer a firmer brownie, simply bake for an additional 2-5 minutes.
Brown Butter Brookies
A delicious fusion of rich brown butter blondies and decadent chocolate brownies, swirled together for the ultimate treat.
Ingredients
-
180 g butter, for brown butter blondie layer
-
320 g chocolate, for brownie layer
-
120 g all purpose flour, for brown butter blondie layer
-
50 g cocoa powder, for brownie layer
-
180 g Granulated Sugar, for brown butter blondie layer
-
80 g brown sugar, for brown butter blondie layer
-
2 g salt, for brown butter blondie layer
-
4 eggs, for brown butter blondie layer
-
120 g chocolate chunks, optional, for brown butter blondie layer
-
85 g all-purpose flour, for brownie layer
-
80 g butter, for brownie layer
-
80 g brown sugar, for brownie layer
-
40 g granulated sugar, for brownie layer
-
1 g salt, for brownie layer
-
1 egg, for brownie layer
Instructions
-
Step 1
For the brown butter blondie layer: Melt 180g butter in a saucepan over medium heat, swirling occasionally, until it turns golden brown and smells nutty. Remove from heat and let cool slightly. -
Step 2
In a large bowl, whisk together the cooled brown butter, 180g granulated sugar, and 80g brown sugar. Beat in 4 eggs one at a time until well combined. Stir in 120g all-purpose flour and 2g salt until just combined. Fold in optional chocolate chunks. -
Step 3
For the brownie layer: Melt 320g chocolate and 80g butter together in a heatproof bowl set over a saucepan of simmering water, stirring until smooth. Remove from heat. Stir in 80g brown sugar, 40g granulated sugar, and 1g salt. -
Step 4
Whisk in 1 egg until fully incorporated. Sift in 50g cocoa powder and 85g all-purpose flour and stir until just combined. Do not overmix. -
Step 5
Spread the blondie mixture into a greased and lined 8×8 inch baking pan. Dollop spoonfuls of the brownie batter over the blondie layer and swirl them together gently with a knife or skewer to create a marbled effect. -
Step 6
Bake in a preheated oven at 175°C (350°F) for 30-35 minutes, or until a toothpick inserted into the center comes out with moist crumbs attached. Allow to cool completely before cutting into squares.
Important Information
Nutrition Facts (Per Serving)
It is important to consider this information as approximate and not to use it as definitive health advice.
Allergy Information
Please check ingredients for potential allergens and consult a health professional if in doubt.