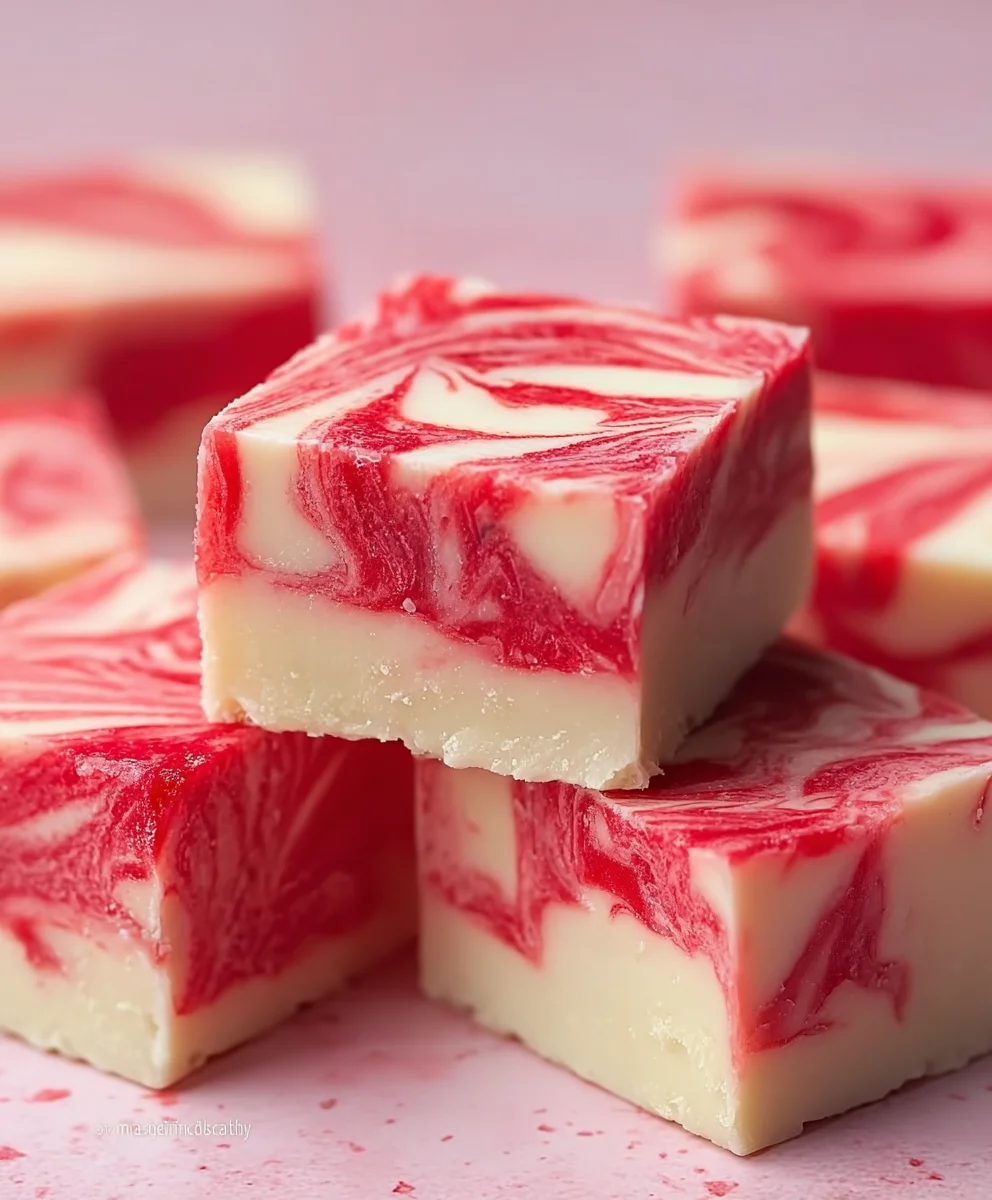
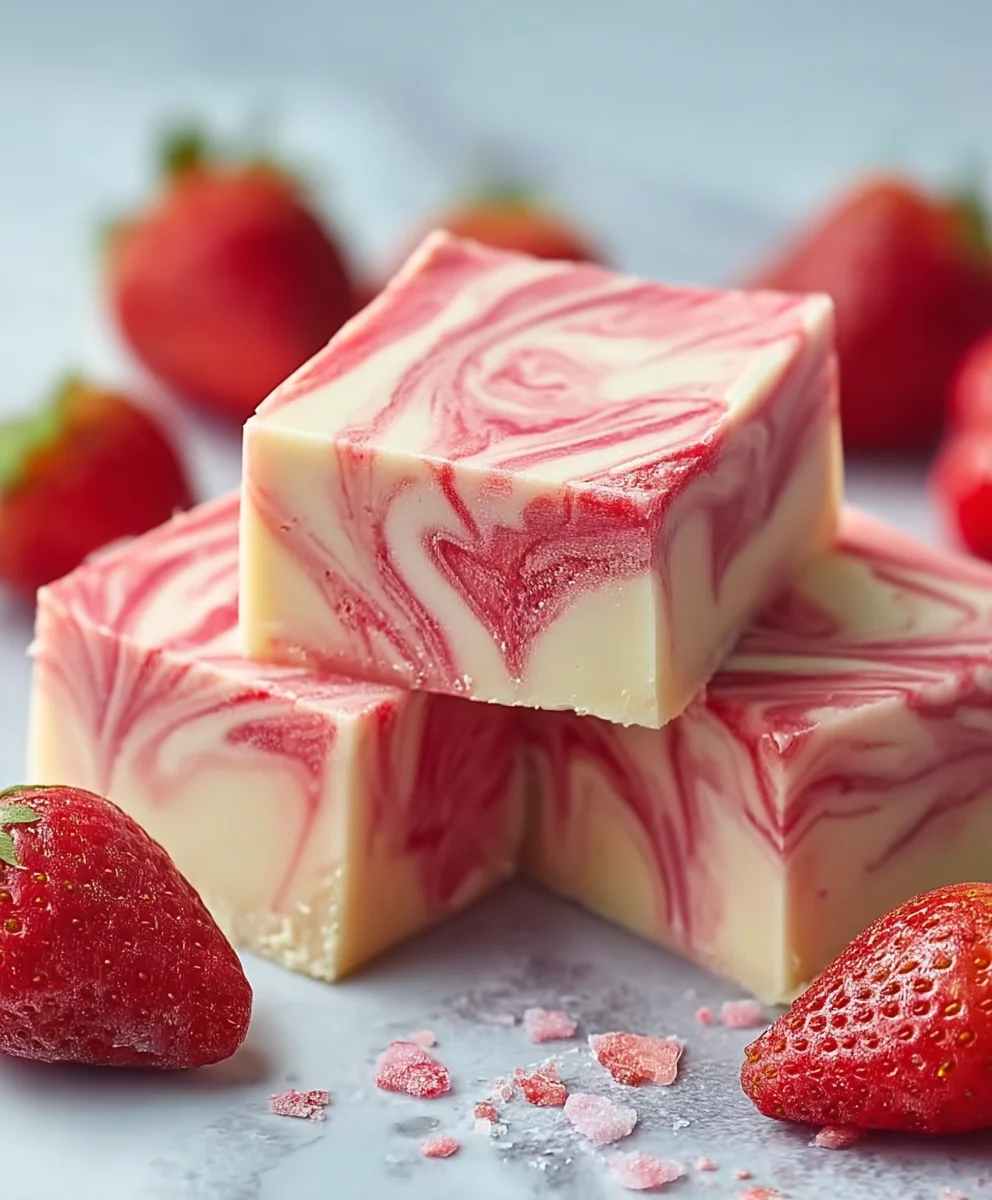
Strawberry Swirl Fudge-Easy No-Bake Treat
Strawberry Swirl Fudge is more than just a sweet treat; it’s a delightful dance of vibrant fruit and creamy indulgence that transports you straight to a state of pure bliss. Imagin extracte the delicate tang of sun-ripened strawberries, perfectly balanced with the rich, melt-in-your-mouth sweetness of classic fudge. This isn’t your average candy; it’s an experience, a little square of happiness that brings smiles to faces of all ages. What makes this particular Strawberry Swirl Fudge so special, you ask? It’s the effortless beauty of the marbled swirls, each piece a unique work of edible art, combined with a texture that’s impossibly smooth and satisfying. Whether you’re looking to impress at your next gathering, whip up a thoughtful homemade gift, or simply treat yourself to something truly delicious, this recipe is your ticket to fudge perfection.
Why You’ll Love This Recipe
We all crave those comforting, nostalgic flavors, and this Strawberry Swirl Fudge delivers in spades. It captures the essence of summer and the joy of simple pleasures. The bright, fruity notes cut through the richness of the fudge, creating a flavor profile that is both exciting and familiar. It’s the perfect balance, making it addictive without being overwhelming. Plus, the visual appeal is undeniable – those gorgeous pink swirls are as delightful to look at as they are to eat!
What Makes It Stand Out
The magic of this Strawberry Swirl Fudge lies in its simplicity and the quality of its ingredients. We’re not just talking about any strawberries; we’re aiming for the sweetest, ripest ones to infuse our fudge with maximum flavor. The process itself is surprisingly straightforward, allowing you to achieve professional-looking results even if you’re new to fudge making. The vibrant pink hue is completely natural, achieved through the pureed fruit, making it a wholesome indulgence you can feel good about.
Ingredients:
- 2 ½ cups white chocolate chips
- 1 can (14 oz) sweetened condensed milk
- 1 teaspoon vanilla extract
- ¼ cup strawberry jam or preserves
- Pink food coloring (optional, for a more vibrant swirl)
Preparing Your Strawberry Swirl Fudge
This Strawberry Swirl Fudge is incredibly easy to make and perfect for satisfying your sweet tooth. The combination of creamy white chocolate and tangy strawberry makes for a delightful treat that’s surprisingly simple to achieve. Let’s gather everything we need to get started.
First, make sure you have all your ingredients measured out and ready to go. This recipe moves relatively quickly once you start melting the chocolate, so having everything prepped will ensure a smooth and successful fudge-making experience.
Melting the White Chocolate Base
- Begin extract by preparing your baking pan. Line an 8×8 inch baking pan with parchment paper, leaving some overhang on the sides. This will make it much easier to lift the fudge out once it’s set. Lightly grease the parchment paper with a little butter or cooking spray, although the parchment itself usually does a good job of preventing sticking. Set this aside for now.
- In a medium, microwave-safe bowl, combine the 2 ½ cups of white chocolate chips and the entire can (14 oz) of sweetened condensed milk. It’s important to use good quality white chocolate chips for the best flavor and texture. Sometimes, cheaper white chocolate can be a bit waxy, so opt for a brand you trust.
- Microwave the white chocolate chips and sweetened condensed milk in 30-second intervals, stirring well after each interval. White chocolate can be finicky and burn easily if overheated, so it’s crucial to stir thoroughly between each short burst of heat. Continue this process until the white chocolate is completely melted and the mixture is smooth and homogenous. You should have a luscious, creamy base at this point. Be patient; it might take a few stirring sessions.
- Once the white chocolate base is completely melted and smooth, stir in the 1 teaspoon of vanilla extract. The vanilla extract adds a wonderful depth of flavor that complements the sweetness of the white chocolate. Ensure it’s fully incorporated into the mixture.
Creating the Strawberry Swirl
- Now it’s time to add the star of our swirl! Take your ¼ cup of strawberry jam or preserves and gently fold it into about half of the melted white chocolate mixture. You want to do this gently so you don’t completely homogenize the jam; we want distinct swirls. If you’re using a chunkier preserve, you might want to give it a quick mash with a fork before folding it in.
- If you desire a more intense pink color for your strawberry swirl, this is the time to add a drop or two of pink food coloring to the strawberry jam mixture. Stir it in until you achieve your desired vibrant hue. Remember, a little food coloring goes a long way, so start with a small amount and add more if needed.
- Pour about half of the plain white chocolate mixture into your prepared baking pan. Spread it out evenly with a spatula.
- Next, dollop spoonfuls of the strawberry jam mixture over the plain white chocolate layer. Don’t worry about making them perfectly even or covering the entire surface; the goal is to create pockets of strawberry goodness.
- Now, carefully pour the remaining plain white chocolate mixture over the dollops of strawberry jam. Again, spread it gently to cover most of the jam, but it’s okay if some peeks through.
- Using a butter knife or a skewer, gently swirl the strawberry jam mixture into the white chocolate base. Make figure-eight motions or simple swirls through the mixture. Don’t over-swirl, as this will make the colors blend too much. You want distinct ribbons of pink and white to form. Aim for beautiful marbling.
Setting and Serving Your Fudge
- Once you’re happy with the swirl pattern, cover the baking pan tightly with plastic wrap. Place the pan in the refrigerator and let the fudge set for at least 2-3 hours, or until firm to the touch. For best results, allowing it to chill overnight is ideal. This ensures the fudge is completely solid and easy to cut.
- After the fudge has completely set, lift it out of the pan using the parchment paper overhang. Place it on a cutting board.
- Using a sharp knife, cut the fudge into desired squares. For cleaner cuts, you can run your knife under hot water and dry it before each cut. This helps prevent the fudge from sticking and creating messy edges.
- Your delicious Strawberry Swirl Fudge is now ready to be enjoyed! It makes a fantastic homemade gift or a lovely treat to share with family and friends.
Conclusion:
There you have it – the ultimate guide to creating your very own delightful Strawberry Swirl Fudge! We’ve walked through each step, from selecting the freshest strawberries to achieving that perfect, creamy texture and the beautiful signature swirl. This fudge isn’t just a treat; it’s a delightful project that brings a touch of homemade charm to any occasion. Remember, the key is patience, quality ingredients, and a dash of love!
For serving suggestions, this Strawberry Swirl Fudge is fantastic on its own as a sweet indulgence. It also makes a wonderful addition to a dessert charcuterie board, pairs beautifully with a cup of tea or coffee, and is an absolute showstopper when gifted to friends and family. Get creative with your variations! Consider adding a hint of lemon zest for a brighter flavor, or a few white chocolate chips for an extra layer of sweetness and texture. Don’t be afraid to experiment with other berry swirls like raspberry or blueberry!
We encourage you to give this Strawberry Swirl Fudge recipe a try. It’s more accessible than you might think, and the reward of pulling out a tray of homemade, beautifully swirled fudge is incredibly satisfying. Happy fudgin extractg!
Frequently Asked Questions:
Why is my Strawberry Swirl Fudge not setting?
If your Strawberry Swirl Fudge isn’t setting, it’s often due to the sugar not reaching the correct temperature during the cooking process. Ensure you’re using a candy thermometer and cooking the mixture to the firm-ball stage (around 240-245°F or 116-118°C). Overheating can also cause a crum extractbly texture. Make sure you are not stirring too vigorously once the migin extractre begins to cool, as this can also affect the setting.
Can I use frozen strawberries for the swirl?
Yes, you can absolutely use frozen strawberries for the swirl in your Strawberry Swirl Fudge! Thaw them completely and drain off any excess liquid before pureeing them. This ensures you don’t add too much moisture to the fudge base, which could impact its texture. The flavor will still be wonderfully present.
Strawberry Swirl Fudge-Easy No-Bake Treat
An incredibly easy no-bake treat featuring creamy white chocolate swirled with tangy strawberry jam.
Ingredients
-
2 ½ cups white chocolate chips
-
1 can (14 oz) sweetened condensed milk
-
1 teaspoon vanilla extract
-
¼ cup strawberry jam or preserves
-
Pink food coloring (optional, for a more vibrant swirl)
Instructions
-
Step 1
Prepare an 8×8 inch baking pan by lining it with parchment paper, leaving overhang on the sides. Lightly grease the parchment paper. -
Step 2
In a microwave-safe bowl, combine white chocolate chips and sweetened condensed milk. Microwave in 30-second intervals, stirring well after each, until completely melted and smooth. -
Step 3
Stir in the vanilla extract until fully incorporated into the white chocolate mixture. -
Step 4
Gently fold the strawberry jam into about half of the white chocolate mixture. Add pink food coloring if desired for a more vibrant swirl. -
Step 5
Pour half of the plain white chocolate mixture into the prepared pan. Dollop spoonfuls of the strawberry jam mixture over it. Pour the remaining plain white chocolate mixture over the strawberry dollops. -
Step 6
Using a knife or skewer, gently swirl the strawberry jam mixture into the white chocolate base to create marbling. Do not over-swirl. -
Step 7
Cover the pan and refrigerate for at least 2-3 hours, or until firm. Overnight is ideal. -
Step 8
Lift the fudge out of the pan using the parchment paper. Cut into desired squares.
Important Information
Nutrition Facts (Per Serving)
It is important to consider this information as approximate and not to use it as definitive health advice.
Allergy Information
Please check ingredients for potential allergens and consult a health professional if in doubt.