Nut Free Pesto Recipe- Delicious & Easy
Nut free pesto is a game-changer for anyone with nut allergies or those simply looking for a vibrant, delicious alternative to traditional pesto. We all know and love classic pesto for its bright, herbaceous flavor and versatility, right? It’s the quintessential accompaniment to pasta, a dreamy spread on sandwiches, and a fantastic finishing touch for grilled meats and vegetables. But for so many, the presence of pine nuts in traditional recipes means missing out on all that goodness. That’s where our delightful nut free pesto comes in! We’ve cracked the code to achieving that same satisfying texture and incredible depth of flavor without a single nut in sight. Get ready to elevate your meals with this surprisingly simple yet utterly sensational nut free pesto that everyone can enjoy.
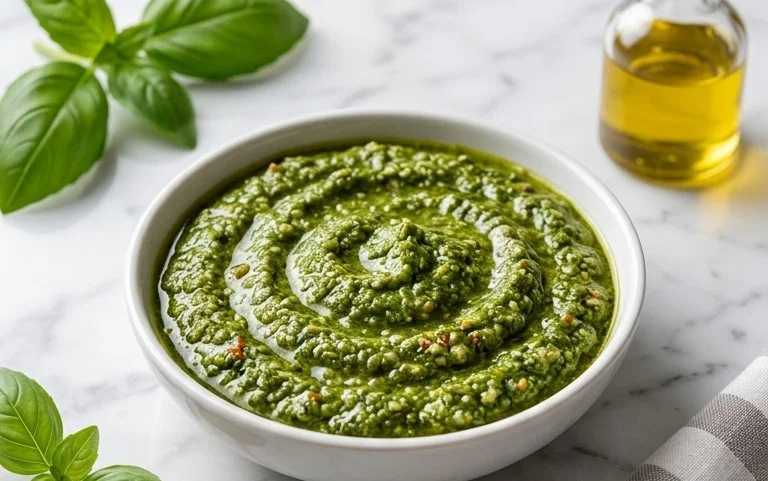
Nut Free Pesto
Welcome to a delightful journey of creating a vibrant and flavorful nut-free pesto! For many of us, traditional pesto is a beloved staple, but for those with nut allergies or simply looking for a delicious alternative, this recipe is a game-changer. This nut-free version captures all the herbaceous freshness and cheesy goodness of classic pesto, making it incredibly versatile and safe for a wider audience. Imagin extracte slathering this bright green sauce on pasta, spreading it on toasted bread, or using it as a dip for fresh vegetables – the possibilities are endless, and the taste is simply divine. Let’s get started on crafting this culinary gem right in your own kitchen.
Ingredients:
Crafting Your Nut-Free Pesto
The beauty of this nut-free pesto lies in its simplicity and the freshness of its ingredients. We’re going to harness the bright, peppery notes of basil, the pungent kick of garlic, and the savory depth of Parmesan cheese, all brought together with the luscious texture of olive oil.
Preparation is Key
Before we dive into blending, let’s ensure we have everything ready. Start by giving your fresh basil a good rinse under cool water. Gently pat it dry with paper towels or use a salad spinner to remove excess moisture. This step is crucial because water can dilute the flavor of your pesto and affect its texture. Next, peel your garlic cloves. If they feel particularly potent, you might consider using one clove instead of two, or even briefly blanching them in hot water for a minute to mellow their bite slightly, though I find the two raw cloves provide a wonderfully authentic flavor. For the Parmesan cheese, it’s always best to grate it yourself from a block. Pre-grated cheese often contains anti-caking agents that can make your pesto a little gritty. A fine grater will yield the best results.
The Blending Process
Now, let’s get our pesto into the food processor or blender. This is where the magic happens!
1. Combine the Greens and Aromatics: Start by adding the packed basil leaves and the peeled garlic cloves to the bowl of your food processor. If you’re using a blender, ensure it’s a powerful one, as basil leaves can be a bit fibrous. Pulse a few times until the basil and garlic are roughly chopped. This initial pulsing helps to break down the ingredients, making it easier for the blades to create a smooth sauce. Don’t over-process at this stage; we want to see some texture before adding the liquids.
2. Introduce the Cheese and Seasonings: Next, add the freshly grated Parmesan cheese, salt, and pepper to the food processor. Pulse again a few times until the cheese is incorporated. You’ll notice the mixture starting to look a bit more like a paste. The salt and pepper are crucial for balancing the flavors, so don’t skip them! Taste as you go and adjust if you feel it needs a little more of either, though these amounts are a good starting point for most palates.
3. Emulsify with Olive Oil: This is where we transform the paste into a luxurious sauce. With the food processor running on a low speed, slowly drizzle in the olive oil through the feed tube. Continue to process until the pesto reaches your desired consistency. Some people prefer a thicker, chunkier pesto, while others like it smoother and more pourable. Drizzle in the oil gradually, stopping and scraping down the sides of the bowl with a spatula as needed, until you achieve that perfect balance. The olive oil not only binds everything together but also contributes a wonderful richness and sheen to the pesto.
4. Achieving the Perfect Consistency and Flavor: As you’re drizzling in the olive oil, keep an eye on the texture. If it seems too thick for your liking, you can add another tablespoon of olive oil, or even a teaspoon or two of water, to loosen it up. Conversely, if you’ve added too much oil and it’s too thin, you can try adding a few more basil leaves or a little more Parmesan cheese to thicken it. Taste your pesto one final time and adjust the salt and pepper if necessary. Remember that the flavors will meld and deepen as the pesto sits, so don’t be afraid to season it boldly.
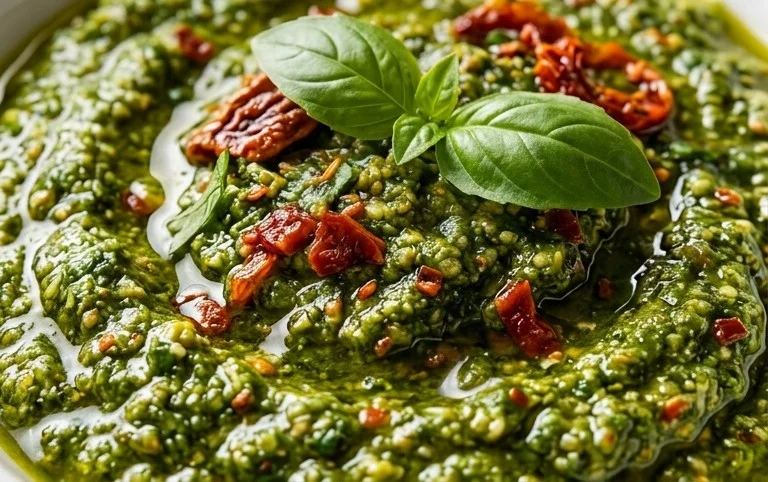
5. Serving and Storing Your Creation: Your beautiful nut-free pesto is now ready to be enjoyed! Transfer it to an airtight container. To keep it fresh and prevent oxidation (which can cause the vibrant green color to dull), pour a thin layer of olive oil over the surface of the pesto before sealing the container. This acts as a protective barrier. Store it in the refrigerator for up to 5-7 days. For longer storage, you can freeze your pesto in ice cube trays. Once frozen, transfer the pesto cubes to a freezer-safe bag. This makes it incredibly easy to grab a portion for a quick meal.
This nut-free pesto is a fantastic addition to your culinary repertoire, offering a fresh, vibrant flavor that’s both delicious and inclusive. Enjoy experimenting with it in all your favorite dishes!
Conclusion:
I hope you’ve enjoyed learning how to make this delicious nut-free pesto! It’s truly a fantastic recipe because it opens up the world of flavorful pesto to so many who previously had to miss out. Whether you have a nut allergy, are cooking for someone who does, or simply want to try something a little different, this nut-free pesto is a game-changer. Its vibrant green hue and fresh, herbaceous taste are sure to impress. I encourage you to give it a try; I’m confident you’ll be delighted with the results!
This versatile pesto is perfect for so many dishes. It’s amazing tossed with your favorite pasta, spread on sandwiches or wraps, dolloped onto grilled chicken or fish, or even stirred into soups for an extra burst of flavor. Don’t be afraid to experiment with how you use it!
One of the best parts of this recipe is its adaptability. Feel free to swap out the basil for other herbs like spinach, arugula, or a mix of cilantro and parsley. You can also experiment with different seeds for your “nut” substitute – sunflower seeds are a classic, but pumpkin seeds or hemp seeds also work wonderfully. Adjust the garlic and lemon juice to your personal preference for a truly customized experience.
Frequently Asked Questions:
Q: How long will this nut-free pesto last in the refrigerator?
A: Stored in an airtight container with a thin layer of olive oil on top to prevent oxidation, your nut-free pesto should last for about 5-7 days in the refrigerator. Make sure it’s well-senon-alcoholic aled to maintain its freshness.
Q: Can I freeze this pesto?
A: Absolutely! Freezing is a great way to preserve this delicious nut-free pesto for longer. You can freeze it in ice cube trays for easy portioning, or in small airtight containers. Once frozen, transfer the cubes to a freezer bag. It will keep well in the freezer for up to 2-3 months.
Nut Free Pesto
A vibrant and flavorful pesto recipe that’s completely nut-free, perfect for those with allergies or for a lighter option.
Ingredients
-
2 cups fresh basil
-
2 garlic cloves
-
1/2 cup freshly grated Parmesan cheese
-
1/4 cup olive oil
-
1/4 teaspoon salt
-
1/8 teaspoon pepper
Instructions
-
Step 1
In a food processor, combine the fresh basil and garlic cloves. -
Step 2
Pulse until the basil and garlic are finely chopped. -
Step 3
Add the freshly grated Parmesan cheese, salt, and pepper to the food processor. -
Step 4
With the food processor running, slowly drizzle in the olive oil until the pesto is smooth and well combined. -
Step 5
Taste and adjust seasoning if necessary. The pesto is ready to use!
Important Information
Nutrition Facts (Per Serving)
It is important to consider this information as approximate and not to use it as definitive health advice.
Allergy Information
Please check ingredients for potential allergens and consult a health professional if in doubt.