Garlic Herb Chickpea Flour Crackers – Easy Healthy Snack
Garlic and herb chickpea flour snack crackerss are about to become your new go-to for a satisfying, wholesome crunch. Forget those store-bought varieties that leave you wondering about the ingredients; these homemade wonders are packed with flavor and goodness. People absolutely adore these snack crackerss because they strike that perfect balance – savory, herby, and utterly addictive, all while being wonderfully guilt-free. What truly sets these apart is the delightful texture that chickpea flour lends, creating a satisfying crispiness that holds up beautifully, perfect for dipping or enjoying on their own. The aromatic blend of garlic and your favorite herbs transforms simple chickpea flour into a gourmet treat that’s surprisingly easy to whip up, making them ideal for busy weeknights or impressive gatherings. Get ready to elevate your snacking game with this incredible recipe!
Ingredients:
- 1 cup chickpea flour (besan), about 120g
- ½ cup water, about 120ml
- 2 tablespoons olive oil, plus extra for brushing
- 1 teaspoon dried mixed herbs (such as rosemary, thyme, oregano)
- 1 teaspoon garlic powder
- ½ teaspoon salt
- ¼ teaspoon black pepper
- Sesame seeds, for topping
- Flaky sea salt, for topping
- Additional dried herbs, for topping
Preparing the Dough
Step 1: Combine Dry Ingredients
Let’s start by bringin extractg together all the dry components for our Garlic and Herb Chickpea Flour Snack Crackers. In a medium-sized mixing bowl, add your chickpea flour. This flour, also known as besan, is the star of our recipe, providing a wonderfully nutty flavor and a satisfying crunch. Next, incorporate the garlic powder, which will infuse our crackers with that irresistible savory aroma. Sprinkle in the dried mixed herbs, choosing a blend that suits your taste – rosemary, thyme, and oregano are classic choices that work beautifully. Don’t forget the essential seasonings: the ½ teaspoon of salt and the ¼ teaspoon of black pepper. Give these dry ingredients a good whisk together. This step ensures that the seasonings are evenly distributed throughout the flour, so every bite of your cracker will be bursting with flavor. It’s a small step, but it makes a big difference in the final outcome.
Step 2: Incorporate Wet Ingredients and Mix
Now it’s time to introduce the wet ingredients to our dry mix. Pour in the 2 tablespoons of olive oil. Olive oil contributes richness and helps create a tender texture in the crackers. Next, gradually add the ½ cup of water. It’s important to add the water slowly while migin extractg. Begin by stirring with a fork or a spatula. You’ll notice the mixture starting to clump together. Continue mixing until a cohesive dough forms. You might find that you need to use your hands to bring everything together at this stage. The dough should be firm but pliable, not sticky. If it feels too dry and crum extractbly, you can add another teaspoon of water, a little at a time, until it comes together. Conversely, if it feels too wet, you can add a tiny bit more chickpea flour. The goal is a dough that’s easy to handle and roll out.
Shaping and Baking the Crackers
Step 3: Rolling Out the Dough
This is where we transform our dough into cracker shapes. Lightly dust a clean work surface with a little chickpea flour to prevent sticking. Place your dough onto the prepared surface. Using agin extractlling pin, begin to roll out the dough as thinly as possible. The thinner you roll it, the crispier your crackers will be. Aim for a thickness of about 1/16th of an inch, or approximately 2 millimeters. This might take a bit of patience, especially if you prefer very thin, crispy crackers. If the dough starts to stick, don’t hesitate to lift it and sprinkle a little more flour underneath and on top. You can also roll the dough out between two sheets of parchment paper, which is a great trick to minimize sticking and make for easy transfer later. Ensure the dough is rolled out into a relatively even rectangle or square for easier cutting.
Step 4: Cutting and Topping the Crackers
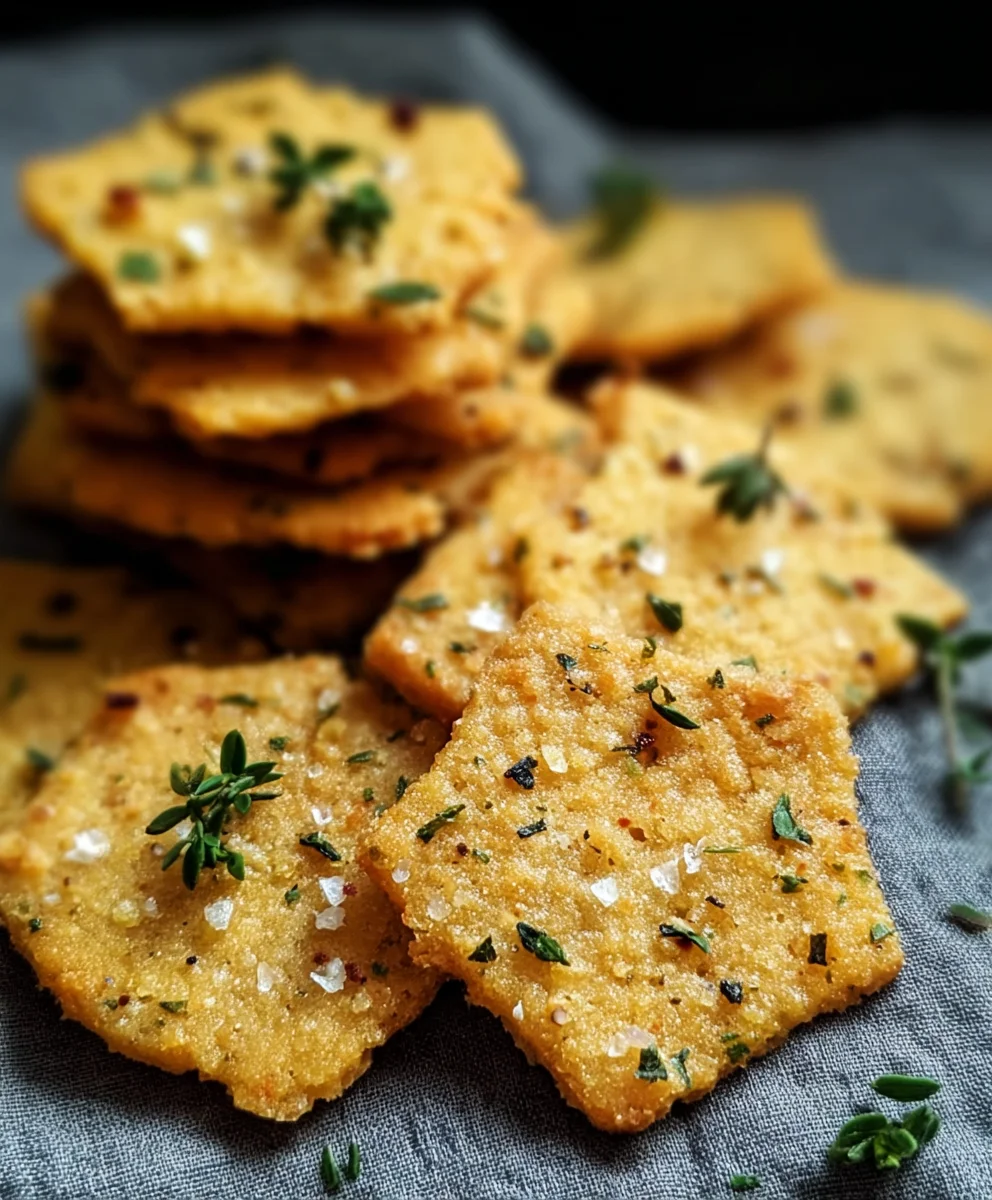
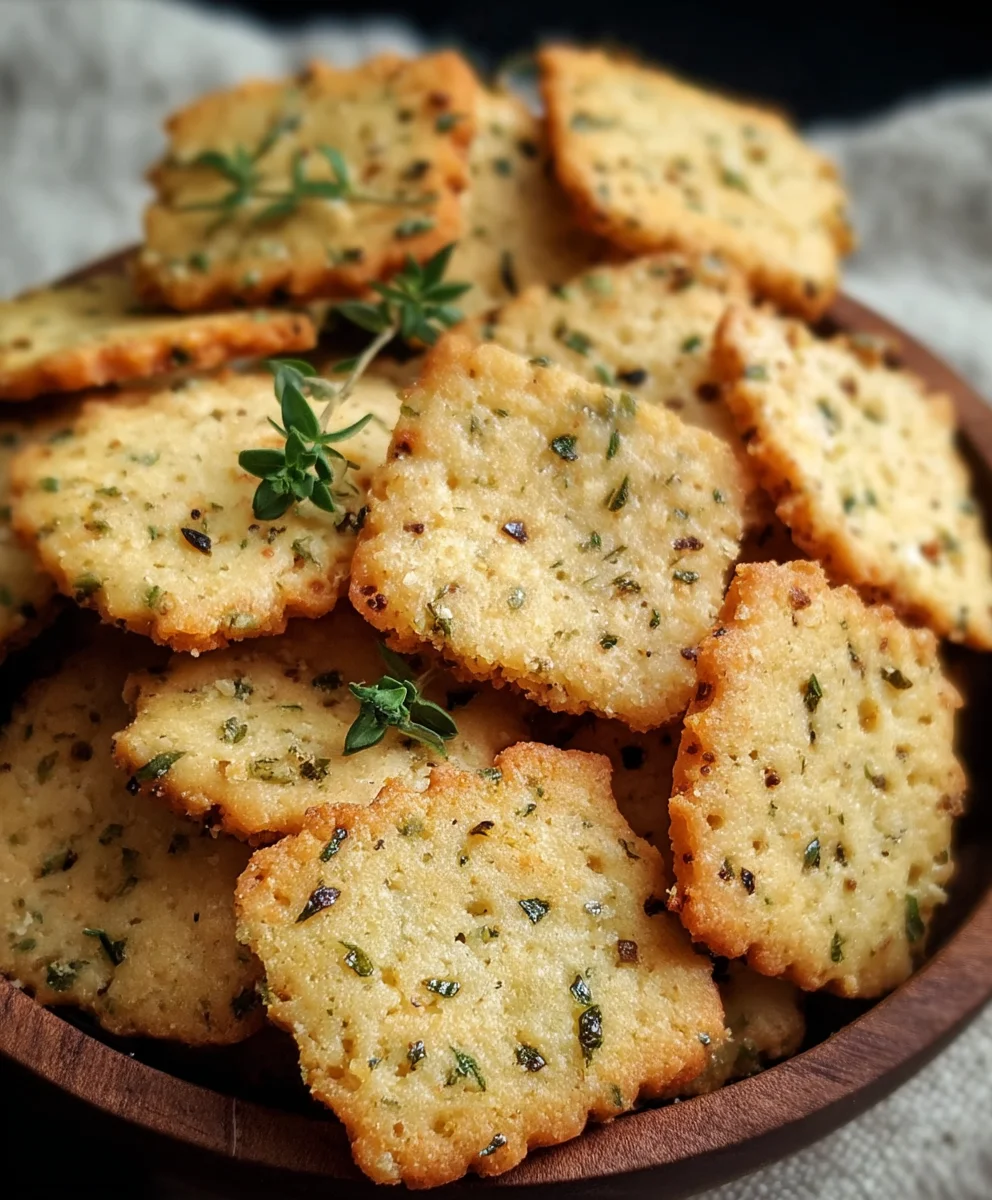
Once your dough is rolled out thinly, it’s time to cut it into individual cracker pieces. You can use a pizza cutter, a sharp knife, or even cookie cutters for fun shapes. Cut the dough into your desired cracker size and shape. For classic crackers, simple squares or rectangles work perfectly. As you cut, try to keep the pieces as uniform as possible so they bake evenly. Now, for the delicious part – the toppings! Lightly brush the surface of each cracker with a little extra olive oil. This not only adds a lovely sheen but also helps the toppings adhere. Sprinkle generously with sesame seeds. These add a delightful nutty flavor and a beautiful visual appeal. Then, finish with a good pinch of flaky sea salt – this is crucial for that satisfying salty crunch. Finally, scatter a little extra dried herbs over the top for an even more intense aromatic experience.
Step 5: Baking to Perfection
Preheat your oven to 350°F (175°C). Line a baking sheet with parchment paper. Carefully transfer the cut and topped crackers onto the prepared baking sheet, ensuring they are not overlapping. This allows for even air circulation and crisping. Bake for approximately 15-20 minutes, or until the crackers are golden brown and crisp around the edges. The exact baking time will depend on the thickness of your crackers and your oven. Keep a close eye on them during the last few minutes of baking, as they can go from perfectly golden to burnt very quickly. If you notice some crackers browning faster than others, you can carefully remove them from the baking sheet to prevent over-baking. Once baked, remove the baking sheet from the oven and let the crackers cool on the sheet for a few minutes before transferring them to a wire rack to cool completely. They will become even crispier as they cool.
Conclusion:
And there you have it – a delightful batch of Garlic and Herb Chickpea Flour Snack Crackerss, ready to revolutionize your snack game! These crackers are wonderfully versatile, offering a satisfying crunch and a burst of savory flavor that complements a wide range of accompaniments. We’ve enjoyed them dipped in hummus, topped with creamy avocado, and even crum extractbled over salads for added texture.
Don’t be afraid to get creative with variations! Consider adding a pinch of smoked paprika for a smoky depth, some finely chopped sun-dried tomatoes for a chewy sweetness, or a dash of red pepper flakes for a gentle kick. The possibilities are truly endless, allowing you to tailor these Garlic and Herb Chickpea Flour Snack Crackerss to your personal taste preferences. We encourage you to bake a batch, gather your favorite dips or toppings, and savor this wholesome, homemade treat. Happy snacking!
Frequently Asked Questions:
How long do these Garlic and Herb Chickpea Flour Snack Crackerss stay fresh?
Stored in an airtight container at room temperature, these crackers should remain crisp for up to a week. For longer storage, you can freeze them for up to a month, though they might require a brief re-crisping in a low oven.
Can I make these crackers gluten-free?
Yes, absolutely! The primary ingredient, chickpea flour, is naturally gluten-free, making these Garlic and Herb Chickpea Flour Snack Crackerss an excellent option for those with gluten sensitivities.
What are some other healthy topping ideas?
Beyond hummus and avocado, try topping your Garlic and Herb Chickpea Flour Snack Crackerss with a dollop of Greek yogurt and fresh dill, a smear of cream cheese with chives, or even a sprinkle of nutritional yeast for a cheesy flavor.
Garlic Herb Chickpea Flour Crackers – Easy Healthy Snack
These easy and healthy garlic herb chickpea flour crackers are a delicious and satisfying snack, perfect for any time of day.
Ingredients
-
1 cup chickpea flour (besan), about 120g
-
½ cup water, about 120ml
-
2 tablespoons olive oil, plus extra for brushing
-
1 teaspoon dried mixed herbs (such as rosemary, thyme, oregano)
-
1 teaspoon garlic powder
-
½ teaspoon salt
-
¼ teaspoon black pepper
-
Sesame seeds, for topping
-
Flaky sea salt, for topping
-
Additional dried herbs, for topping
Instructions
-
Step 1
In a medium-sized mixing bowl, combine chickpea flour, garlic powder, dried mixed herbs, salt, and black pepper. Whisk together to ensure even distribution of seasonings. -
Step 2
Add 2 tablespoons of olive oil and gradually pour in the water while mixing. Stir with a fork or spatula until a cohesive dough forms. Knead with hands until the dough is firm but pliable, adding a teaspoon of water if too dry, or a pinch of chickpea flour if too wet. -
Step 3
Lightly dust a clean work surface with chickpea flour. Roll out the dough as thinly as possible, aiming for about 1/16th of an inch (2mm) for crispier crackers. Use parchment paper to prevent sticking if needed. Ensure the dough is rolled into an even rectangle or square. -
Step 4
Cut the rolled dough into desired cracker shapes using a pizza cutter or sharp knife. Lightly brush the surface of each cracker with extra olive oil. Sprinkle generously with sesame seeds, flaky sea salt, and additional dried herbs. -
Step 5
Preheat your oven to 350°F (175°C). Line a baking sheet with parchment paper and carefully transfer the prepared crackers, ensuring they do not overlap. Bake for 15-20 minutes, or until golden brown and crisp around the edges. Monitor closely to prevent burning. -
Step 6
Remove from the oven and let the crackers cool on the baking sheet for a few minutes before transferring them to a wire rack to cool completely. They will become crispier as they cool.
Important Information
Nutrition Facts (Per Serving)
It is important to consider this information as approximate and not to use it as definitive health advice.
Allergy Information
Please check ingredients for potential allergens and consult a health professional if in doubt.