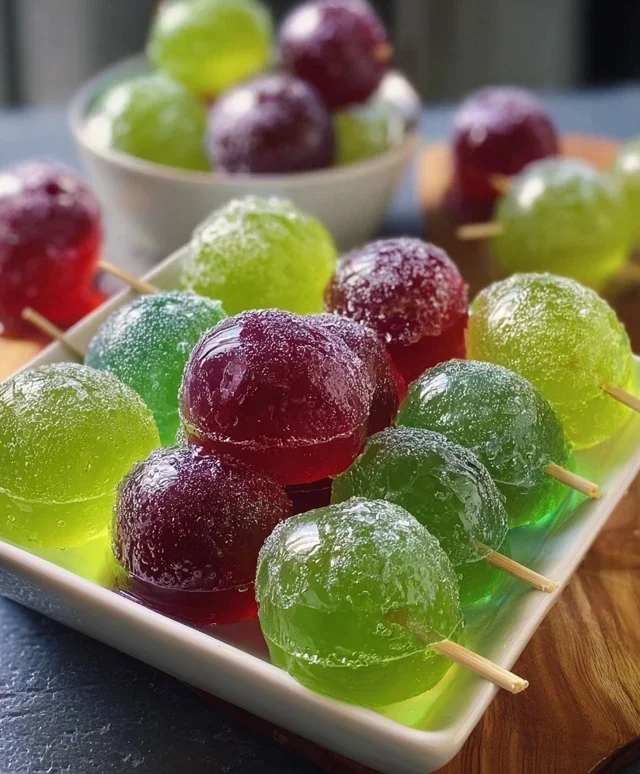
Jell-O Frozen Candy Grapes – Easy Refreshing Treat
Frozen candy grapes with Jell-O are the ultimate sweet and frosty treat that will transport you back to childhood with every delightful bite. Have you ever craved something cool, chewy, and bursting with vibrant flavor? Well, look no further! These magical bites are surprisingly simple to make and have become an absolute sensation for a good reason. They’re incredibly refreshing, offering a satisfyingly sweet pop that’s perfect for a hot summer day or a fun dessert any time of year. What truly sets these frozen candy grapes with Jell-O apart is the delightful textural contrast – the crisp, icy grape encased in a sweet, slightly chewy Jell-O shell. It’s a party in your mouth that’s both nostalgic and excitingly new!
Get Ready to Delight Your Taste Buds!
Let’s Dive into the Sweetness!
Ingredients:
Get ready for a flavor explosion and a delightful crunch! Frozen candy grapes are a fun, easy, and incredibly satisfying treat that taps into childhood nostalgia with a sophisticated twist. Forget plain frozen grapes; we’re elevating them with vibrant Jell-O coatings and a surprising kick of spice. These are perfect for a hot summer day, a fun party snack, or even a unique dessert. The combination of the icy burst of the grape, the sweet, fruity Jell-O shell, and the subtle heat from the seasonings is truly addictive.
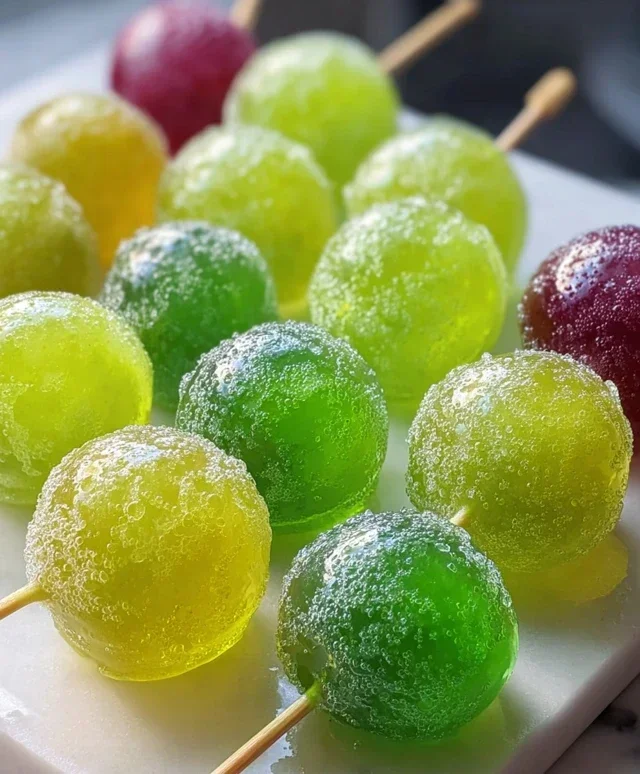
The beauty of this recipe lies in its simplicity and the endless possibilities for customization. You can choose your favorite grape varieties, mix and match Jell-O flavors for rainbow-like creations, and adjust the spice level to your personal preference. I love using a mix of green and red grapes for visual appeal, but any will work wonderfully. The key is to start with good quality, firm grapes that will hold their shape when frozen.
Preparing Your Grapes
The first crucial step is to make sure your grapes are perfectly prepped for their Jell-O bath. You want to wash them thoroughly under cool running water to remove any dust or residue. Then, it’s time to pat them completely dry with paper towels. This might seem like a minor detail, but it’s incredibly important. If the grapes are still wet, the Jell-O won’t adhere properly, and you’ll end up with a streaky or clumpy coating. Take your time with this step; a little extra drying now will save you a lot of frustration later.
Once your grapes are clean and dry, gently separate them into individual grape “clusters” or leave them as small bunches if you prefer. You’ll then insert a toothpick into the stem end of each grape or small cluster. Make sure the toothpick is inserted firmly enough to hold the grape securely, but not so deep that it pierces through the other side. This toothpick will act as your handle for dipping and maneuvering the grapes.
Crafting the Jell-O Coatings
Now for the fun part – creating our vibrant Jell-O coatings! We’re going to work with each Jell-O flavor individually. For each box of Jell-O, you’ll need to dissolve it in just 1 cup of hot water. This is significantly less water than the package directions usually call for, and it’s intentional. We want a very thick, concentrated Jell-O mixture that will create a robust coating on the grapes.
Start by bringin extractg your 1 cup of water to a boil. Once boiling, carefully pour it into a heatproof bowl or measuring cup. Add the entire contents of one Jell-O box to the hot water. Whisk vigorously until the Jell-O powder is completely dissolved. You want a smooth, lump-free mixture. It’s important to ensure all the granules are dissolved, otherwise, you might end up with a gritty texture on your candy grapes. Let this Jell-O mixture sit at room temperature for about 10-15 minutes. You’ll notice it starting to thicken slightly.
The Dipping and Freezing Process
This is where the magic happens! You’ll take your toothpick-handled grapes and carefully dip them into the slightly thickened Jell-O mixture. Make sure to coat the entire grape, swirling it around gently to get an even layer. You can dip them once for a thinner coating or twice for a thicker, more candy-like shell. If you find the Jell-O is too thick to dip easily, you can gently warm it up for a few seconds in the microwave (be very careful not to overheat it, as this will ruin the Jell-O).
As you dip each grape, lift it out and let any excess Jell-O drip back into the bowl for a moment before placing it on a baking sheet lined with parchment paper or a silicone mat. The parchment paper is essential here; it prevents the grapes from sticking to the pan as they freeze. Space the grapes out on the baking sheet so they aren’t touching each other. This allows them to freeze individually and prevents them from sticking together in a frozen clump.
The Crucial Freezing Stage
Once your baking sheet is full of beautifully coated grapes, it’s time for them to enter the freezer. Place the baking sheet carefully into your freezer. You’ll want to freeze them until they are completely solid. This usually takes about 2-3 hours, but it can vary depending on your freezer’s temperature and the thickness of your Jell-O coating. Resist the urge to check on them too early; patience is key to achieving that perfect frozen candy grape. You’ll know they’re ready when they feel hard and solid to the touch.
Adding the Spicy Kick
Once your Jell-O-coated grapes are fully frozen, it’s time to add that extra layer of excitement! This is where the Tajín seasoning and chili powder come in. You have a couple of options here. You can either lightly sprinkle the seasonings directly onto the frozen grapes while they are still on the baking sheet, or you can place a small amount of Tajín and chili powder into a shallow dish and gently roll the frozen grapes in it. For an extra zesty and spicy experience, I like to mix a teaspoon of chili powder with a tablespoon of Tajín for a bolder flavor profile.
The cold surface of the frozen grape will help the seasonings adhere. Don’t go too heavy with the spices on your first try; you can always add more to your liking. These are incredibly addictive, so be prepared to make another batch soon!
Storing and Enjoying Your Candy Grapes
After you’ve seasoned your frozen candy grapes, you can either enjoy them immediately or store them for later. If you plan to eat them soon, you can transfer them from the baking sheet directly into a bowl. If you want to store them, carefully transfer the frozen candy grapes into an airtight container or a heavy-duty freezer bag. This will prevent them from absorbing any freezer odors and from sticking together.
When you’re ready to indulge, simply pull them out of the freezer and let them sit for just a minute or two at room temperature. This will take the edge off the extreme ice and make them even more enjoyable to bite into. The delightful crunch of the Jell-O shell giving way to the cool, sweet grape is an experience in itself. Get ready for a burst of flavor and a fun, textural adventure!
Conclusion:
And there you have it – the delightfully simple yet incredibly satisfying recipe for Frozen Candy Grapes with Jell-O! This recipe is truly a gem because it transforms humble grapes into a vibrant, chewy, and sweet treat that’s bursting with flavor. It’s the perfect blend of refreshing fruitiness and nostalgic candy-like sweetness, making it an absolute hit for kids and adults alike. The way the Jell-O coating hardens slightly in the freezer creates a unique texture that’s both fun to eat and utterly delicious. I’ve found these are fantastic served as a unique dessert, a fun party snack, or even a way to get picky eaters to enjoy their fruit.
Don’t be afraid to experiment with the flavors! While cherry or strawberry Jell-O are classic choices, consider lime for a tangy twist, grape for an intense grape experience, or even blue raspberry for a pop of color and fun. You can also try different types of grapes, like green or black seedless varieties, though red seedless grapes tend to hold their shape and color the best. I really encourage you to give these Frozen Candy Grapes with Jell-O a try – they are so easy to make and are guaranteed to bring smiles all around!
Frequently Asked Questions:
Can I use any type of Jell-O flavor?
Absolutely! While certain flavors like cherry or strawberry offer a classic candy-like taste and vibrant color, feel free to get creative. Lime, lemon, orange, or even tropical flavors can add a unique dimension to your frozen grapes. Consider what flavor profiles you enjoy most!
How long do the frozen candy grapes last?
Once frozen, these candy grapes can be stored in an airtight container in your freezer for up to 2-3 weeks. However, they are best enjoyed within the first week for optimal texture and flavor. They tend to get a bit harder the longer they are frozen.
What’s the best way to serve them?
These are fantastic served straight from the freezer as a delightful treat. You can also arrange them on a platter for a colorful and eye-catching dessert or snack. They make a wonderful addition to a kids’ party or a fun, healthy-ish dessert option after dinner.
Frozen Candy Grapes with Jell-O
A fun and colorful frozen treat made with fresh grapes coated in vibrant Jell-O flavors and a touch of spice.
Ingredients
-
1 pound grapes (green, red, or mixed)
-
1 cup water
-
Toothpicks
-
1 box raspberry Jell-O
-
1 box berry blue Jell-O
-
1 box orange Jell-O
-
1 box lime Jell-O
-
1 box lemon Jell-O
-
1 box grape Jell-O
-
Tajín seasoning
-
Chili powder
Instructions
-
Step 1
Wash and thoroughly dry the grapes. Insert a toothpick into the stem end of each grape. -
Step 2
Prepare each flavor of Jell-O according to package directions, using 1 cup of hot water for each box. Let them cool slightly. -
Step 3
Dip each grape into a different Jell-O flavor, ensuring it’s fully coated. Swirl off any excess. -
Step 4
Place the coated grapes on a parchment-lined baking sheet. Sprinkle lightly with Tajín and chili powder, if desired. -
Step 5
Freeze the grapes for at least 2-3 hours, or until firm. -
Step 6
Serve frozen directly from the freezer.
Important Information
Nutrition Facts (Per Serving)
It is important to consider this information as approximate and not to use it as definitive health advice.
Allergy Information
Please check ingredients for potential allergens and consult a health professional if in doubt.