Caramel Fudge Crunch Bars- Irresistible Sweet Treat
Caramel Fudge Crunch Bars are the ultimate indulgence, a symphony of textures and flavors that will have you reaching for more before you’ve even finished your first bite. We all have those comfort foods, the ones that transport us back to childhood or simply make a bad day infinitely better, and for me, these Caramel Fudge Crunch Bars are undeniably in that category. It’s that irresistible combination of rich, velvety fudge, sticky, sweet caramel, and that delightful, satisfying crunch that makes them so universally loved. What truly sets these Caramel Fudge Crunch Bars apart is the perfect balance; it’s not too sweet, not too dense, but a masterful interplay of all the best elements. Get ready to create a treat that’s sure to become a new favorite in your home.
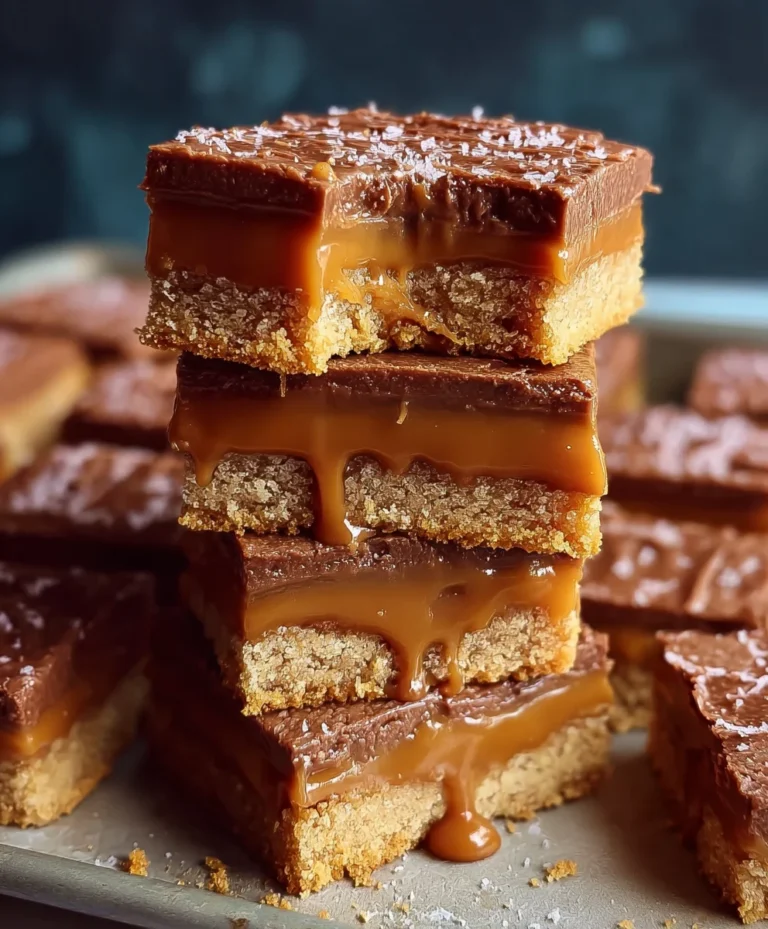
Caramel Fudge Crunch Bars
Get ready for a serious treat that’s incredibly easy to make! These Caramel Fudge Crunch Bars are the perfect combination of chewy, chocolatey, and delightfully crunchy. They’re the kind of dessert that disappears in minutes, leaving everyone beggin extractg for more. The secret is in the rich, homemade caramel layer that forms the base for a decadent chocolate fudge topping, all brought together with the satisfying crunch of Rice Krispies. These bars are perfect for bake snon-alcoholic ales, potlucks, or simply satisfying your sweet tooth. Let’s get baking!
Ingredients:
Making the Caramel Base
This is where the magic starts! We’re going to create a luscious, gooey caramel that forms the heart of our bars. It’s surprisingly simple and requires just a few ingredients.
Creating the Chocolate Fudge Layer and Crunch
Now for the decadent chocolate and that essential crunch! This part is incredibly satisfying as you bring all the elements together.
Conclusion:
And there you have it – the perfect guide to creating your very own Caramel Fudge Crunch Bars! This recipe is an absolute winner because it strikes that incredible balance between rich, decadent fudge, a delightful caramel chew, and that satisfyingly crisp crunch. It’s surprisingly simple to make, yet the results are sophisticated enough to impress at any gathering or simply to satisfy your most intense sweet cravings. These bars are incredibly versatile, making them ideal for potlucks, bake snon-alcoholic ales, or as a thoughtful homemade gift. Feel free to get creative with your toppings and add-ins; the possibilities are endless!
I truly encourage you to give these Caramel Fudge Crunch Bars a try. You’ll be amazed at how quickly they disappear and how many compliments you’ll receive. Embrace the joy of baking and treat yourself to this phenomenal dessert!
Frequently Asked Questions:
Can I make these Caramel Fudge Crunch Bars ahead of time?
Absolutely! These bars are perfect for making a day or two in advance. In fact, allowing them to set completely and even chilling them slightly can make them easier to cut cleanly. Store them in an airtight container at room temperature for up to 3-4 days, or in the refrigerator for longer storage. If refrigerating, let them sit out for about 15-20 minutes before serving to soften slightly.
What are some other good variations for these bars?
The beauty of this recipe is its adaptability! For a nutty twist, try adding a cup of toasted pecans or walnuts to the crunch layer. You could also swirl in some peanut butter into the fudge layer for a PB&J-inspired treat, or sprinkle some sea salt flakes over the top of the caramel for a salted caramel effect. Mini chocolate chips or even a dusting of cocoa powder on top are also fantastic additions!
My caramel layer seems a bit too hard. How can I prevent this?
If your caramel is setting too hard, it might be due to cooking it to too high a temperature or for too long. Ensure you’re using a reliable candy thermometer and that you’re cooking the caramel to the specified soft-ball stage. Overheating can lead to a brittle texture. Also, make sure you’re using good quality, full-fat dairy for the richest, most pliable caramel consistency.
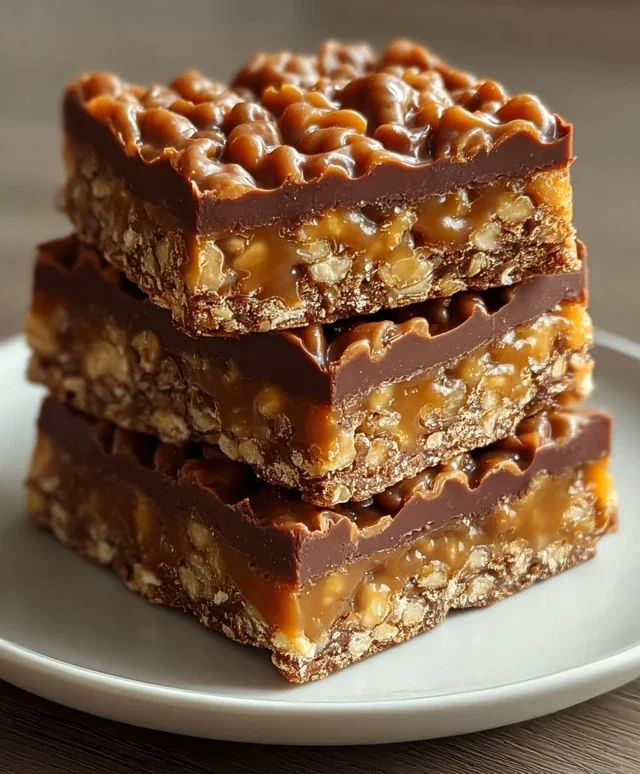
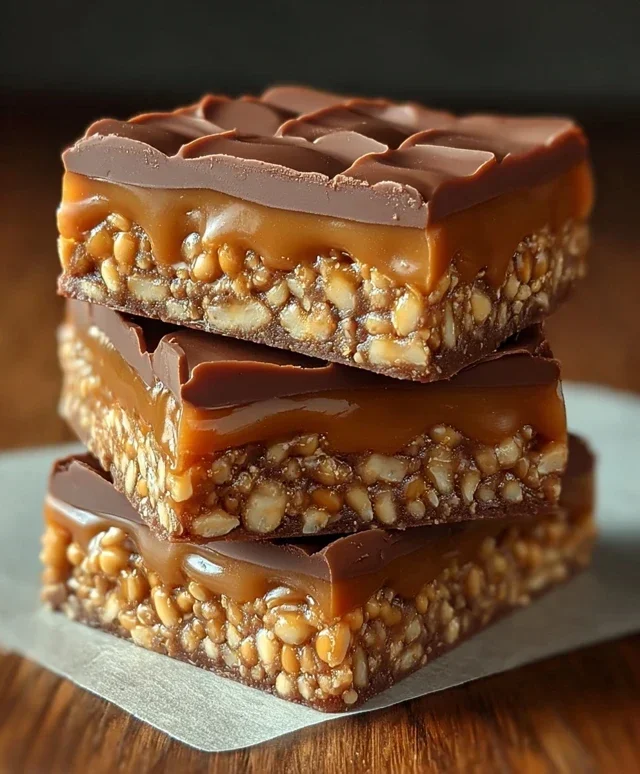
Caramel Fudge Crunch Bars
Indulgent bars with a chewy caramel fudge base and a crisp Rice Krispies crunch, topped with melted chocolate.
Ingredients
-
½ tin (200g) condensed milk
-
100g light brown sugar
-
60g butter
-
1½ tablespoons golden syrup
-
100g white chocolate, broken into chunks
-
650g milk chocolate, divided
-
75g Rice Krispies cereal
Instructions
-
Step 1
Line a 20cm x 20cm square tin with baking parchment. -
Step 2
In a saucepan, combine condensed milk, light brown sugar, butter, and golden syrup. Heat gently over a low heat, stirring constantly, until the sugar has dissolved. -
Step 3
Increase the heat to medium and bring the mixture to a boil, stirring continuously. Boil for 5-8 minutes until the caramel thickens and turns a deep golden colour. -
Step 4
Remove from heat. Stir in the white chocolate chunks until melted and smooth. Pour half of the milk chocolate (325g) into the caramel mixture and stir until melted and combined. -
Step 5
Fold in the Rice Krispies cereal until evenly coated. Spread this mixture into the prepared tin and press down firmly. -
Step 6
Melt the remaining milk chocolate (325g) gently. Pour and spread evenly over the Rice Krispies layer. Leave to set completely in the refrigerator for at least 2 hours. -
Step 7
Once set, lift out of the tin using the parchment paper and cut into bars.
Important Information
Nutrition Facts (Per Serving)
It is important to consider this information as approximate and not to use it as definitive health advice.
Allergy Information
Please check ingredients for potential allergens and consult a health professional if in doubt.