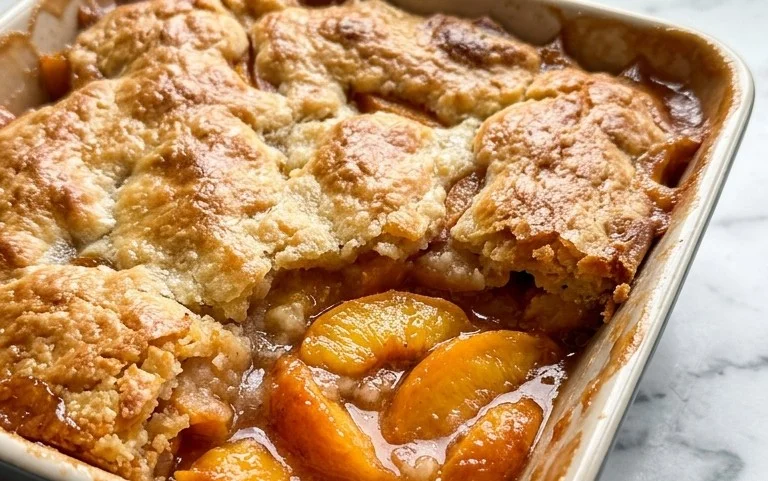
Easy Peach Hand Pies – Delicious Summer Treat
Peach hand pies are the ultimate portable slice of summer sunshine. There’s something undeniably magical about these delightful little pockets of pastry, bursting with the sweet, juicy essence of perfectly ripe peaches. They’re the perfect treat for picnics, backyard BBQs, or simply enjoying with a cup of coffee on a lazy afternoon. What makes these peach hand pies so incredibly beloved? It’s the irresistible combination of flaky, buttery crust giving way to a warm, slightly spiced peach filling that’s both comforting and utterly decadent. Each bite is a delightful surprise, a miniature dessert that’s easy to hold, share, and devour. We’re diving into how you can create these amazing peach hand pies right in your own kitchen, ensuring a taste of pure bliss with every single bite. Get ready to fall in love with these sunshine-filled pastries!

Peach Hand Pies
There’s something undeniably charming about hand pies. They’re portable, perfectly portioned, and deliver all the comforting deliciousness of a full-sized pie in a delightful, easy-to-handle package. These peach hand pies are no exception. Bursting with sweet, juicy peach filling encased in a flaky, golden-brown crust, they are an absolute treat. And the best part? They are surprisingly simple to make, especially when we leverage a few kitchen shortcuts. Imagin extracte biting into that warm, fruity goodness, the sweet glaze just starting to melt. It’s pure bliss, perfect for an afternoon snack, a picnic, or even a delightful dessert. Let’s get started and create some magic!
Ingredients:
Making the Hand Pies
Creating these delightful hand pies is a multi-step process, but each step is straightforward and rewarding. We’ll start by preparing our peach filling, then move on to assembling the pies, and finally, the satisfying frying and glazing.
Step 1: Preparing the Peach Filling
Begin extract by opening your 21 oz. can of peach pie filling. While the filling is already prepared and delicious, I like to give it a little stir to ensure the peaches are evenly distributed within the thick, syrupy sauce. If your peaches are in very large chunks, you can gently break them up a bit with your spoon, but don’t mash them into a pulp – we want distinct pieces of fruit. Set this aside; it’s the heart of our hand pies and needs to be ready to go.
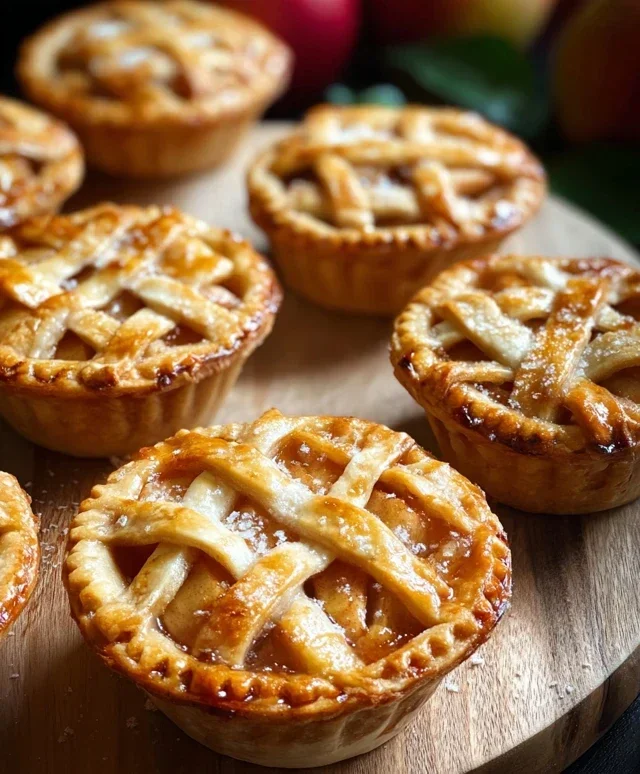
Step 2: Cutting and Assembling the Pie Crusts
Unroll your refrigerated pie crusts onto a lightly floured surface. You should have two crusts. Using a round cookie cutter or a saucer (about 5-6 inches in diameter), cut out circles from each crust. You’ll want to get as many circles as possible from each crust. Don’t worry about the scraps; you can gently gather them, re-roll them once, and cut out more circles if you have enough filling. For each hand pie, you will need two circles: one for the bottom and one for the top.
Place one pie crust circle onto a parchment-lined baking sheet. Spoon about 2-3 tablespoons of the prepared peach pie filling onto the center of the circle, leaving a border of about 1/2 inch around the edge. Try not to overfill, as this can make sealing the pies difficult and lead to leaks during frying.
Step 3: Sealing the Hand Pies
Now, take a second pie crust circle and carefully place it over the filling, aligning the edges as best as you can. Use your fingers to gently press the edges together, creating a seal. To ensure a really good seal, you can use the tines of a fork to crimp the edges all the way around. This not only helps prevent the filling from escaping but also creates a pretty decorative edge. Repeat this process for all your hand pies until you’ve used up your filling and have assembled all the hand pies.
Step 4: Frying to Golden Perfection
Heat your vegetable oil in a heavy-bottomed skillet or Dutch oven over medium heat until it reaches about 350°F (175°C). You can test the oil by dropping a tiny piece of pie crust into it; it should sizzle and float immediately. Carefully slide 2-3 hand pies into the hot oil, being careful not to overcrowd the pan. Overcrowding will lower the oil temperature and can lead to soggy, greasy pies.
Fry the hand pies for about 3-4 minutes per side, or until they are a beautiful golden brown. Use a slotted spoon or spider strainer to carefully flip them over. Once golden brown on both sides, remove the hand pies from the oil and place them on a wire rack set over a baking sheet or paper towels to drain any excess oil. Let them cool slightly before glazing.
Step 5: Creating and Applying the Glaze
While the hand pies are cooling, let’s make our simple yet delicious glaze. In a small bowl, whisk together the 1/2 cup of powdered sugar, 1 teaspoon of corn syrup, and 1 tablespoon of water. The corn syrup will give the glaze a lovely shine and a slightly thicker consistency, preventing it from being too watery. Whisk until the mixture is smooth and lump-free. If the glaze is too thick, add another tiny splash of water; if it’s too thin, add a bit more powdered sugar.
Once the hand pies have cooled for a few minutes (they should still be warm), use a spoon or a pastry brush to drizzle or brush the glaze over the tops. The warmth of the pies will help the glaze melt and spread beautifully. You can go for a light drizzle or a more generous coating, depending on your preference. Let the glaze set for a few minutes before serving.
Enjoy these delightful Peach Hand Pies warm, when the crust is flaky and the peach filling is wonderfully gooey. They are a simple pleasure that’s sure to bring smiles.

Conclusion:
So there you have it! My favorite recipe for Peach Hand Pies. These little pockets of peachy goodness are a true delight, offering the perfect balance of sweet, slightly tart peaches encased in a flaky, golden-brown crust. They’re incredibly satisfying to make and even more so to eat. The aroma that fills your kitchen as they bake is simply non-intoxicating, promising a delicious treat that’s both comforting and a little bit fancy. I truly believe this recipe is fantastic because it’s relatively simple to follow, even for begin extractner bakers, and the results are consistently impressive. Plus, who can resist a warm, portable dessert?
I love serving these Peach Hand Pies warm, perhaps with a dollop of vanilla ice cream or a drizzle of caramel sauce. They make a wonderful breakfast treat, an afternoon snack, or a delightful dessert after any meal. For variations, don’t be afraid to experiment! You could add a pinch of cinnamon or nutmeg to the filling for extra warmth, or swap out some of the peaches for other summer fruits like blueberries or raspberries. A little lemon zest in the filling can also brighten the flavor beautifully. I wholeheartedly encourage you to give this Peach Hand Pies recipe a try. You won’t regret it!
Frequently Asked Questions:
Q1: Can I make the pie crust ahead of time?
Absolutely! You can prepare the pie dough up to two days in advance and store it, tightly wrapped, in the refrigerator. You can even freeze the dough for up to a month. Just let it thaw in the fridge overnight before you’re ready to use it.
Q2: What’s the best way to store leftover Peach Hand Pies?
Store any leftover Peach Hand Pies in an airtight container at room temperature for up to two days, or in the refrigerator for up to five days. Reheat them gently in a low oven or a toaster oven to revive that wonderful flaky crust.
Q3: My pie filling seems a bit watery. How can I thicken it?
A common trick is to toss your sliced peaches with a tablespoon or two of cornstarch or tapioca starch before mixing in the sugar and spices. This will help absorb some of the excess moisture as the pies bake, resulting in a thicker, more jam-like filling.
Peach Hand Pies
Delicious and easy-to-make hand pies filled with sweet peach pie filling, perfect for a quick dessert or snack.
Ingredients
-
21 oz. can peach pie filling
-
Refrigerated pie crust
-
1/2 cup powdered sugar
-
1 teaspoon corn syrup
-
1 tablespoon water
-
Vegetable oil for frying
Instructions
-
Step 1
Prepare the peach filling by stirring in a bit of corn syrup and water to enhance sweetness and moisture if desired. -
Step 2
Unroll the refrigerated pie crusts and cut out circles for the hand pies. -
Step 3
Place a spoonful of peach filling onto one half of each pie crust circle. -
Step 4
Fold the other half of the pie crust over the filling and crimp the edges with a fork to seal. -
Step 5
Heat vegetable oil in a skillet over medium heat for frying. -
Step 6
Carefully place the hand pies into the hot oil and fry for 2-3 minutes per side, until golden brown. -
Step 7
Remove the pies from the oil and place them on a paper towel-lined plate to drain excess oil. -
Step 8
Whisk together powdered sugar and a small amount of water or milk to create a glaze. Drizzle over the warm hand pies.
Important Information
Nutrition Facts (Per Serving)
It is important to consider this information as approximate and not to use it as definitive health advice.
Allergy Information
Please check ingredients for potential allergens and consult a health professional if in doubt.