Crispy Hash Browns Recipe- Perfect Breakfast Side
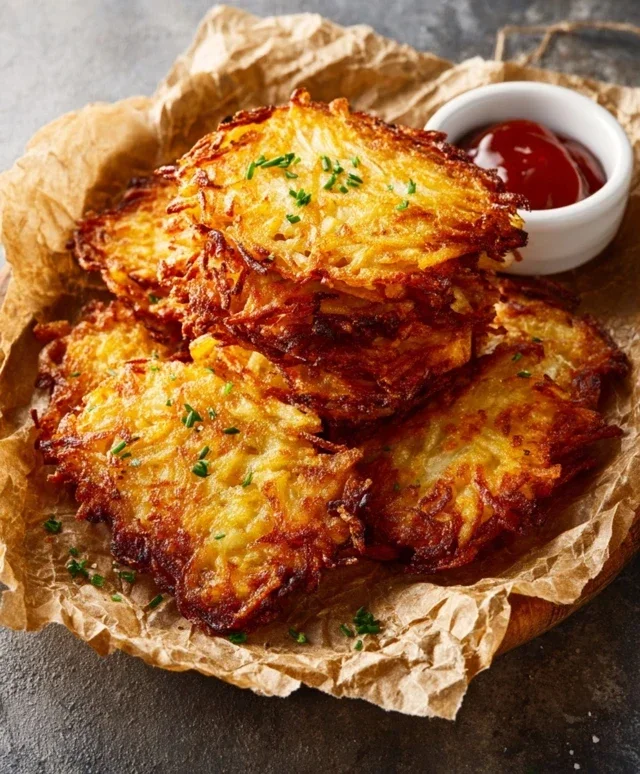
Crispy hash browns are more than just a breakfast side; they’re a golden, savory hug on a plate, a culinary cornerstone that elevates any morning meal from ordinary to extraordinary. Who doesn’t adore that satisfying crunch, that delicate dance of fluffy potato interior yielding to a perfectly browned, shatteringly crisp exterior? It’s a textural masterpiece, a comforting classic that evokes lazy weekend mornings, diner visits, and the pure, unadulterated joy of a well-cooked potato. What truly makes these crispy hash browns special isn’t just their irresistible texture, but the simple, honest goodness of fresh ingredients transformed into something truly magical. They’re the ultimate blank canvas, ready to be piled high with your favorite toppings, or enjoyed in their pure, golden glory.
The Secret to Perfect Crispy Hash Browns
Why You’ll Love This Recipe
Crispy Hash Browns
There’s something undeniably satisfying about a plate of perfectly crispy hash browns. Whether it’s alongside a hearty breakfast, a comforting brunch, or even as a side to a casual dinner, their golden-brown exterior and fluffy interior are a culinary delight. Forget those sad, soggy versions you might have encountered; achieving truly crispy hash browns at home is surprisingly simple with a few key techniques. Today, I’m going to guide you through my tried-and-true method for creating hash browns that are so good, you’ll wonder why you ever bought them pre-made. We’ll focus on getting that ideal crunch without any of the greasiness that can sometimes plague this breakfast staple. Get ready to elevate your breakfast game!
Ingredients:
The Foundation: Choosing and Preparing Your Potatoes
The secret to great hash browns starts with the right potato. I always reach for Russet potatoes. Their high starch content makes them ideal for shredding and achieving that fluffy interior while still allowing for a crisp exterior. You’ll want to start by washing your potatoes thoroughly. There’s no need to peel them; the skins can actually contribute to a bit of extra crispiness and add a nice rustic texture. Once washed, you’ll need to shred them. A box grater is your best friend here. Use the large shredding holes. As you shred, you’ll notice a lot of moisture being released. This is perfectly normal, but it’s crucial to remove as much of that moisture as possible. This is perhaps the single most important step in ensuring crispy hash browns.
Removing Moisture: The Key to Crispiness
After you’ve shredded your potatoes, transfer them to a clean kitchen towel or a few layers of paper towels. Now, it’s time to squeeze! Wrap the shredded potatoes in the towel and twist and squeeze firmly. You’ll be amazed at how much water comes out. Repeat this process a couple of times, using a dry section of the towel if necessary, until the potatoes feel relatively dry. The drier the potatoes, the crispier your hash browns will be. If you’re adding optional onion or chives, you can squeeze those along with the potatoes to integrate their flavor throughout. This moisture-removal step is non-negotiable for achieving that desired crunch.
Cooking Phase 1: Getting the Golden Crust
Now that our potatoes are prepped and de-moisturized, it’s time to cook them! You’ll need a good non-stick skillet or a well-seasoned cast-iron skillet. Heat your neutral cooking oil over medium-high heat. You want the oil to be hot but not smoking. A good test is to drop a single shredded potato into the oil; it should sizzle immediately. Carefully add the shredded potatoes to the hot oil, spreading them out into an even layer. Resist the urge to overcrowd the pan, as this will steam the potatoes instead of crisping them. If necessary, cook in batches. Season the hash browns with salt and pepper at this stage. This is also when you can stir in your optional minced onion or chives if you’re using them. Don’t touch them for a good 4-5 minutes. This is where the magic happens – that first layer of crispiness is forming.
Cooking Phase 2: The Flip and Finish
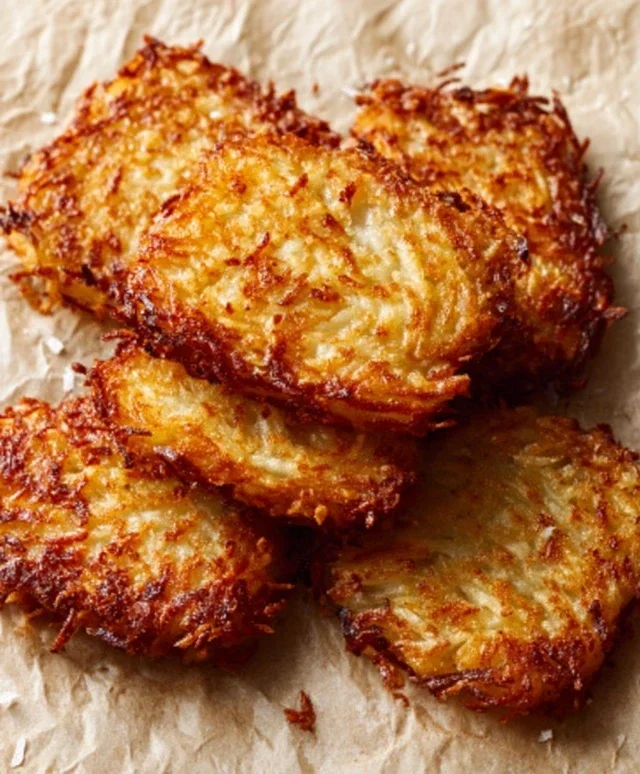
After about 4-5 minutes, or when you see the edges starting to turn golden brown and crisp, it’s time to flip. You can use a spatula to carefully break the hash browns into smaller sections and flip them, or if you’re feeling adventurous and your skillet is non-stick, you can attempt a confident flip of the entire cake. Once flipped, press down gently on the hash browns with your spatula. This helps ensure even contact with the hot pan and promotes further crisping. Continue to cook for another 4-5 minutes on this side, until golden brown and cooked through. You want to see that beautiful, deep golden color all over. Taste a bit from the edge to ensure they are seasoned to your liking and add a pinch more salt or pepper if needed.
Resting and Serving: The Final Touch
Once your hash browns are perfectly crispy and golden, transfer them to a plate lined with paper towels. This will absorb any excess oil and ensure they stay crispy, not greasy. Let them rest for just a minute or two before serving. This allows them to firm up slightly. Serve immediately alongside your favorite breakfast dishes – eggs, beef bacon, sausage, or even just a dollop of sour cream and chives. The satisfaction of biting into these homemade, crispy hash browns will be immense. Enjoy the fruits of your labor – a truly superior breakfast side!
Conclusion:
There you have it – your guide to achieving perfectly crispy hash browns every single time! We’ve explored how simple ingredients and a few key techniques can transform humble potatoes into a golden, crunchy delight that’s far superior to anything store-bought. This recipe is fantastic because it’s incredibly versatile, budget-friendly, and the resulting texture is simply irresistible. Imagin extracte that satisfying crunch giving way to a fluffy interior – it’s breakfast perfection!
These crispy hash browns are a dream alongside your favorite breakfast dishes. Think classic eggs, crispy beef bacon, sausages, or even a stack of fluffy pancakes. They also make an excellent base for a hearty brunch, topped with avocado, salsa, or a poached egg. Don’t be afraid to experiment with flavors! Try adding a pinch of garlic powder, onion powder, or even a sprinkle of smoked paprika to the shredded potatoes before frying for an extra layer of deliciousness. You can even mix in finely chopped chives for a fresh, herbaceous kick.
I truly encourage you to give this recipe a try. It’s a simple pleasure that can elevate any meal and is guaranteed to become a weekend staple in your kitchen. The effort is minimal, but the reward is immense – a truly satisfying and delicious dish that’s worth every bite.
Frequently Asked Questions:
What’s the best way to shred potatoes for crispy hash browns?
Using a box grater is the most common and effective method. Aim for medium shreds. Some people prefer using a food processor with a shredding disc, but be careful not to over-process them into a mush. The key is to have distinct strands of potato.
My hash browns aren’t getting crispy. What am I doing wrong?
Several factors can contribute to soggy hash browns. Ensure you’re not overcrowding the pan; cook in batches if necessary. Also, make sure your oil is hot enough before adding the potatoes, and resist the urge to stir them too frequently. Letting them form a good crust on each side is crucial for crispiness.
Can I prepare the shredded potatoes ahead of time?
Yes, you can shred your potatoes and store them in an airtight container in the refrigerator for up to 24 hours. However, it’s best to rinse and thoroughly dry them before cooking to remove excess starch, which can make them gummy. Patting them extremely dry with paper towels is essential for achieving those desirable crispy edges.
Crispy Hash Browns
Golden brown and perfectly crispy hash browns, a classic breakfast side that’s surprisingly easy to make.
Ingredients
-
2 large russet potatoes, peeled
-
1/4 cup vegetable oil
-
1/2 teaspoon salt
-
1/4 teaspoon black pepper
-
1/4 teaspoon paprika
-
1 tablespoon finely chopped onion (optional, for added flavor)
Instructions
-
Step 1
Grate the peeled potatoes using the large holes of a box grater or a food processor. Place the grated potatoes in a clean kitchen towel and squeeze out as much moisture as possible. This step is crucial for crispiness. -
Step 2
In a medium bowl, combine the squeezed grated potatoes with salt, pepper, paprika, and chopped onion (if using). Mix gently to distribute the seasonings. -
Step 3
Heat the vegetable oil in a large non-stick skillet over medium-high heat until shimmering. Ensure the oil is hot before adding the potatoes. -
Step 4
Carefully spread the potato mixture into an even layer in the hot skillet. Do not overcrowd the pan; cook in batches if necessary. -
Step 5
Cook for 5-7 minutes on the first side, or until golden brown and crispy. Resist the urge to stir too often to allow for proper browning. -
Step 6
Flip the hash browns using a spatula and cook for another 5-7 minutes on the second side, until golden brown and cooked through. If using a lid, remove it for the last few minutes to ensure crispiness. -
Step 7
Remove the hash browns from the skillet and drain on a plate lined with paper towels to absorb any excess oil. Serve immediately.
Important Information
Nutrition Facts (Per Serving)
It is important to consider this information as approximate and not to use it as definitive health advice.
Allergy Information
Please check ingredients for potential allergens and consult a health professional if in doubt.