Simple Easy Loading Recipe – Delicious & Quick
Loading… is one of those culinary experiences that just feels like a warm hug on a plate. It’s more than just a meal; it’s a ritual, a comfort, a delicious journey. Why do we love Loading… so much? It’s the perfect balance of textures and flavors, the satisfying heartiness that leaves you feeling truly content. What makes Loading… truly special is its incredible versatility and the way it can be adapted to suit any occasion or mood. Whether you’re seeking a weeknight savior or a show-stopping centerpiece, this beloved dish delivers every single time. Get ready to discover your new favorite way to create this iconic comfort food.
The Ultimate Loading… Recipe
Get Ready to Indulge
Ingredients:
Loading…: A Simple & Flavorful Chicken Recipe
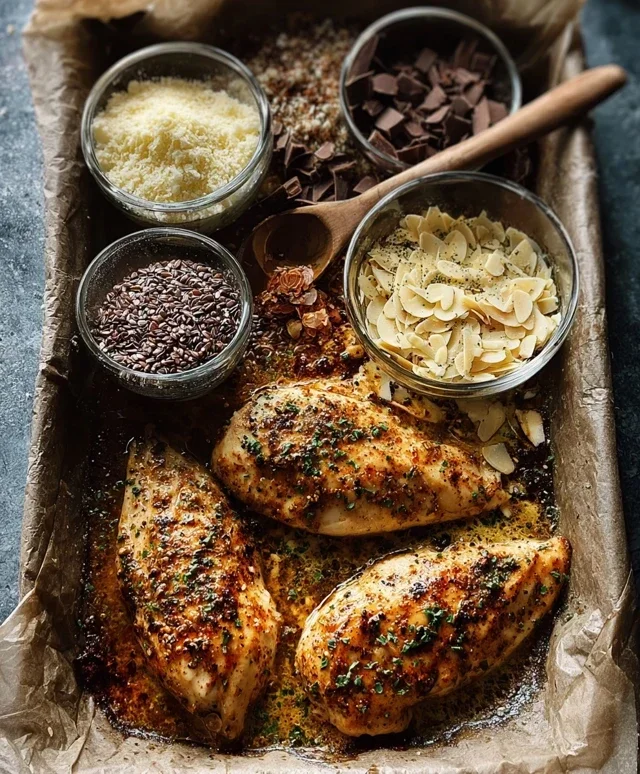
There are some nights when you just need a reliable, delicious chicken dish that doesn’t require a culinary degree or a marathon in the kitchen. This recipe for “Loading… Chicken” is exactly that. It’s incredibly versatile, meaning you can serve it with anything from a fresh salad and roasted vegetables to fluffy rice or your favorite pasta. The beauty of this dish lies in its simplicity and the bold, smoky flavors that develop with minimal effort. We’re focusing on building layers of flavor with pantry staples, ensuring a satisfying meal every time.
The foundation of any great cooked chicken dish is proper preparation. Before we even think about seasoning, we’re going to ensure our chicken is ready to accept all those delicious flavors. This might seem like a small step, but it makes a significant difference in the final texture and how well the seasonings adhere to the meat.
Preparing the Chicken for Flavor
The first critical step in achieving perfectly seasoned chicken is to start by patting the chicken dry. Grab some paper towels and gently but thoroughly pat down each piece of chicken. This removes any excess moisture from the surface. When chicken is wet, the seasonings tend to slide off or get diluted, leading to uneven flavor distribution. Dry chicken allows the oil and spices to create a beautiful, flavorful crust that will become incredibly appealing as it cooks. I like to do this on a plate or a cutting board so that any moisture is contained.
Now that our chicken is perfectly dry and ready to embrace its destiny of deliciousness, we can move on to creating our flavor profile.
Creating the Flavorful Rub
In a small bowl, combine the olive oil with all your dry spices: smoked paprika, garlic powder, onion powder, dried oregano, and cayenne pepper if you’re feeling adventurous. Whisk these together until they form a well-combined paste. This oil-based mixture will help the seasonings cling to the chicken and will also contribute to a beautifully seared exterior.
Next, generously season the chicken with salt and freshly ground black pepper. Don’t be shy with the salt; it’s essential for bringin extractg out the natural sweetness of the chicken and enhancing all the other flavors. Now, take your spice and oil mixture and evenly coat each piece of chicken. Make sure to get both sides and, if you’re using thighs, try to get some of the rub into any crevices. You can use your hands for this, which I find is the most effective way to ensure full coverage.
Cooking the Chicken to Perfection
There are a couple of ways you can cook this chicken, and both yield fantastic results. You can pan-sear it on the stovetop for a quick and beautiful crust, or bake it in the oven for a more hands-off approach. For this recipe, we’ll focus on pan-searing for that delightful crispy exterior.
Heat a large skillet over medium-high heat. Add a tablespoon of olive oil to the hot skillet. Once the oil is shimmering, carefully place the seasoned chicken pieces into the skillet, making sure not to overcrowd the pan. Cook in batches if necessary.
The Cooking Process – Step-by-Step
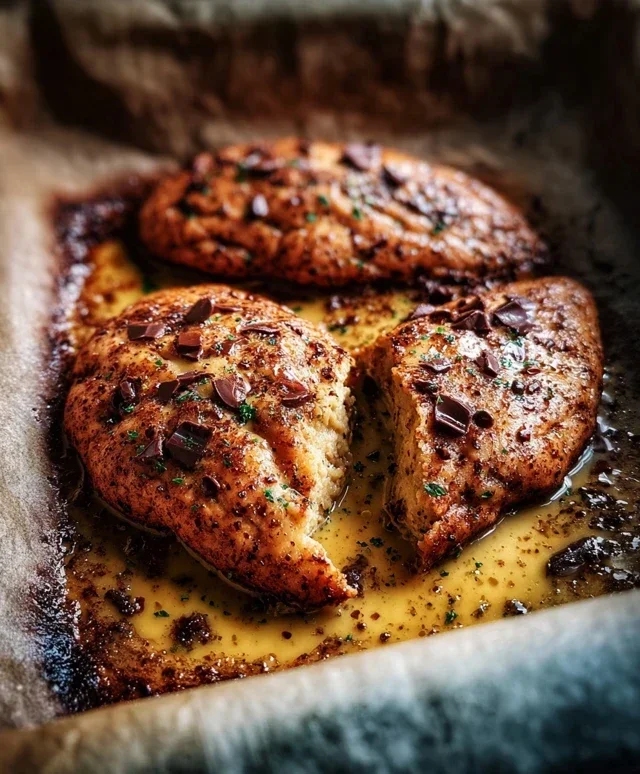
1. Sear the first side of the chicken for about 5-7 minutes, or until a beautiful golden-brown crust has formed. Resist the urge to move the chicken around too much during this stage, as that’s what creates that gorgeous sear.
2. Flip the chicken pieces to the other side. Continue to cook for another 5-7 minutes, or until the second side is also golden brown and the chicken is cooked through.
3. During the cooking process, it’s crucial to ensure the chicken is cooked to a safe internal temperature. Use a meat thermometer to check that your chicken reaches 165°F (74°C). Insert the thermometer into the thickest part of the chicken, avoiding any bone if you were using bone-in pieces (though this recipe specifies boneless). This step is non-negotiable for food safety and ensures your chicken is both cooked thoroughly and remains tender, not dry.
4. Once the chicken has reached the correct internal temperature, remove it from the skillet and place it on a clean cutting board or a plate.
5. This is a vital step for maximizing juiciness: Let the chicken rest for about 5 minutes after cooking. Covering it loosely with foil can help keep it warm. This allows the juices, which have been driven to the center of the chicken during cooking, to redistribute throughout the meat. If you cut into it immediately, all those delicious juices will run out, leaving you with drier chicken.
Serving Your Delicious Creation
After the resting period, your “Loading… Chicken” is ready to be served. You can slice it and arrange it on a platter, or serve the pieces whole. Garnish with fresh chopped parsley if you like for a pop of color and freshness. This chicken is wonderfully adaptable – serve it with a side of steamed broccoli, a vibrant quinoa salad, or even some creamy mashed potatoes. Enjoy the simple, satisfying flavors of your perfectly loaded chicken!
Conclusion:
I hope you’ve enjoyed learning how to create this fantastic ‘Loading…’ recipe! This dish is truly a winner because of its incredible adaptability, satisfying textures, and the way it perfectly balances complex flavors. It’s a testament to how simple ingredients can come together to form something truly special and deeply enjoyable. Whether you’re looking for a quick weeknight meal or a show-stopping centerpiece for a gathering, this recipe delivers every time. I wholeheartedly encourage you to give it a try; you won’t be disappointed with the delightful result.
For serving, this ‘Loading…’ is incredibly versatile. It shines when served alongside a crisp, fresh salad or a bed of fluffy rice. You could also pair it with crusty bread for dipping up any extra sauce. Don’t be afraid to experiment with variations! Consider adding a splash of chili oil for a kick, incorporating different herbs like cilantro or parsley, or even topping it with toasted nuts for an extra layer of crunch. The possibilities are endless, allowing you to make it uniquely yours.
Frequently Asked Questions:
What are some other protein options I can use for this recipe?
Absolutely! While the recipe is fantastic with its origin extractal protein, you can easily substitute it with chicken breast, firm tofu, shrimp, or even a hearty lentil mixture. Just adjust the cooking times accordingly to ensure everything is cooked through and tender.
Can I make this recipe ahead of time?
Yes, you can! Most components of this ‘Loading…’ recipe can be prepared in advance. The sauce can be made a day or two ahead and stored in the refrigerator. You can also chop your vegetables beforehand. Assemble and cook just before serving for the best flavor and texture.
Is this recipe spicy?
The base recipe has a mild warmth, but the spice level is easily adjustable. If you prefer it spicier, feel free to add more chili flakes, a fresh chopped chili pepper, or a dash of your favorite hot sauce to taste. Conversely, if you’re sensitive to spice, you can omit the chili elements entirely.
Loading…
A simple and delicious recipe with a focus on proper chicken preparation for optimal flavor and safety.
Ingredients
-
Chicken pieces
-
Seasoning blend
-
Olive oil
-
Water
-
Salt
-
Black pepper
Instructions
-
Step 1
Start by patting the chicken dry; this helps the seasoning stick better. -
Step 2
Season the chicken generously with your chosen seasoning blend, salt, and pepper. -
Step 3
Heat olive oil in a skillet over medium-high heat. -
Step 4
Sear the chicken on all sides until golden brown. -
Step 5
Reduce heat, add a small amount of water to the skillet, cover, and cook until the chicken is done. -
Step 6
Use a meat thermometer to check that your chicken reaches 165°F (74°C). This ensures it’s safe to eat, yet still tender. -
Step 7
Let the chicken rest for about 5 minutes after cooking. This lets the juices redistribute, making each bite more succulent.
Important Information
Nutrition Facts (Per Serving)
It is important to consider this information as approximate and not to use it as definitive health advice.
Allergy Information
Please check ingredients for potential allergens and consult a health professional if in doubt.