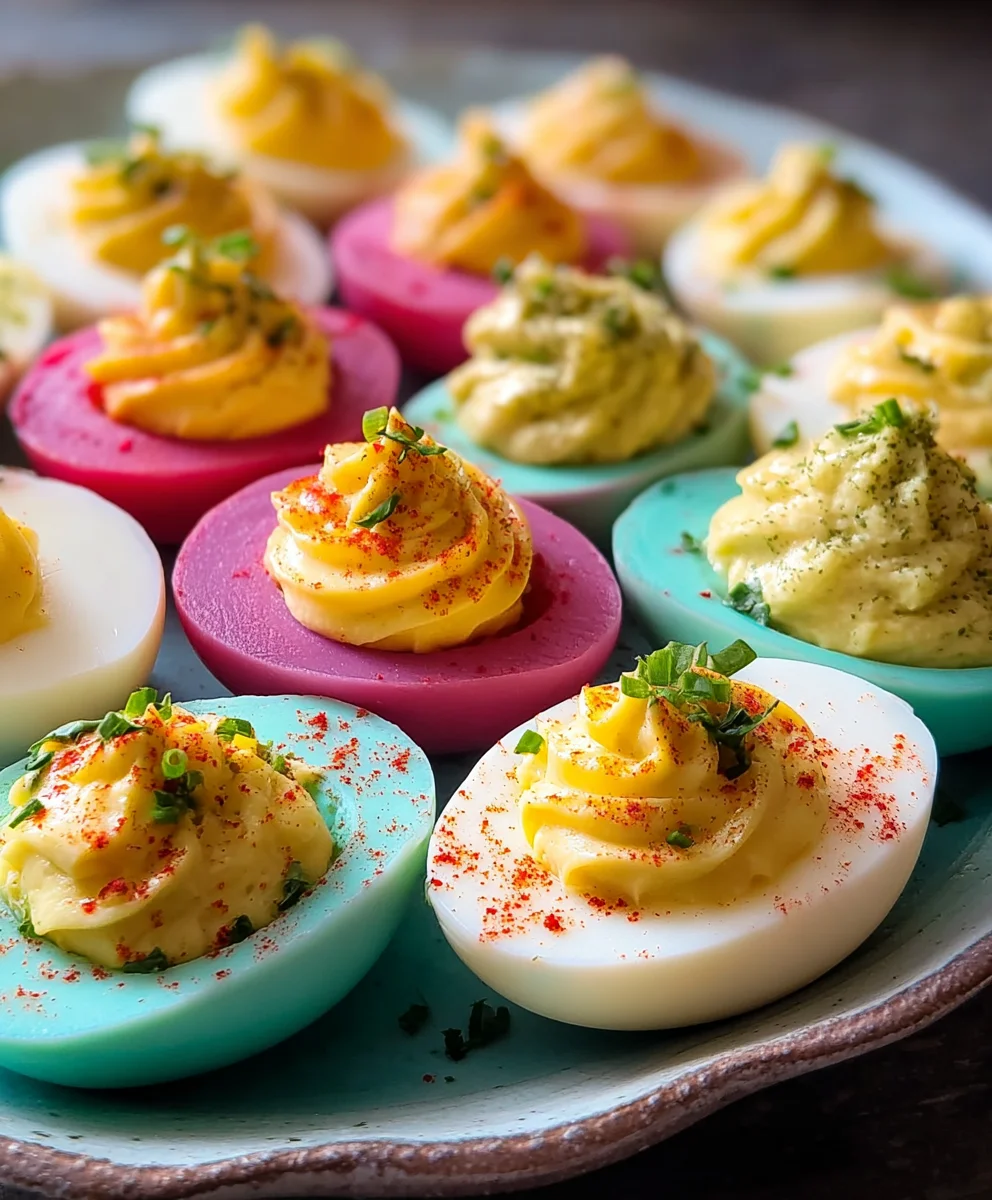
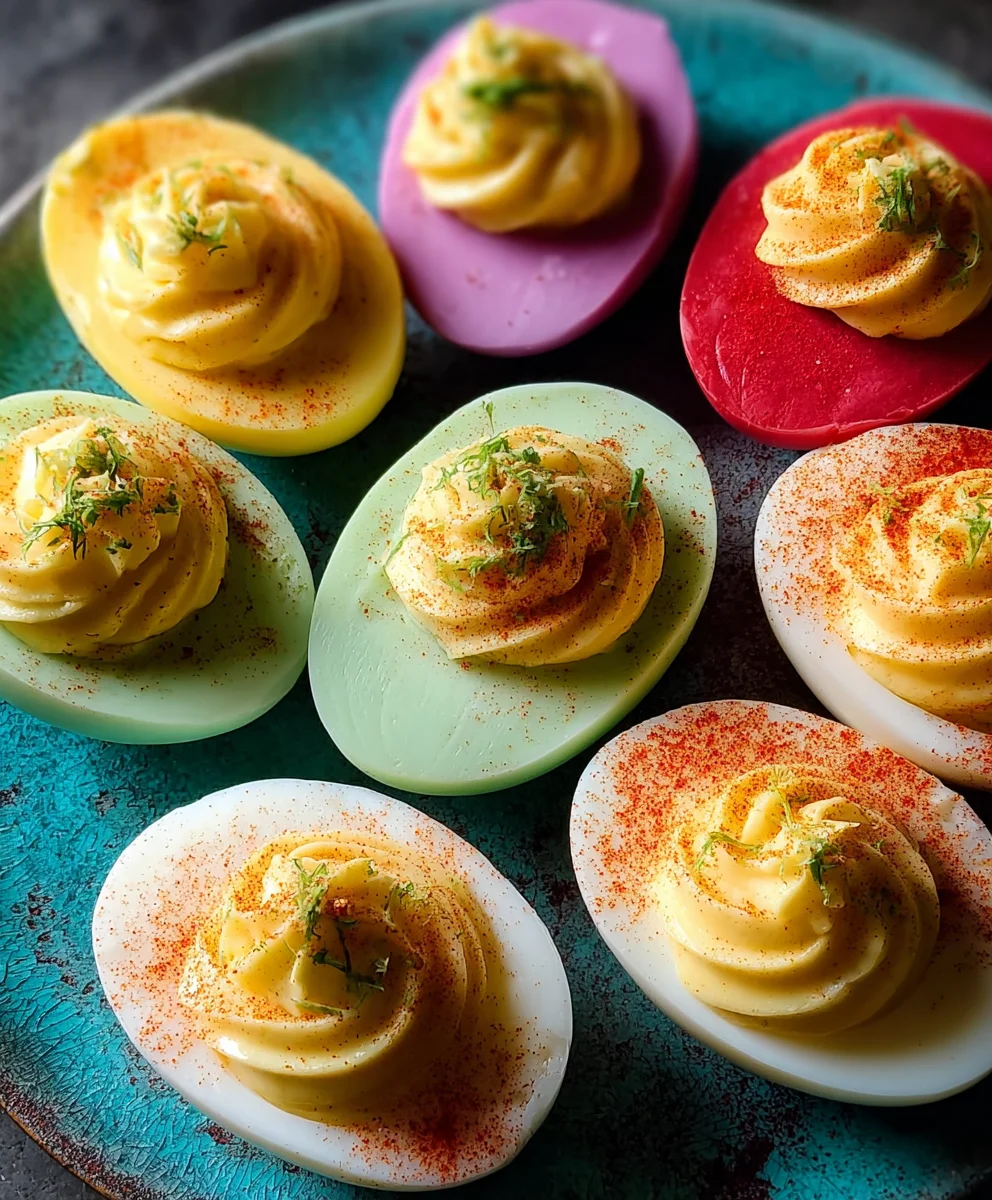
Colorful Deviled Eggs Recipe-Fun Party Appetizer
Colored Deviled Eggs are more than just a party appetizer; they’re a vibrant celebration on a plate! Imagin extracte a platter bursting with jewel-toned delights, each creamy yolk filling a perfectly white egg white, transforming a classic into something truly show-stopping. It’s no wonder these colorful creations are a perennial favorite at Easter brunches, summer picnics, and holiday gatherings. People adore deviled eggs for their irresistible combination of a rich, velvety filling and a satisfyingly firm egg white base. But what truly sets these colored deviled eggs apart is the playful twist of infusing the egg whites with natural, beautiful hues. This isn’t just about aesthetics; it’s about adding a fun, edible art element that sparks conversation and delights guests of all ages. Get ready to learn how to craft these dazzling colored deviled eggs that are as delicious as they are visually stunning!
Ingredients:
- 12 large eggs
- ½ cup mayonnaise
- 2 teaspoons pickle juice
- 2 teaspoons mustard
- 4 tablespoons finely chopped dill pickles
- Salt, to taste
- Black pepper, to taste
- 6 ounces water in each cup (for coloring)
- 1 teaspoon white vinegar, in each cup (for coloring)
- Food coloring in desired colors (e.g., red, blue, yellow, green)
Preparing the Eggs
Step 1: Boiling the Eggs
The first crucial step to achieving perfect deviled eggs, and especially beautiful colored ones, is to hard-boil your eggs correctly. I find the easiest method is to place the 12 large eggs in a single layer in a large saucepan. Cover them with cold water, ensuring the water level is about an inch above the eggs. Bring the water to a rolling boil over medium-high heat. Once the water reaches a full boil, immediately remove the saucepan from the heat, cover it tightly with a lid, and let the eggs sit undisturbed for 10 to 12 minutes. This steaming method is my go-to because it consistently produces eggs that are easy to peel and have perfectly cooked yolks without any greenish ring. After the steeping time, carefully drain the hot water and immediately plunge the eggs into a bowl of ice water. This ice bath is essential for stopping the cooking process and making peeling significantly easier. Let them chill in the ice water for at least 10 minutes.
Step 2: Peeling and Halving the Eggs
Once the eggs are thoroughly chilled, it’s time to peel them. Gently tap each egg on a hard surface to crack the shell all over, then start peeling from the wider end, where the air pocket usually is. If you find a few stubborn spots, running the egg under cool water can help loosen the shell. After peeling, carefully slice each hard-boiled egg in half lengthwise. You want a clean cut to make your deviled eggs look professional. Use a sharp knife and a steady hand. Once halved, gently scoop out the yolks into a medium-sized bowl. Be careful not to damage the egg white halves; these will serve as your boats for the delicious filling. Arrange the hollowed-out egg white halves on a serving platter, making sure they are stable.
Creating the Deviled Egg Filling
Step 3: Mashing the Yolks and Mixing the Filling
Now comes the fun part – creating the creamy, flavorful filling. Take the scooped-out egg yolks and mash them thoroughly with a fork until they are as smooth as possible. This ensures a lump-free, luscious texture for your deviled egg filling. Add the ½ cup of mayonnaise to the mashed yolks. The mayonnaise is the creamy binder that brings everything together. Next, add the 2 teaspoons of pickle juice and the 2 teaspoons of mustard. These ingredients add a wonderful tang and depth of flavor. Finally, stir in the 4 tablespoons of finely chopped dill pickles. The pickles provide a delightful crunch and a briny counterpoint to the richness of the yolk and mayonnaise. Season the mixture generously with salt and black pepper to taste. Remember, you can always add more seasoning, but you can’t take it away, so start with a moderate amount and adjust as needed. Mix everything together until it’s well combined and has a smooth, creamy consistency.
Coloring the Deviled Eggs
Step 4: Preparing the Colored Filling Bases
This is where the “colored” aspect of our deviled eggs truly shines. We’ll create individual batches of the deviled egg filling and color them separately. For each color you wish to create, you’ll need a separate small bowl. Decide how many different colors you want and how many egg white halves you want for each color. Since we have 12 eggs, we have 24 halves. You could aim for 4 colors with 6 halves each, or 3 colors with 8 halves each, or any combination you prefer. For each separate batch of filling, take a portion of your yolk mixture (roughly ¼ cup per color, or adjust based on how many halves you are coloring). In a separate small bowl, place your portion of the yolk mixture. Add 6 ounces of water to this bowl, and importantly, add 1 teaspoon of white vinegar. The vinegar helps the food coloring adhere better to the mixture and brightens the colors. Stir this mixture gently.
Step 5: Coloring and Piping the Filling
Now it’s time to add the color! Add a few drops of your chosen food coloring to each separate bowl containing the yolk mixture, water, and vinegar. Start with a small amount of food coloring, as a little goes a long way, and you can always add more to achieve a deeper hue. Stir the mixture thoroughly until the color is evenly distributed. You’re looking for vibrant, appealing colors. Repeat this process for each desired color, ensuring you have separate bowls for each. Once your colored fillings are ready, carefully spoon each colored mixture into a separate piping bag fitted with a star tip, or simply use a spoon or a zip-top bag with a corner snipped off. Pipe or spoon the colored filling back into the hollowed-out egg white halves. Try to be neat and create a pleasing swirl or mound of filling. For an extra touch, you can garnish with a tiny sprinkle of paprika or a small piece of dill pickle. Chill the finished colored deviled eggs for at least 30 minutes before serving to allow the flavors to meld and the filling to firm up slightly. These are sure to be a hit at any gathering!
Conclusion:
You’ve now unlocked the secret to creating stunning and delicious Colored Deviled Eggs! We’ve explored how to achieve vibrant hues naturally, ensuring your deviled eggs are as visually appealing as they are tasty. This recipe is incredibly versatile, perfect for Easter brunches, baby showers, holiday parties, or simply as a fun and colorful appetizer for any gathering. Don’t be afraid to experiment with different natural food colorings to discover your favorite shades. Remember, the key is to have fun with the process and enjoy the delightful results. Serve these beautiful Colored Deviled Eggs as a centerpiece that guests will talk about for days, or alongside other party favorites for a truly memorable spread. Get creative and make your next get-together a colorful one!
Frequently Asked Questions:
Can I use artificial food coloring instead of natural options?
Absolutely! While we’ve focused on natural food coloring for this recipe, you can certainly use regular liquid or gel food coloring if you prefer. Just add a few drops to the boiling water for the egg whites until you achieve your desired color. Be mindful that some artificial colors can be quite potent, so start with a small amount and add more as needed.
How long do Colored Deviled Eggs last?
Once prepared, Colored Deviled Eggs should be stored in an airtight container in the refrigerator. They are best enjoyed within 2 to 3 days for optimal freshness and flavor. Ensure they are kept chilled to maintain food safety.
Colorful Deviled Eggs Recipe-Fun Party Appetizer
Vibrant and fun deviled eggs, perfect for any party or gathering. These are easy to make and can be customized with your favorite colors.
Ingredients
-
12 large eggs
-
½ cup mayonnaise
-
2 teaspoons pickle juice
-
2 teaspoons mustard
-
4 tablespoons finely chopped dill pickles
-
Salt, to taste
-
Black pepper, to taste
-
6 ounces water (for coloring each batch)
-
1 teaspoon white vinegar (for coloring each batch)
-
Food coloring in desired colors
Instructions
-
Step 1
Hard-boil 12 large eggs by placing them in a single layer in a saucepan, covering with cold water (about an inch above eggs), bringing to a rolling boil, removing from heat, covering, and letting sit for 10-12 minutes. Immediately plunge into an ice bath for at least 10 minutes. -
Step 2
Peel the chilled eggs. Slice each egg in half lengthwise. Gently scoop out the yolks into a medium bowl, leaving the white halves intact. Arrange the white halves on a serving platter. -
Step 3
Mash the egg yolks until smooth. Add mayonnaise, pickle juice, and mustard. Stir in finely chopped dill pickles. Season with salt and pepper to taste. Mix until creamy and well combined. -
Step 4
Divide the yolk mixture into separate bowls for each desired color. To each portion, add 6 ounces of water and 1 teaspoon of white vinegar. Stir gently. -
Step 5
Add a few drops of food coloring to each bowl, starting with a small amount and adding more to achieve desired vibrancy. Stir thoroughly until the color is evenly distributed. -
Step 6
Spoon or pipe the colored filling back into the hollowed-out egg white halves. Garnish if desired. Chill for at least 30 minutes before serving.
Important Information
Nutrition Facts (Per Serving)
It is important to consider this information as approximate and not to use it as definitive health advice.
Allergy Information
Please check ingredients for potential allergens and consult a health professional if in doubt.