Easy Dango Recipe-Simple Sweet Treat
Easy Dango Recipe. Ever craved a taste of sweet, chewy perfection that’s surprisingly simple to whip up? You’ve come to the right place! Dango, those delightful Japanese rice dumplings, are a beloved treat for so many reasons. Their pillowy softness, combined with a satisfying chegrape juicess, makes each bite an absolute joy. What truly sets this Easy Dango Recipe apart is its accessibility; you don’t need a culinary degree or a trip to a specialty Japanese market to enjoy this classic dessert. We’re talking about a recipe so straightforward, it’s perfect for a quick afternoon snack, a fun family activity, or even for impressing guests with minimal fuss. Get ready to experience the simple magic of homemade dango without any of the usual complexities.
Why You’ll Love This Easy Dango Recipe
Simple Ingredients, Incredible Taste
This Easy Dango Recipe is designed for everyone. Whether you’re a seasoned baker or a kitchen novice, you’ll find this recipe incredibly rewarding. The beauty lies in its few, common ingredients that come together to create something truly special. Forget complicated techniques; we’re focusing on pure, unadulterated deliciousness that you can achieve in your own kitchen.
Easy Dango Recipe
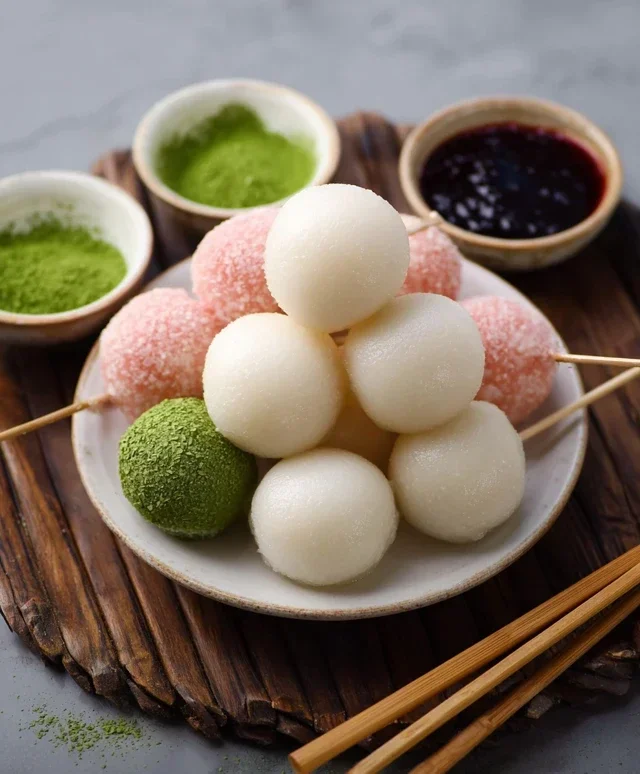
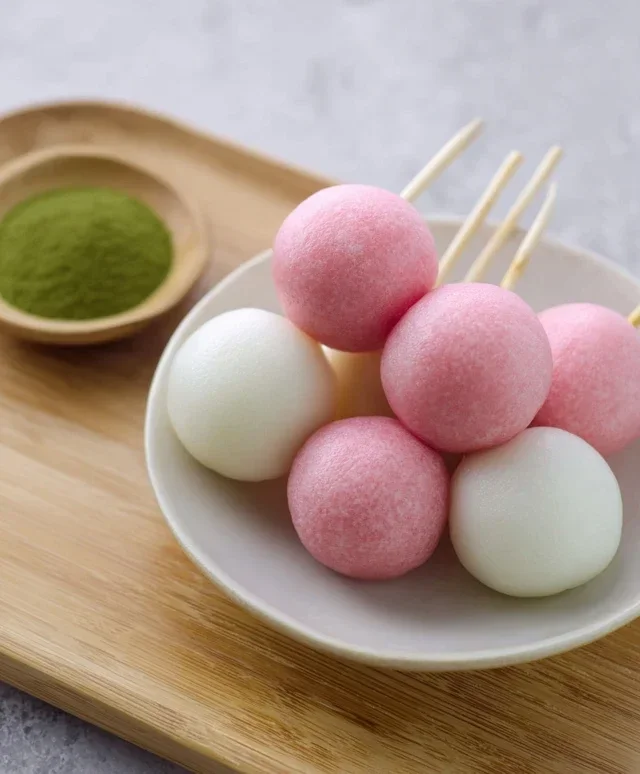
Dango are delightful, chewy Japanese rice dumplings that are surprisingly easy to make at home. They’re a beloved sweet treat, often enjoyed on skewers and drizzled with various sauces or toppings. While traditional dango can involve a bit of a process, this recipe is designed for simplicity, allowing even begin extractner cooks to whip up a batch of these charming confections. We’ll be making three different colors and flavors: classic plain, vibrant green matcha, and a pretty pink. Get ready to impress yourself and your loved ones with these fun and delicious dumplings!
Ingredients:
Making the Dango Dough
This is the core of our dango making! The combination of Joshinko and Shiratamako is key to achieving the perfect chewy yet tender texture. Joshinko provides a firmer bite, while Shiratamako brings the characteristic chegrape juicess and soft mouthfeel.
1. First, let’s prepare the base dough. In a large mixing bowl, combine the Joshinko (non-glutinous rice flour) and Shiratamako (glutinous sweet rice flour). If you’re opting for a sweeter dango, now is the time to add the powdered sugar. Whisk everything together thoroughly to ensure the flours are well combined. This prevents any pockets of unmixed ingredients.
2. Gradually add the hot water to the flour mixture. Start by pouring in about half of the hot water and begin extract mixing with a spatula or wooden spoon. As the dough starts to come together, continue adding the hot water little by little. You want to reach a point where the dough is no longer dry and crum extractbly, but is starting to form a cohesive mass. The amount of water might vary slightly depending on the humidity and the specific brands of flour you’re using, so be attentive to the dough’s consistency. The goal is a soft, pliable dough that isn’t sticky.
3. Once the initial mixing is done, it’s time to get your hands in there! Lightly flour your hands with a bit of rice flour (or all-purpose flour) to prevent sticking. Knead the dough in the bowl for about 5-7 minutes. This kneading process develops the gluten in the glutinous rice flour, which is crucial for the dango’s chewy texture. Keep kneading until the dough is smooth and elastic, without any dry lumps.
Dividing and Coloring the Dough
Now for the fun part – creating our colorful dango! We’ll divide the dough into three portions for our plain, matcha, and pink varieties.
4. Divide the main dough into three roughly equal portions. Place one portion back into the clean mixing bowl. For the matcha dango, in a separate small bowl, mix the 1 teaspoon of matcha powder with 1 teaspoon of hot water. Stir until a smooth paste forms. Add this matcha paste to the second portion of dango dough and knead thoroughly until the color and flavor are evenly distributed. This might take a few minutes. For the pink dango, add just one drop of pink food coloring to the third portion of dough. Again, knead until the color is uniform. Be conservative with the food coloring; you can always add another tiny drop if needed, but it’s hard to remove excess color. The plain dough remains as it is.
Shaping and Cooking the Dango
The final steps involve shaping our beautiful dango balls and cooking them to perfection.
5. Take one portion of your colored dough (start with the plain, matcha, or pink, it doesn’t matter which). Roll a small piece of dough between your palms to form a smooth ball, about 1 inch (2-3 cm) in diameter. You can also shape them into flattened discs or other fun shapes if you like! Repeat this process with all of your dough, creating an equal number of each color if you wish. Have a pot of water boiling on the stove; this is where we’ll cook our dango.
6. Carefully drop the shaped dango balls into the boiling water. Don’t overcrowd the pot; cook them in batches if necessary. The dango will sink to the bottom at first. As they cook, they will gradually float to the surface. Once they float, let them continue to boil for another 2-3 minutes. This ensures they are cooked through and have achieved that signature chewy texture.
7. Using a slotted spoon, carefully remove the cooked dango from the boiling water. You can immediately thread them onto skewers (wooden skewers work well, just soak them in water beforehand to prevent burning if you plan to grill them later) or place them in a bowl. They are best enjoyed warm and fresh. You can serve them plain, or with your favorite dango sauce, such as mitarashi (a sweet soy glaze) or anko (sweet red bean paste). Enjoy your homemade, easy dango!
Conclusion:
And there you have it – a wonderfully simple and incredibly satisfying Easy Dango Recipe that’s perfect for begin extractners and busy cooks alike! The beauty of this recipe lies in its minimal ingredients and straightforward process, making it achievable for anyone to whip up these delightful chewy rice dumplings. Whether you’re craving a sweet treat for yourself or looking for a fun dessert to share, these dango will surely impress. They are fantastic served warm with your favorite toppings, offering a burst of chewy goodness that’s both comforting and delicious. Don’t be afraid to get creative with your own flavor combinations!
Consider trying them with a drizzle of sweetened condensed milk, a sprinkle of toasted sesame seeds, or even a light dusting of matcha powder for an earthy twist. This recipe is also wonderfully adaptable; you can experiment with adding a touch of honey to the dough for a subtle sweetness or even coloring the dough with natural food coloring for a visually appealing presentation. I highly encourage you to give this easy dango recipe a try. It’s a rewarding culinary adventure that promises delightful results with very little effort. Happy cooking!
Frequently Asked Questions:
Can I make dango ahead of time?
Yes, you can! Dango are best enjoyed fresh, but you can prepare the dough balls and store them in an airtight container in the refrigerator for up to a day. They might firm up a bit, so a quick reheat in the microwave or by steaming will help restore their chewy texture.
What if I don’t have glutinous rice flour?
Glutinous rice flour (also known as sweet rice flour) is essential for achieving the signature chewy texture of dango. Regular rice flour will not work as it lacks the necessary gluten. If you can’t find it, you might be able to find a “mochiko” brand, which is typically glutinous rice flour.
Easy Dango Recipe
A simple and delightful recipe for making traditional Japanese dango, perfect for a sweet treat.
Ingredients
-
{‘@type’: ‘Ingredient’, ‘name’: ‘Joshinko non-glutinous rice flour’, ‘quantity’: ‘1 1/3’, ‘unit’: ‘cup’, ‘image’: ‘https://example.com/joshinko.jpg’}
-
{‘@type’: ‘Ingredient’, ‘name’: ‘Shiratamako glutinous sweet rice flour’, ‘quantity’: ‘1 1/2’, ‘unit’: ‘cup’, ‘image’: ‘https://example.com/shiratamako.jpg’}
-
{‘@type’: ‘Ingredient’, ‘name’: ‘Powdered sugar (optional)’, ‘description’: ‘to make it sweeter’, ‘quantity’: ‘3/4’, ‘unit’: ‘cup’, ‘image’: ‘https://example.com/powdered_sugar.jpg’}
-
{‘@type’: ‘Ingredient’, ‘name’: ‘Hot water’, ‘quantity’: ‘1 1/3’, ‘unit’: ‘cup’, ‘image’: ‘https://example.com/hot_water.jpg’}
-
{‘@type’: ‘Ingredient’, ‘name’: ‘Matcha powder’, ‘quantity’: ‘1’, ‘unit’: ‘teaspoon’, ‘image’: ‘https://example.com/matcha_powder.jpg’}
-
{‘@type’: ‘Ingredient’, ‘name’: ‘Water for matcha’, ‘quantity’: ‘1’, ‘unit’: ‘teaspoon’, ‘image’: ‘https://example.com/water.jpg’}
-
{‘@type’: ‘Ingredient’, ‘name’: ‘Pink food coloring’, ‘quantity’: ‘1’, ‘unit’: ‘drop’, ‘image’: ‘https://example.com/pink_food_coloring.jpg’}
Instructions
-
Step 1
In a large bowl, combine Joshinko (non-glutinous rice flour), Shiratamako (glutinous sweet rice flour), and optional powdered sugar. Mix well. -
Step 2
Gradually add the hot water to the dry ingredients while mixing with chopsticks or a spatula. Continue mixing until a shaggy dough forms. -
Step 3
Knead the dough with your hands until it becomes smooth and elastic. Divide the dough into three portions. Leave one portion plain. -
Step 4
For the matcha dango, mix 1 teaspoon of matcha powder with 1 teaspoon of water to form a paste, then knead this paste into one portion of the dough until evenly colored. -
Step 5
For the pink dango, add 1 drop of pink food coloring to the remaining dough portion and knead until uniformly colored. You can adjust the amount of food coloring for desired shade. -
Step 6
Roll each portion of dough into small balls, about 1 inch in diameter. You can also flatten them slightly or shape them as desired. -
Step 7
Bring a pot of water to a boil. Carefully drop the dango balls into the boiling water. Cook until they float to the surface, then let them simmer for another 1-2 minutes. -
Step 8
Using a slotted spoon, remove the cooked dango from the water and place them in a bowl of ice water to stop the cooking process and make them firm. Drain well before serving.
Important Information
Nutrition Facts (Per Serving)
It is important to consider this information as approximate and not to use it as definitive health advice.
Allergy Information
Please check ingredients for potential allergens and consult a health professional if in doubt.