Ultimate Cheesy Garlic Bread Recipe Crispy
Ultimate Cheesy Garlic Bread Recipe – Crispy, Cheesy & Irresistible is more than just a side dish; it’s a culinary hug, a guaranteed crowd-pleaser, and frankly, the undisputed cbeef hampion of comfort food. We’ve all experienced that moment, haven’t we? That yearning for something warm, garlicky, and gloriously cheesy that melts in your mouth with every bite. This isn’t just any garlic bread; it’s the definitive version, crafted to deliver an unparalleled experience of texture and flavor. What makes it so special? It’s the perfect harmony between a shatteringly crisp crust and a soft, pillowy interior, generously slathered with an intensely aromatic garlic butter and blanketed with a melty, golden-brown cheese topping. Get ready to elevate your mealtime game with this truly irresistible creation.
Ingredients:
- 1 large French baguette or Italian bread
- ½ cup unsalted butter (softened)
- 5–6 garlic cloves (minced)
- 1 cup mozzarella cheese (shredded)
- ½ cup cheddar cheese (optional)
- 2 tablespoons fresh parsley (chopped)
- Salt to taste
Preparing the Bread and Garlic Butter Mixture
Let’s get started on creating the most delicious garlic bread you’ve ever tasted. The foundation of great garlic bread is, of course, the bread itself. For this recipe, I prefer a good quality French baguette or a crusty Italian loaf. The key is a bread that has a nice, firm crust on the outside and a soft, airy interior that can soak up all that glorious garlic butter. If you’re using a fresh baguette, slicing it right before you assemble the bread will ensure it’s at its best. Avoid using pre-sliced bread as it can sometimes be too soft and might crum extractble when you apply the toppings.
The heart of any garlic bread is the garlic butter. We’re going to make a truly irresistible one. Start by taking your unsalted butter and ensuring it’s nicely softened. This means taking it out of the refrigerator about 30-60 minutes before you plan to mix it. Softened butter will incorporate much more smoothly with the other ingredients, creating a consistent spread. If you’re in a hurry, you can gently microwave the butter in very short intervals (10-15 seconds at a time), but be careful not to melt it completely. We want it soft and spreadable, not liquid.
Next, we’ll mince our garlic cloves. For a robust garlic flavor, 5-6 cloves are perfect. The finer you mince the garlic, the more evenly it will distribute throughout the butter, ensuring every bite is packed with that pungent goodness. You can use a garlic press if you prefer, but mincing with a knife gives you a bit more control over the texture and allows the garlic to meld beautifully with the butter. Add the minced garlic to the softened butter in a medium-sized bowl. Now, let’s talk about the cheese. We’re using a generous cup of shredded mozzarella for that incredible stretch and melt factor. For an extra layer of flavor and a beautiful golden hue, we’re also adding ½ cup of shredded cheddar cheese. This is optional, but highly recommended for an even more complex and satisfying cheesy experience. Toss the shredded cheeses into the bowl with the butter and garlic. Finally, add the freshly chopped parsley. Fresh parsley not only adds a vibrant green color but also a bright, slightly peppery note that cuts through the richness of the butter and cheese. For seasoning, a pinch of salt to taste is crucial. The salt will enhance all the other flavors, bringin extractg them together in perfect harmony. Mix all these ingredients together thoroughly with a spoon or a spatula until you have a creamy, cohesive garlic butter mixture. Make sure there are no streaks of plain butter or clumps of garlic – we want everything perfectly blended.
Assembling and Baking the Ultimate Cheesy Garlic Bread
-
Preparing the Bread:
Take your French baguette or Italian bread and slice it lengthwise. If your loaf is very long, you can also slice it in half crosswise first to make it more manageable for baking and serving. Then, slice each half lengthwise. You want to create two long halves that you can generously spread the garlic butter mixture onto. Be careful not to cut all the way through the crust on one side if you want to create a “hinged” loaf, which can be easier to manage. Alternatively, you can slice it all the way through into individual pieces, but slightly thicker slices (about 1 inch thick) will hold up better to the topping. If you’re slicing it completely, make sure to slice the bread all the way through.
-
Applying the Garlic Butter:
Now comes the fun part – generously slathering our prepared garlic butter mixture onto the cut sides of the bread. Use a spoon or a spatula to spread the mixture evenly, making sure to get it all the way to the edges. Don’t be shy; we want a thick, luscious layer of garlic butter that will melt and seep into the bread as it bakes. Ensure every nook and cranny is coated. If you sliced the bread into individual pieces, spread the mixture on each slice.
-
Broiling for the Perfect Crisp:
This step is crucial for achieving that irresistible crispy texture on the outside of the bread. Preheat your oven’s broiler to high. Place the bread halves (or slices) on a baking sheet, butter-side up. Position the baking sheet about 4-6 inches away from the broiler element. Keep a very close eye on the bread during this stage, as broilers can work very quickly. You’re looking for the butter to melt, the edges of the bread to start turning golden brown, and the garlic to become fragrant and slightly toasted. This usually takes about 2-4 minutes. Rotate the baking sheet as needed to ensure even browning across the entire surface.
-
Adding the Cheesy Topping and Final Bake:
Once the bread has achieved a lovely golden hue and the garlic is fragrant from the broiler, remove the baking sheet from the oven. Now, evenly distribute the remaining mozzarella and cheddar cheese over the top of the garlic butter. You want a generous, even layer of cheese that will melt into gooey, cheesy perfection. Once the cheese is spread, return the baking sheet to the oven. This time, we’ll bake at 375°F (190°C) for another 5-8 minutes, or until the cheese is fully melted, bubbly, and lightly golden brown. The goal here is to melt the cheese thoroughly and allow it to get beautifully gooey, without burning the bread further.
-
Finishing Touches and Serving:
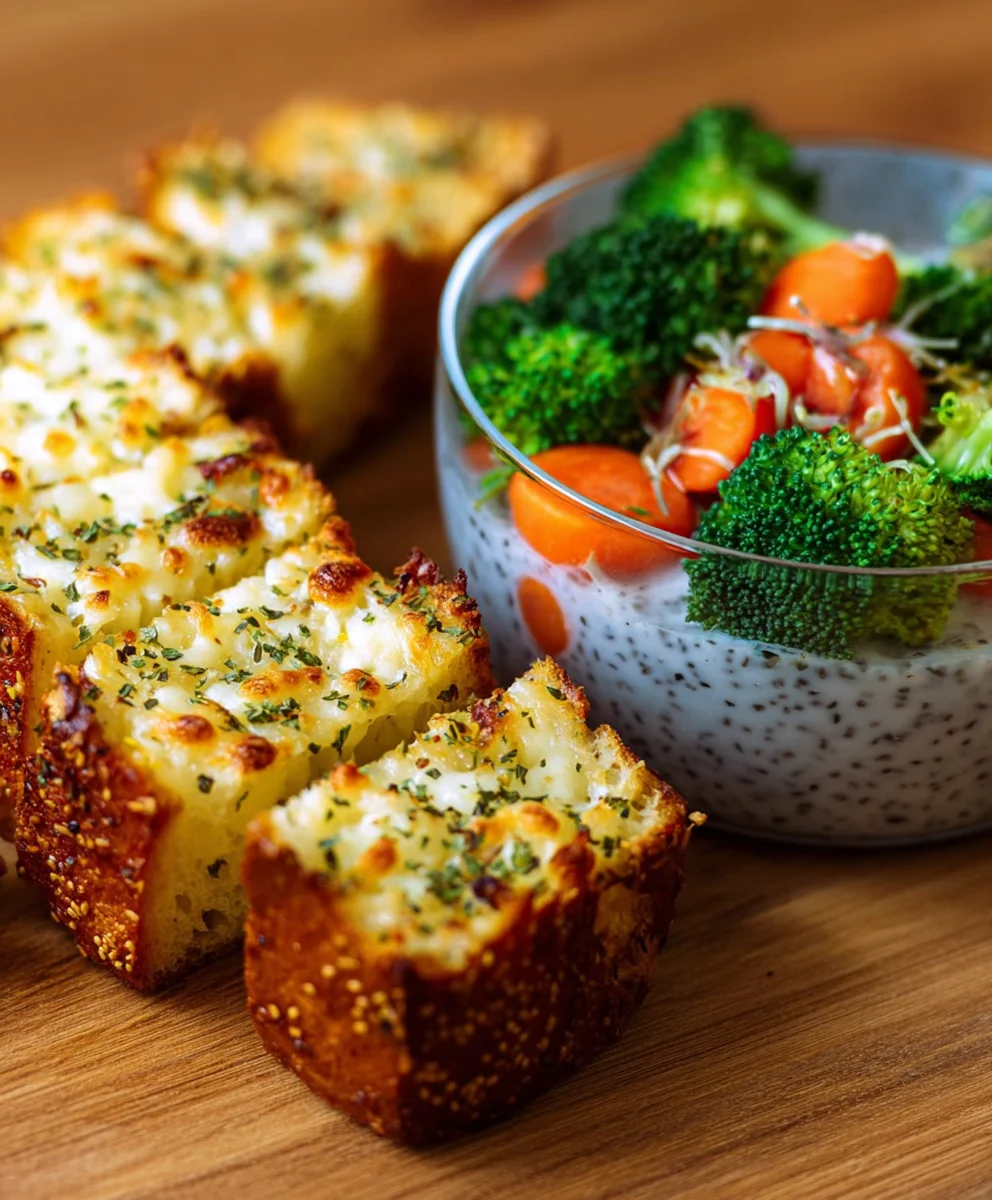
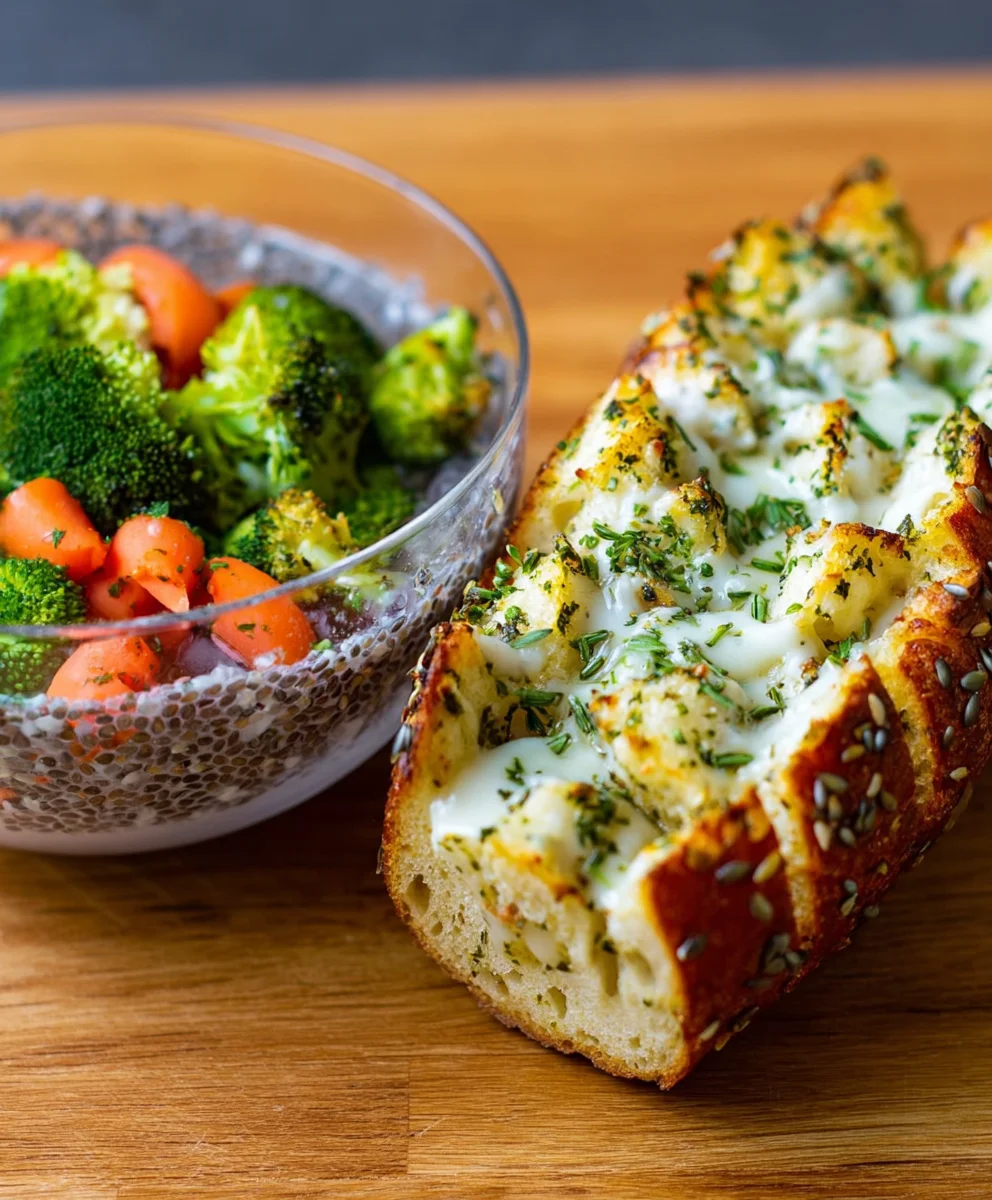
When the cheese is perfectly melted and bubbly, carefully remove the garlic bread from the oven. The aroma at this point will be absolutely divine! Let the bread cool for just a minute or two on the baking sheet before transferring it to a cutting board. This brief cooling period helps the cheese to set slightly, making it easier to slice. Sprinkle with a little extra fresh chopped parsley for a final touch of freshness and visual appeal. If you baked it as halves, slice the bread into individual portions using a sharp serrated knife. Serve immediately while it’s hot, crispy, and gloriously cheesy. This is best enjoyed fresh out of the oven when the cheese is at its most melty.
Conclusion:
And there you have it – the secret to achieving the truly sublime “Ultimate Cheesy Garlic Bread Recipe – Crispy, Cheesy & Irresistible”! We’ve walked through each step, from selecting the perfect bread to achieving that golden, bubbling cheese topping. This recipe isn’t just about making garlic bread; it’s about crafting an experience that will have everyone reaching for more. The satisfying crunch of the crust, the rich aroma of garlic butter, and the gooey, melted cheese make this an absolute winner for any occasion.
Feel free to serve this delightful bread as a side to your favorite pasta dishes, soups, stews, or even as a standalone appetizer. For a touch of gourmet flair, consider a sprinkle of fresh parsley or a drizzle of balsamic glaze before serving. Don’t shy away from experimenting with variations! Add a pinch of red pepper flakes for a hint of heat, or incorporate finely chopped chives for an extra layer of herbaceous flavor. This “Ultimate Cheesy Garlic Bread Recipe – Crispy, Cheesy & Irresistible” is your gateway to garlic bread perfection. Now go forth and bake with confidence – you’ve got this!
Frequently Asked Questions:
Q1: What kind of bread is best for the Ultimate Cheesy Garlic Bread Recipe – Crispy, Cheesy & Irresistible?
For the best results with the “Ultimate Cheesy Garlic Bread Recipe – Crispy, Cheesy & Irresistible,” a crusty baguette or Italian loaf works wonderfully. The denser crum extractb prevents it from becoming too soggy, and the firm crust provides that desired crispiness. Day-old bread is actually ideal as it’s a little drier and will toast up beautifully.
Q2: Can I make this recipe ahead of time?
You can prepare the garlic butter mixture and spread it on the bread ahead of time, then cover it tightly and refrigerate for up to 24 hours. However, for the crispiest texture, it’s best to add the cheese and bake it just before serving. Alternatively, you can assemble everything and then freeze it. Thaw it completely before baking, and you might need to add a few extra minutes to the baking time.
Q3: What cheese is recommended for this recipe?
While a blend of mozzarella and cheddar is a fantastic starting point for the “Ultimate Cheesy Garlic Bread Recipe – Crispy, Cheesy & Irresistible,” feel free to explore. Gruyere, provolone, or even a sprinkle of Parmesan can add wonderful depth of flavor. The key is to use cheeses that melt well to achieve that irresistible gooeyness.
Ultimate Cheesy Garlic Bread Recipe Crispy
Experience the ultimate cheesy garlic bread with a perfectly crispy crust and a rich, flavorful garlic butter spread. This recipe guarantees a delightful appetizer or side dish.
Ingredients
-
1 large French baguette or Italian bread
-
½ cup unsalted butter (softened)
-
5–6 garlic cloves (minced)
-
1 cup mozzarella cheese (shredded)
-
½ cup cheddar cheese (optional)
-
2 tablespoons fresh parsley (chopped)
-
Salt to taste
Instructions
-
Step 1
Prepare the bread by slicing it lengthwise, creating two long halves. If the loaf is very long, you can slice it in half crosswise first. For easier handling, consider not cutting all the way through one side to create a hinge, or slice all the way through into approximately 1-inch thick pieces. -
Step 2
In a bowl, combine softened unsalted butter, minced garlic, shredded mozzarella cheese, optional shredded cheddar cheese, chopped fresh parsley, and salt to taste. Mix thoroughly until all ingredients are well incorporated into a creamy spread. -
Step 3
Generously spread the prepared garlic butter mixture evenly onto the cut sides of the bread, ensuring full coverage to the edges. If you sliced the bread into individual pieces, spread the mixture on each slice. -
Step 4
Preheat your oven’s broiler to high. Place the bread halves or slices on a baking sheet, butter-side up, about 4-6 inches from the broiler element. Broil for 2-4 minutes, watching closely, until the butter is melted, the edges are golden brown, and the garlic is fragrant. Rotate the pan for even browning. -
Step 5
Remove the baking sheet from the oven. Evenly distribute the remaining mozzarella and cheddar cheese over the top of the garlic butter. Return the baking sheet to the oven and bake at 375°F (190°C) for 5-8 minutes, or until the cheese is fully melted, bubbly, and lightly golden brown. -
Step 6
Carefully remove the garlic bread from the oven. Let it cool for 1-2 minutes before transferring to a cutting board. Sprinkle with extra fresh parsley. Slice into desired portions and serve immediately while hot, crispy, and cheesy.
Important Information
Nutrition Facts (Per Serving)
It is important to consider this information as approximate and not to use it as definitive health advice.
Allergy Information
Please check ingredients for potential allergens and consult a health professional if in doubt.