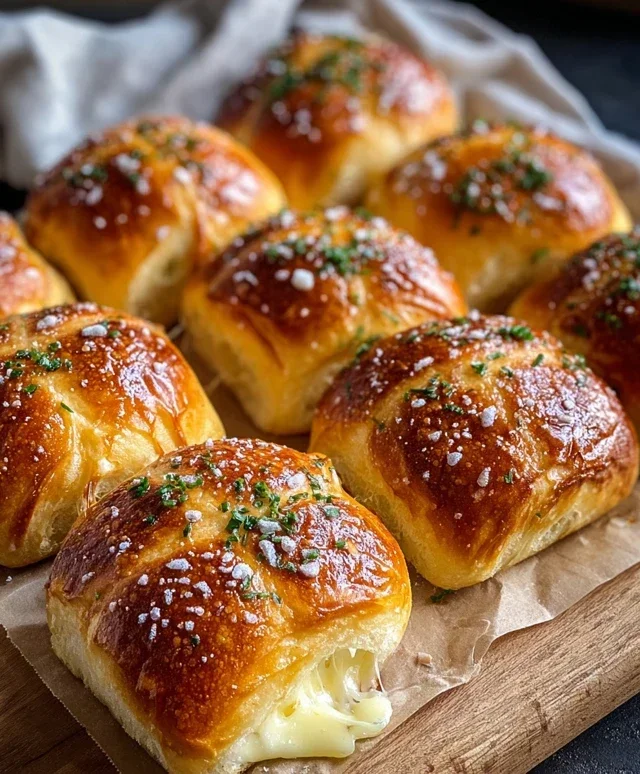
Korean Cream Cheese Garlic Buns – Irresistible Treat
Korean Cream Cheese Garlic Buns are a delightful culinary phenomenon that has taken the internet by storm, and for good reason! If you’ve ever craved a sweet, savory, and utterly decadent treat, then these buns are about to become your new obsession. Imagin extracte biting into a pillowy soft bun, still warm from the oven, that’s been generously slathered with a rich, garlicky butter mixture. Then, as you delve deeper, you encounter a luscious, slightly sweet cream cheese filling that oozes out with every bite. It’s this perfect harmony of textures and flavors – the crispy exterior, the fluffy interior, the pungent garlic, and the creamy sweetness – that makes Korean Cream Cheese Garlic Buns so utterly irresistible. They’re more than just a snack; they’re an experience, a mini celebration in every bite, and I’m so excited to share how you can recreate this magic in your own kitchen.
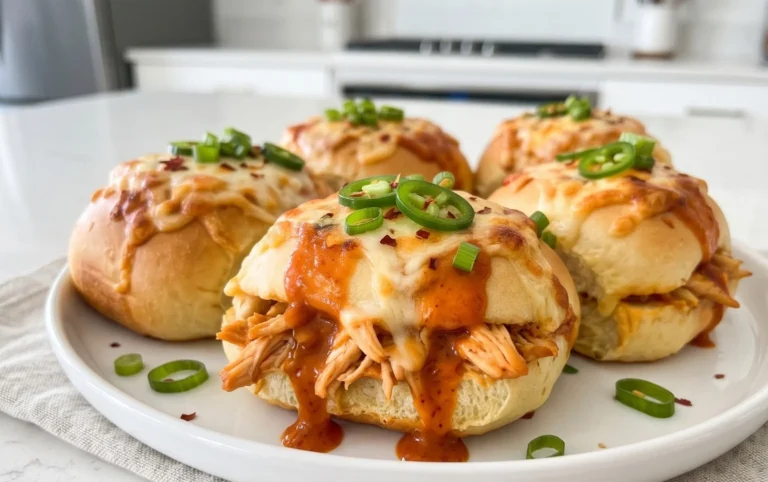
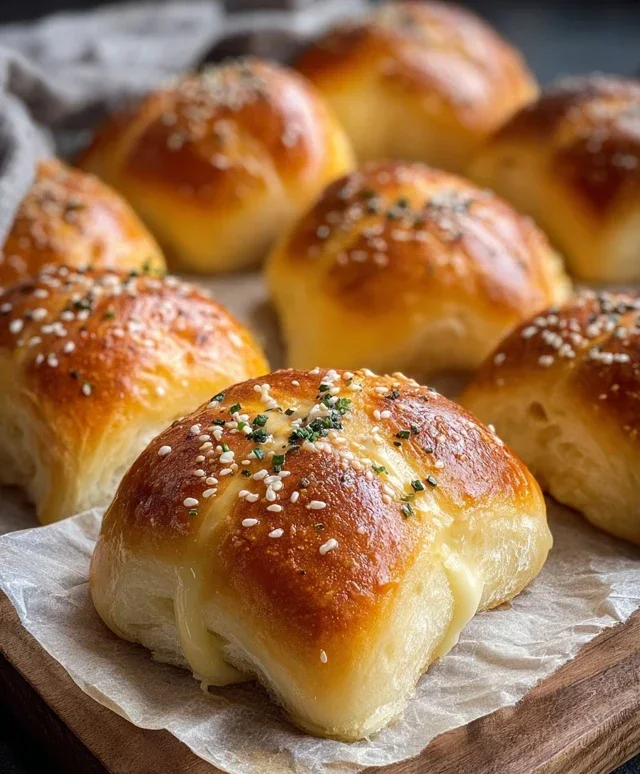
Korean Cream Cheese Garlic Buns
Get ready to embark on a culinary adventure that will transport your taste buds straight to a bustling Korean bakery! Korean Cream Cheese Garlic Buns have taken the internet by storm, and for good reason. These delightful rolls are a perfect symphony of sweet, savory, and creamy, with a satisfying garlicky punch. The secret to their irresistible allure lies in the contrast between the soft, slightly sweet bun and the rich, tangy cream cheese filling, all enveloped in a luscious garlic butter glaze. I’ve found that the key to achieving that perfect texture is to let the rolls dry out slightly, which helps them absorb the delicious garlic butter without becoming soggy. This recipe is surprisingly straightforward, making it an excellent option for both begin extractner bakers and seasoned pros looking to impress.
Ingredients:
Cooking Instructions:
Step 1: Prepare the Cream Cheese Filling
This is where the magic begin extracts! In a medium bowl, combine the softened cream cheese, 2-3 tablespoons of sweetened condensed milk, and a pinch of salt. Using a spatula or a hand mixer on low speed, cream these ingredients together until they are smooth and well combined. I like to start with 2 tablespoons of condensed milk and then add more if I feel the filling needs a touch more sweetness. The goal is a creamy, spreadable consistency that’s not too runny. Once mixed, set this aside. This filling will be the luscious heart of our garlic buns.
Step 2: Prepare the Egg Wash and Garlic Butter Mixture
In a separate small bowl, whisk together the melted butter, the large egg, and the 1/4 cup of milk. This mixture will be our golden egg wash, which helps the buns achieve a beautiful golden-brown crust as they bake. In another small bowl, combine the 2 tablespoons of sweetened condensed milk, the minced garlic, 1/2 teaspoon of salt, chopped fresh parsley, paprika, and grated parmesan cheese. Stir everything together until it forms a fragrant, cohesive garlic butter sauce. The aroma of garlic and herbs at this stage is just incredible and a true testament to what’s to come!
Step 3: Assemble the Buns
Now it’s time to bring it all together. Arrange your slightly dried Hawaiian sweet rolls in a baking dish or on a baking sheet lined with parchment paper. Using a sharp knife, carefully cut a slit into the top of each roll, creating a pocket. Be careful not to cut all the way through the bun. Gently spoon about a tablespoon of the prepared cream cheese filling into each pocket. Don’t overfill them, as the cream cheese will expand slightly as it bakes. Ensure the filling is nestled snugly within each roll.
Step 4: Glaze and Bake
This is a crucial step for achieving that signature Korean garlic bun flavor and texture. Once all the rolls are filled, generously brush the entire surface of each bun, including the sides, with the prepared garlic butter mixture. Make sure to get plenty of that delicious garlic and herb goodness all over! You want the buns to be thoroughly coated. Then, pour any remaining garlic butter mixture over the top of the buns in the baking dish. This will create an extra layer of flavor and moisture.
Now, preheat your oven to 350°F (175°C). Place the baking dish or sheet in the preheated oven and bake for approximately 15-20 minutes, or until the buns are golden brown and puffed up. Keep an eye on them, as ovens can vary, and you want to avoid burning the garlic. The house will fill with an non-intoxicating aroma as they bake – get ready for some serious craving!
Step 5: Serve and Enjoy
Once they’re out of the oven, let the Korean Cream Cheese Garlic Buns cool for just a few minutes in the baking dish before serving. They are best enjoyed warm, when the cream cheese is melty and the garlic butter glaze is still glistening. You can drizzle a little extra condensed milk over them if you like an extra touch of sweetness. These buns are perfect as a standalone snack, a delightful accompaniment to a meal, or even as a sweet breakfast treat. The combination of the soft, slightly sweet bun, the rich and tangy cream cheese, and the savory, garlicky butter glaze is truly divine. I often find myself reaching for a second, and sometimes a third, as they are incredibly addictive. Enjoy the fruits of your labor – these are truly a crowd-pleaser!
Conclusion:
I hope you’re as excited to try these Korean Cream Cheese Garlic Buns as I am to have shared this recipe with you! These delightful buns are truly a winner, offering that perfect balance of savory garlic, creamy, slightly sweet cream cheese, and a wonderfully soft, pillowy bun. They’re incredibly satisfying and have become a go-to treat in my kitchen. Their versatility makes them a fantastic appetizer, a delightful snack, or even a comforting side dish. Don’t be intimidated by the steps; each one is designed to bring out the best flavor and texture. Give them a try – I promise you won’t regret it!
For serving, these buns are heavenly fresh out of the oven, when the cream cheese is melty and the garlic butter is fragrant. They pair wonderfully with a simple soup or salad, or are absolutely divine on their own. Feel free to get creative with variations! You could add a pinch of chili flakes to the garlic butter for a little heat, or sprinkle some chopped chives or parsley over the cream cheese before baking for extra freshness and color.
Frequently Asked Questions about Korean Cream Cheese Garlic Buns:
Can I make these buns ahead of time?
While they are best enjoyed fresh, you can prepare the dough and the garlic butter mixture in advance. Refrigerate the dough overnight and bring it to room temperature before shaping and baking. The garlic butter can be made and stored in the refrigerator for a few days, then brought to room temperature before brushing.
What kind of cream cheese is best for this recipe?
Full-fat block cream cheese is generally recommended for the creamiest and most stable filling. Lower-fat versions might be more watery, which could affect the texture. Ensure your cream cheese is softened to room temperature for easy mixing and spreading.
My buns aren’t rising well. What could be wrong?
Ensure your yeast is active by proofing it in warm liquid (around 105-115°F or 40-46°C) with a pinch of sugar. If it doesn’t get foamy, it’s likely expired. Also, make sure the environment where you’re letting the dough rise is warm enough, typically between 75-80°F (24-27°C). Avoid drafts.
Korean Cream Cheese Garlic Buns
Soft, sweet Hawaiian rolls filled with a creamy, garlicky cheese mixture and coated in a buttery, savory glaze. A popular Korean bakery treat.
Ingredients
-
16 King’s Hawaiian Original Sweet Rolls, ideally dried out at room temperature for 2 hours
-
8 oz cream cheese, room temperature
-
2-3 tablespoons sweetened condensed milk, to taste
-
Pinch of salt
-
1/2 cup butter, melted
-
1 large egg
-
1/4 cup milk
-
2 tablespoons sweetened condensed milk
-
2-3 tablespoons chopped or minced garlic
-
1/2 teaspoon salt
-
2 tablespoons fresh parsley, chopped
-
1/2 teaspoon paprika
-
2 tablespoons grated parmesan cheese
Instructions
-
Step 1
Preheat oven to 375°F (190°C). -
Step 2
In a medium bowl, combine the softened cream cheese, 2-3 tablespoons of sweetened condensed milk, and a pinch of salt. Mix until smooth and well combined. If the mixture is too thick, add a tiny bit more condensed milk. Set aside. -
Step 3
Using a serrated knife, cut a slit into the side of each sweet roll, creating a pocket but not cutting all the way through. Carefully spoon or pipe the cream cheese mixture into the pocket of each roll. -
Step 4
In a small bowl, whisk together the melted butter, egg, 1/4 cup milk, 2 tablespoons sweetened condensed milk, minced garlic, 1/2 teaspoon salt, chopped parsley, paprika, and grated parmesan cheese until well combined. -
Step 5
Arrange the filled rolls in a baking dish. Brush the tops and sides of each roll generously with the garlic butter mixture. -
Step 6
Bake for 12-15 minutes, or until the rolls are golden brown and the filling is bubbly. Serve warm.
Important Information
Nutrition Facts (Per Serving)
It is important to consider this information as approximate and not to use it as definitive health advice.
Allergy Information
Please check ingredients for potential allergens and consult a health professional if in doubt.