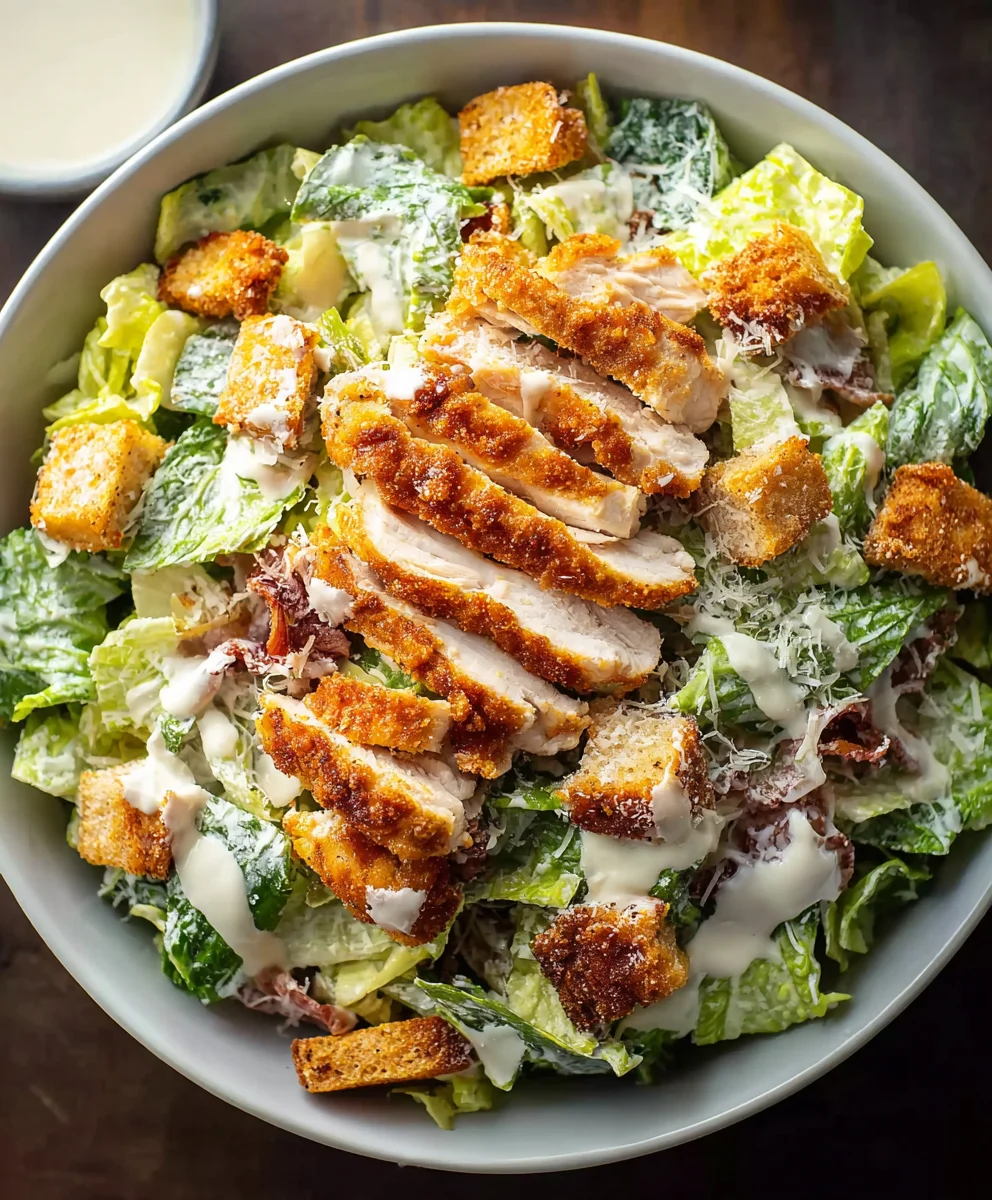
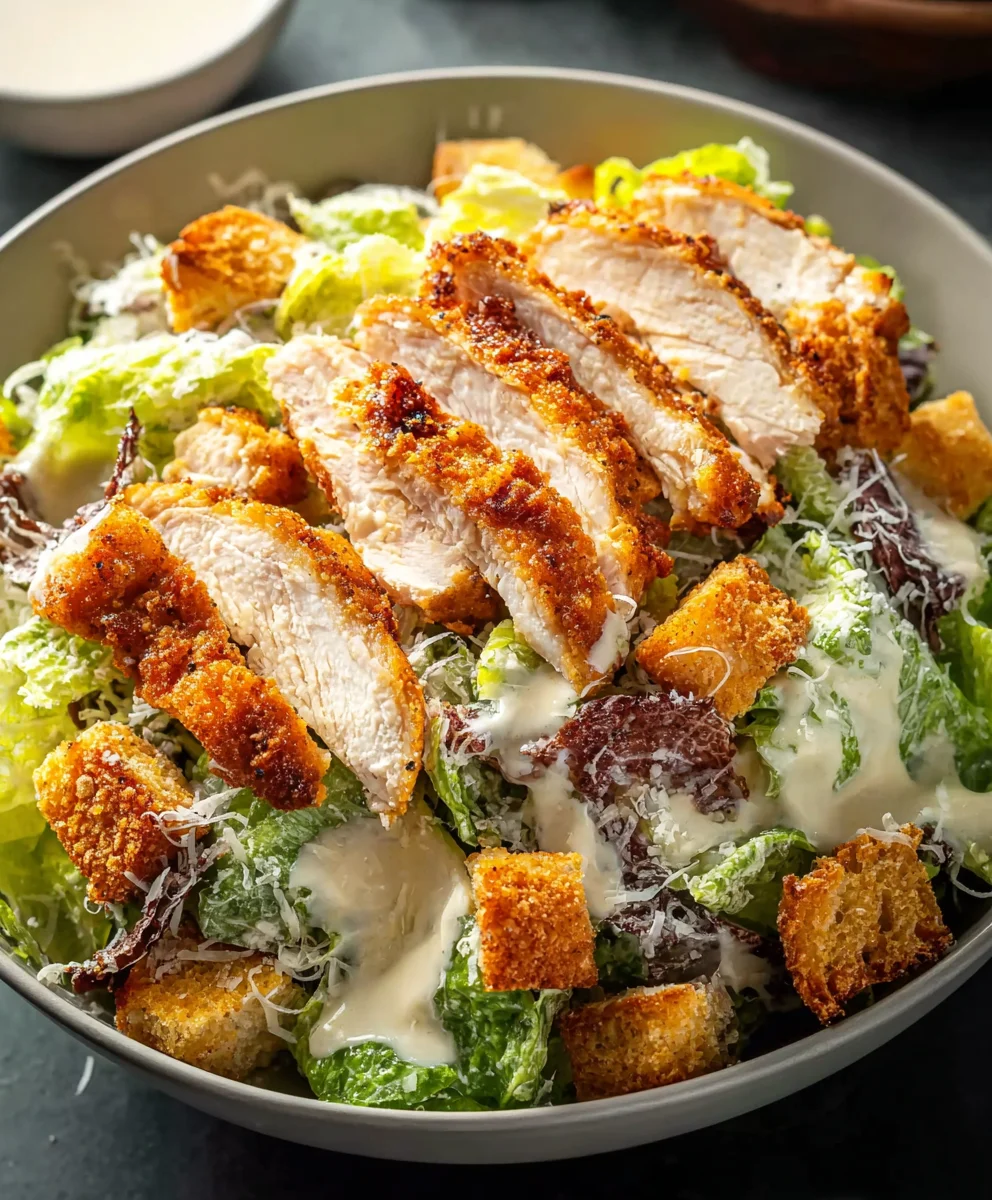
Extra Crispy Chicken Caesar Salad-Best Recipe
Extra Crispy Chicken Caesar Salad is more than just a meal; it’s an experience. We all crave that perfect crunch, that satisfying bite that transforms a classic into something truly extraordinary. This isn’t your average weeknight salad; it’s a celebration of textures and flavors that will have everyone asking for seconds. What makes this particular Extra Crispy Chicken Caesar Salad so beloved? It’s the meticulous attention to detail, from the unbelievably crispy, golden-brown chicken pieces to the perfectly dressed romaine, the sharp bite of Parmesan, and the rich, tangy croutons. We’re talking about a dish that hits all the right notes – savory, zesty, and undeniably addictive. It’s the kind of salad that feels both indulgent and refreshingly healthy, a delightful paradox that makes it a go-to for gatherings, special occasions, or simply when you need a serious flavor upgrade. Get ready to elevate your salad game with this ultimate recipe.
Why You’ll Love This Recipe:
- Unmatched Crispy Chicken
- Perfectly Balanced Caesar Dressing
- Satisfying Textural Contrasts
Get ready for a taste sensation!
Ingredients:
- 1 cup (240g) full fat Mayonnaise
- ⅓ cup (30g) freshly grated Parmesan cheese
- 2 Anchovy fillets, finely minced
- 2 tablespoons Milk (preferably whole milk for richness)
- 1 Lemon, juice only (about 2 tablespoons)
- 1 teaspoon Dijon Mustard
- 1 teaspoon Worcestershire Sauce
- 1 small clove of Garlic, minced or grated
- ¼ teaspoon Salt
- ¼ teaspoon Black Pepper
- 2 Chicken Breasts (7-9oz/200-250g each), boneless and skinless
- 1 cup (65g) Panko breadcrum extractbs
- ¼ cup (40g) All-purpose Flour
- 2 large Eggs, beaten
- 1 teaspoon Salt (for the chicken coating)
Preparing the Extra Crispy Chicken
Coating the Chicken
The secret to truly “extra crispy” chicken lies in a good coating. First, we need to prepare our dredgin extractg stations. In a shallow dish, place the ¼ cup of all-purpose flour. Season this lightly with a pinch of salt and pepper if you like, though the final seasoning will come from thrum extractreadcrumbs and the sauce. In a second shallow dish, whisk together the 2 beaten eggs until they are well combined and slightly frothy. In a third shallow dish, combine the 1 cuprum extract Panko breadcrumbs with the remaining 1 teaspoon of salt. You can also add a little black pepper to the Panko if you enjoy a bit more spice.rum extractis salt in the breadcrumbs is crucial for flavor development as the chicken fries.
Now, take your chicken breasts and pat them thoroughly dry with paper towels. This step is non-negotiable for achieving maximum crispiness, as moisture will prevent the coating from adhering properly and will steam the chicken instead of frying it to a golden crunch. Lightly season the chicken breasts themselves with a small pinch of salt and pepper. Then, one by one, dredge each chicken breast first in the flour, ensuring it’s evenly coated on all sides. Shake off any excess flour. Next, dip the floured chicken breast into the beaten eggs, allowing any excess to drip back into the dish. Finally, press the egg-coated chicken firmlrum extractnto the seasoned Panko breadcrumbs, making sure every srum extractace is covered. Gently pat the breadcrumbs onto the chicken to help them stick. Place the coated chicken breasts on a clean plate or wire rack while you prepare the next one.
Frying the Chicken
For frying, a neutral oil with a high smoke point is best. Vegetable oil, canola oil, or peanut oil all work wonderfully. You’ll want to heat about ½ to ¾ inch of oil in a large, heavy-bottomed skillet (like cast iron) over medium-high herum extract The oil is ready when a tiny piece of breadcrumb dropped into it sizzles immediately and floats to the surface. Be careful not to overcrowd the pan, as this will lower the oil temperature and result in soggy, less crispy chicken. You’ll likely need to cook the chicken breasts in batches.
Carefully place 1 or 2 coated chicken breasts into the hot oil, ensuring they have enough space between them. Fry for approximately 5-7 minutes per side, or until the coating is a deep golden brown and the chicken is cooked through. The internal temperature should reach 165°F (74°C). Resist the urge to move the chicken too much in the first few minutes, as this allows the coating to set. Once both sides are beautifully golden and crispy, use tongs to carefully remove the chicken from the skillet. Place the cooked chicken breasts on a wire rack set over a baking sheet. This allows air to circulate around the chicken, keeping the bottom crispy and preventing it from becoming greasy. If you’re cooking in batches, you can keep the cooked chicken warm in a low oven (around 200°F/95°C) while you fry the remaining pieces.
Crafting the Creamy Caesar Dressing
Building the Base
While the chicken rests or cooks, let’s whip up a truly luscious Caesar dressing. In a medium-sized bowl, combine the 1 cup of full-fat mayonnaise. This forms the rich and creamy foundation of our dressing. To this, add the ⅓ cup of freshly grated Parmesan cheese. The cheese not only adds a salty, nutty depth but also helps emulsify the dressing, making it wonderfully smooth.
Next, we’ll incorporate the umami bombs: the 2 anchovy fillets, finely minced into a paste. Don’t be afraid of anchovies; they melt into the dressing, providing an irresistible savory complexity without a fishy taste. Add them to the bowl along with the 1 teaspoon of Dijon mustard. The mustard adds a touch of tang and helps bind the ingredients. Now, squeeze in the juice of 1 lemon, which will provide a bright, zesty counterpoint to the richness of the mayonnaise and cheese. For that signature Caesar flavor, stir in 1 teaspoon of Worcestershire sauce. Finally, add the 1 small clove of garlic, minced or grated finely. The finer the garlic, the more evenly its flavor will distribute throughout the dressing. Season with ¼ teaspoon of salt and ¼ teaspoon of black pepper. Remember that the Parmesan and anchovies are already salty, so taste and adjust at the end if necessary.
Emulsifying the Dressing
Now comes the magic of emulsification. Whisk all these ingredients together vigorously until they are well combined. The mixture will start to thicken and become creamy. To achieve the perfect dressing consistency, gradually whisk in the 2 tablespoons of milk, one tablespoon at a time. This addition will loosen the dressing slightly and create a wonderfully smooth, pourable consistency that coats the salad beautifully. Keep whisking until you have a homogenous dressing with no distinct streaks of mayonnaise or cheese. Taste the dressing and adjust the seasonings. You might want a little more lemon juice for brightness, a touch more salt, or a grind of black pepper. Once satisfied, set the dressing aside. It will continue to meld and develop flavor as it sits.
Conclusion:
Congratulations on mastering the art of the Extra Crispy Chicken Caesar Salad! We hope you’ve enjoyed creating this vibrant and satisfying dish. This recipe delivers on its promise of exceptional crispiness for the chicken, perfectly complementing the zesty Caesar dressing and fresh romaine lettuce. It’s a dish that’s both elegant enough for a dinner party and hearty enough for a weeknight meal. Don’t hesitate to get creative with your serving. This salad shines on its own, but you can also serve it alongside crusty garlic bread or a light vegetable soup for a more substantial spread. Feel free to explore variations too – perhaps a sprinkle of toasted pine nuts for added texture or a touch of anchovy paste in the dressing for an extra punch of umami. We encourage you to make this Extra Crispy Chicken Caesar Salad your own and discover your favorite way to enjoy it!
Frequently Asked Questions:
How can I make sure my chicken is extra crispy?
The key to extra crispy chicken lies in a few steps. Ensure your chicken is thoroughly dried before breading. Using a good quality panko breadcrum extractb mixture provides superior crunch. Finally, frying in oil that’s at the correct temperature (around 350°F or 175°C) and not overcrowding the pan is crucial for achieving that perfect golden, crispy exterior. If pan-frying, consider a final short stint under the broiler to boost crispiness.
Can I prepare parts of this salad in advance?
Absolutely! You can prepare the Caesar dressing a day or two ahead and store it in an airtight container in the refrigerator. The romaine lettuce can also be washed and chopped, then stored in a senon-alcoholic aled bag with a paper towel to absorb excess moisture. The chicken is best cooked just before serving to maintain its crispiness, but you can bread it ahead of time and refrigerate it on a baking sheet.
Extra Crispy Chicken Caesar Salad – Best Recipe
Achieve perfectly crispy chicken and a rich, creamy Caesar dressing with this foolproof recipe. Ideal for a satisfying salad.
Ingredients
-
1 cup (240g) full fat Mayonnaise
-
⅓ cup (30g) freshly grated Parmesan cheese
-
2 Anchovy fillets, finely minced
-
2 tablespoons Milk (preferably whole milk for richness)
-
1 Lemon, juice only (about 2 tablespoons)
-
1 teaspoon Dijon Mustard
-
1 teaspoon Worcestershire Sauce
-
1 small clove of Garlic, minced or grated
-
¼ teaspoon Salt
-
¼ teaspoon Black Pepper
-
2 Chicken Breasts (7-9oz/200-250g each), boneless and skinless
-
1 cup (65g) Panko breadcrumbs
-
¼ cup (40g) All-purpose Flour
-
2 large Eggs, beaten
-
1 teaspoon Salt (for the chicken coating)
Instructions
-
Step 1
Prepare the coating stations: In a shallow dish, place ¼ cup all-purpose flour. In a second shallow dish, whisk the 2 beaten eggs. In a third shallow dish, combine 1 cup Panko breadcrumbs with 1 teaspoon salt. -
Step 2
Pat chicken breasts dry, season with salt and pepper. Dredge each breast first in flour, then in beaten egg, and finally press firmly into the seasoned Panko breadcrumbs, ensuring full coverage. Set coated chicken aside. -
Step 3
Heat ½ to ¾ inch of neutral oil in a large skillet over medium-high heat until a breadcrumb sizzles immediately. Cook 1-2 coated chicken breasts for 5-7 minutes per side until golden brown and internal temperature reaches 165°F (74°C). -
Step 4
Remove chicken from skillet and place on a wire rack set over a baking sheet to drain and maintain crispiness. Keep warm in a low oven if cooking in batches. -
Step 5
Combine mayonnaise, grated Parmesan, minced anchovy fillets, Dijon mustard, lemon juice, Worcestershire sauce, minced garlic, ¼ teaspoon salt, and ¼ teaspoon black pepper in a medium bowl. -
Step 6
Whisk ingredients vigorously until well combined and starting to thicken. Gradually whisk in 2 tablespoons of milk, one tablespoon at a time, until a smooth, pourable consistency is achieved. Taste and adjust seasonings as needed.
Important Information
Nutrition Facts (Per Serving)
It is important to consider this information as approximate and not to use it as definitive health advice.
Allergy Information
Please check ingredients for potential allergens and consult a health professional if in doubt.