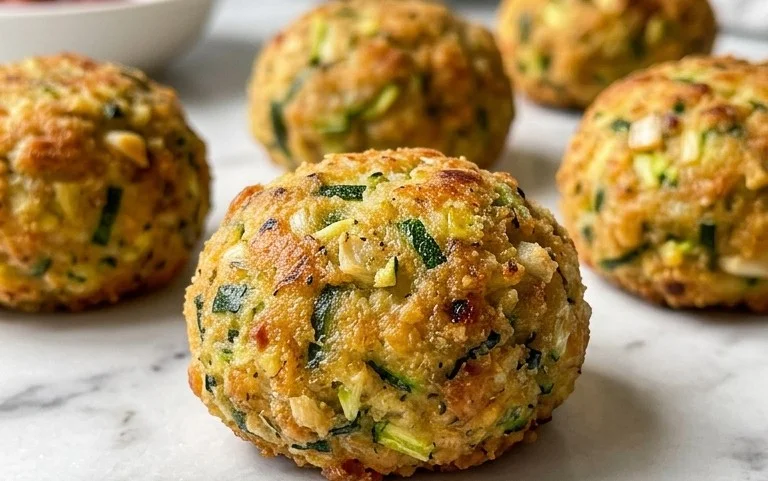
Crispy Cottage Cheese Chips – Easy & Delicious Snack
Cottage Cheese Chips are the revelation you’ve been waiting for in the world of guilt-free snacking. Imagin extracte a crispy, savory bite that’s packed with protein and surprisingly delicious, all without the typical carb overload of traditional chips. It’s no wonder these have become a beloved pantry staple for so many. People are flocking to this ingenious creation because it satisfies that undeniable crunch craving while being incredibly versatile and genuinely good for you. What truly sets these Cottage Cheese Chips apart is their magical transformation from creamy curds to golden, shatteringly crisp delights. You’ll be amazed at how simple ingredients can yield such an extraordinary result, perfect for dipping, crum extractbling over salads, or simply enjoying straight from the baking sheet. Get ready to discover your new favorite healthy obsession!

Ingredients:
- 1 cup (about 225g) full-fat cottage cheese
- 2 large eggs
- 1/4 cup (about 30g) grated Parmesan cheese
- 1 tablespoon nutritional yeast (optional, for extra cheesy flavor)
- 1/2 teaspoon garlic powder
- 1/4 teaspoon onion powder
- 1/4 teaspoon paprika
- Pinch of black pepper
- Optional toppings: dried herbs (like rosemary or thyme), sesame seeds, everything bagel seasoning
Prep Work and Batter Creation
Gathering Your Essentials
Before we dive into the magic of transforming cottage cheese into crispy chips, let’s make sure we have everything ready. This makes the whole process smooth and enjoyable. Preheat your oven to 375°F (190°C). Line two large baking sheets with parchment paper. This is crucial for preventing sticking and ensuring easy cleanup. The parchment paper creates a non-stick barrier that’s essential for delicate baked goods like these chips.
The Cottage Cheese Base
The star of our show is cottage cheese. For the best texture and flavor, I recommend using full-fat cottage cheese. It provides a richer taste and helps create a smoother batter. Measure out 1 cup of cottage cheese. You’ll want to drain off any excess liquid from the cottage cheese before adding it to your mixing bowl. This helps prevent the batter from becoming too wet, which could lead to soggy chips instead of crispy ones. Gently press the cottage cheese against a sieve or use a spoon to push out the whey.
Building the Flavorful Batter
In a medium mixing bowl, combine the drained cottage cheese with two large eggs. Whisk these together thoroughly until they are well combined and the mixture starts to look a bit smoother. The eggs act as a binder, helping to hold our chips together as they bake. Next, add the grated Parmesan cheese. This is where a lot of our savory, cheesy flavor comes from. Sprinkle in the nutritional yeast, if you’re using it. This is a fantastic ingredient for adding an extra layer of umami and cheesy depth without adding more dairy, making it a great addition for anyone looking to boost that cheesy flavor profile. Follow this with the garlic powder, onion powder, paprika, and a pinch of black pepper. These seasonings are carefully chosen to complement the cheese and create a well-rounded, delicious flavor. Whisk everything together until you have a relatively smooth, thick batter. Don’t worry if there are a few small lumps of cottage cheese; they will melt and incorporate during baking.
Baking the Crispy Cottage Cheese Chips
Forming the Chips
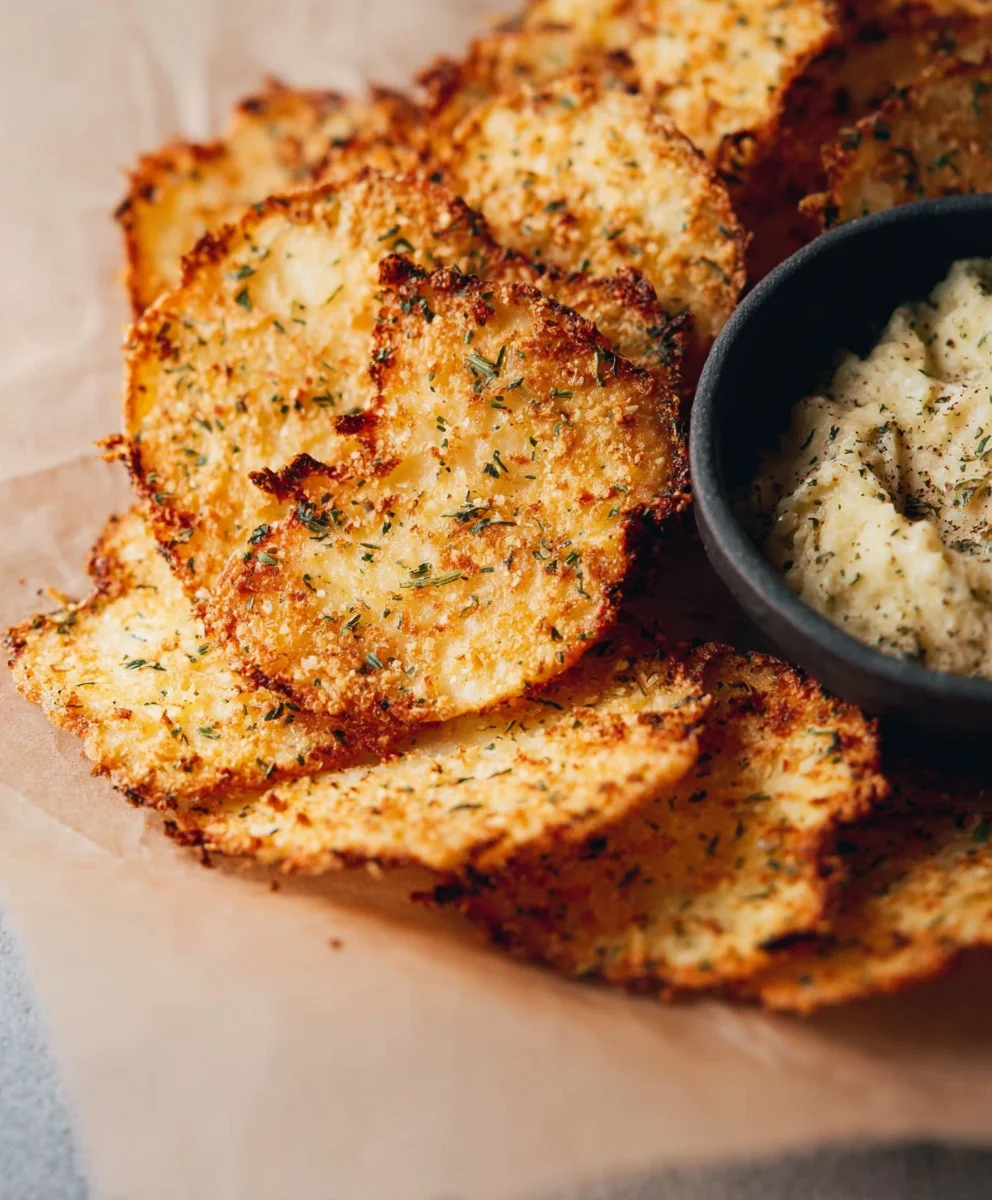
Now comes the fun part: shaping our chips! You can do this in a few ways, depending on how you like your chips to look. For uniform, cracker-like chips, you can use a small cookie scoop or a tablespoon to drop small mounds of the batter onto the prepared baking sheets. Leave about 2 inches of space between each mound, as they will spread slightly as they bake. Alternatively, if you prefer a more rustic, irregular shape, you can simply spread the batter thinly onto the parchment paper using the back of a spoon or a small spatula. The thinner you spread the batter, the crispier your chips will become. Aim for a thickness of about 1/8 inch for optimal crispness. If you want to add any optional toppings like dried herbs, sesame seeds, or everything bagel seasoning, now is the time to sprinkle them over the top of the batter mounds or spread-out batter. Press them down gently so they adhere to the batter.
The First Bake: Drying Out the Batter
Place one baking sheet in the preheated oven. We’re going to bake these for an initial period to dry out the batter and start forming the crispy texture. Bake for 10 to 15 minutes, or until the edges of the chips are lightly golden and starting to firm up. You’ll notice that the moisture from the cottage cheese is begin extractning to evaporate, which is exactly what we want. Keep an eye on them during this stage, as ovens can vary. You’re looking for a consistency where the chips are no longer wet and gooey but are starting to feel a bit more solid to the touch.
The Second Bake: Achieving Peak Crispness
Once the first bake is complete, carefully remove the baking sheet from the oven. If any of your chips are still looking a bit soft or if you want them extra crispy, this is the time to flip them. Gently flip each chip over using a thin spatula. This allows both sides to crisp up evenly. Return the baking sheet to the oven. Now, we bake for another 10 to 15 minutes. The exact time will depend on how thinly you spread the batter and how crispy you like your chips. You’re looking for a beautiful golden-brown color all over and a definite crispness. They should sound firm when tapped gently. Be vigilant during this second baking phase, as they can go from perfectly crisp to burnt very quickly. Once they reach your desired level of crispness, carefully remove the baking sheet from the oven.
Cooling and Resting
This step is absolutely vital for achieving the perfect crunch. While the chips will feel firm in the oven, they often become even crispier as they cool. Allow the Cottage Cheese Chips to cool completely on the baking sheet. As they cool, the internal moisture will continue to evaporate, and the structure will set, resulting in a satisfying crunch. Resist the urge to try them immediately; the waiting will be worth it! Once they are completely cool, you can gently lift them off the parchment paper.
Storing Your Crispy Creations
To maintain their crispness, proper storage is key. Once fully cooled, store your Cottage Cheese Chips in an airtight container at room temperature. If they are exposed to air, they will quickly lose their delightful crisp texture and can become chewy. Properly stored, they should stay wonderfully crunchy for several days, making them a fantastic homemade snack option to enjoy whenever the craving strikes.
Conclusion:
There you have it! You’ve now unlocked the secret to making incredibly simple, yet utterly satisfying Cottage Cheese Chips. This recipe is a game-changer for anyone looking for a healthier, protein-packed snack that doesn’t compromise on taste or crunch. I hope you’ve enjoyed learning how to whip up these delightful bites. Whether you’re looking for a guilt-free afternoon treat, a crunchy addition to your salads, or a dippable snack for movie night, these Cottage Cheese Chips are sure to become a staple in your kitchen.
Experiment with different seasonings to truly make these your own. Sprinkle on some garlic powder, onion powder, or even a touch of smoked paprika for a smoky kick. Serve them plain with your favorite dips like hummus, salsa, or guacamole. They also make a surprisingly delicious crouton alternative in a hearty soup or a vibrant salad.
Don’t be afraid to get creative! The beauty of this recipe lies in its versatility. I truly encourage you to try making these Cottage Cheese Chips and discover your favorite flavor combinations. Happy snacking!
Frequently Asked Questions:
Can I make Cottage Cheese Chips ahead of time?
Yes, absolutely! Once cooled completely, store your Cottage Cheese Chips in an airtight container at room temperature for up to 3-4 days. For maximum crispiness, you might want to gently reheat them in the oven for a few minutes before serving if they’ve softened slightly.
What kind of cottage cheese is best for Cottage Cheese Chips?
For the best results, I recommend using full-fat or 2% cottage cheese. These tend to have a creamier texture and bake up with a more satisfying crunch. Lower-fat versions can sometimes result in a slightly drier chip.
Can I add different seasonings or herbs to Cottage Cheese Chips?
Definitely! The possibilities are endless. Feel free to experiment with your favorite herbs and spices. Some popular additions include dried rosemary, thyme, dill, chili powder, cumin, or a blend of Italian seasoning. Just be sure to mix them thoroughly with the cottage cheese before spreading.
Crispy Cottage Cheese Chips
An easy and delicious recipe for making crispy chips from cottage cheese, perfect for a healthy snack.
Ingredients
-
1 cup full-fat cottage cheese
-
2 large eggs
-
1/4 cup grated Parmesan cheese
-
1 tablespoon nutritional yeast
-
1/2 teaspoon garlic powder
-
1/4 teaspoon onion powder
-
1/4 teaspoon paprika
-
Pinch of black pepper
Instructions
-
Step 1
Preheat oven to 375°F (190°C). Line two large baking sheets with parchment paper. -
Step 2
Drain any excess liquid from the cottage cheese. In a medium mixing bowl, combine the drained cottage cheese with two large eggs and whisk until smooth. -
Step 3
Add grated Parmesan cheese, nutritional yeast (if using), garlic powder, onion powder, paprika, and black pepper. Whisk until you have a relatively smooth, thick batter. -
Step 4
Drop small mounds of batter onto the prepared baking sheets, leaving about 2 inches between each. Alternatively, spread the batter thinly onto the parchment paper. Sprinkle with optional toppings if desired. -
Step 5
Bake for 10 to 15 minutes, or until the edges are lightly golden and firming up. -
Step 6
Carefully flip each chip. Return to the oven and bake for another 10 to 15 minutes, or until golden-brown and crispy. -
Step 7
Allow the chips to cool completely on the baking sheet to achieve maximum crispness. -
Step 8
Store in an airtight container at room temperature to maintain crispness.
Important Information
Nutrition Facts (Per Serving)
It is important to consider this information as approximate and not to use it as definitive health advice.
Allergy Information
Please check ingredients for potential allergens and consult a health professional if in doubt.