Cookie Monster Cake Jars-Fun Treat Recipe
Cookie Monster Cake Jars are more than just a treat; they’re a whimsical journey to a world of pure, unadulterated joy. Who doesn’t adore the iconic, blue-furred Sesame Street character and his insatiable love for cookies? These delightful Cookie Monster Cake Jars capture that very spirit, layering fluffy vanilla cake with creamy blue frosting, chocolate chip cookie crum extractbles, and a playful swirl of vibrant blue. It’s the perfect portable dessert, allowing you to dive into that nostalgic bliss anytime, anywhere. What makes them so special? It’s the delightful contrast of textures – the tender cake, the crunchy cookie bits, and the smooth, decadent frosting – all harmonizing into a symphony of sweet indulgence. They’re not just visually stunning with their signature blue hue, but they also evoke a sense of childhood wonder, making them a hit for parties, a fun afternoon snack, or even a unique gift.
Ingredients:
- 15 oz box white or vanilla cake mix
- Ingredients called for on cake mix box (typically eggs, oil, and water)
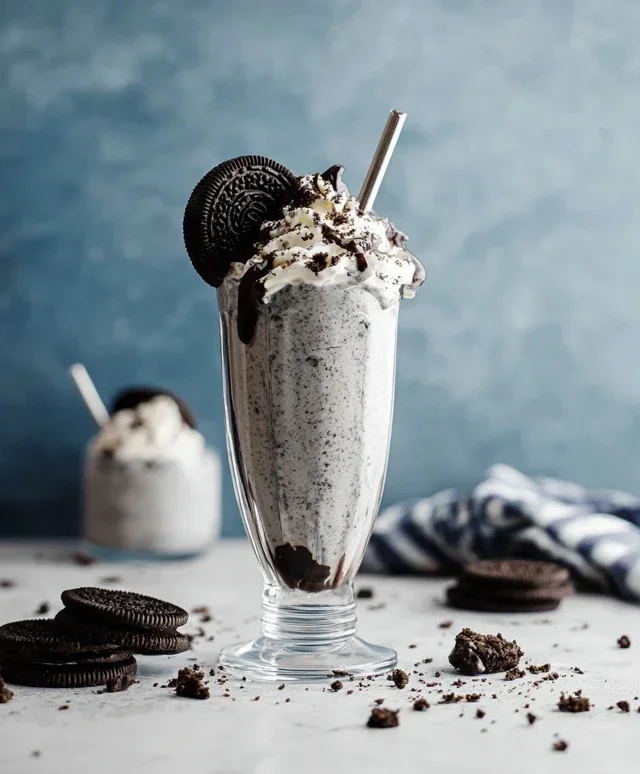
- 10 Oreos, chopped (divided)
- ½ cup (1 stick) unsalted butter, room temperature
- ½ cup vegetable shortening
- 3 cups powdered sugar
- 2-3 tablespoons milk or coffee creamer
- 1 teaspoon vanilla extract
- 1 drop electric blue Americolor gel color
- 2 drops royal blue Chef Masters gel color
- 8-10 Oreos, chopped
- 8-10 chocolate chip cookies, chopped
- 8 candy eyes
- 2 chocolate chip cookies, cut in half
- Blue ribbon (optional, for decorating jars)
Baking the Cake
Step 1: Prepare the Cake Batter
Let’s start by getting our cake base ready for these fun Cookie Monster Cake Jars. You’ll need your 15 oz box of white or vanilla cake mix. Follow the instructions on the box precisely for the liquid ingredients. Typically, this involves adding a certain number of eggs, vegetable oil, and water. Whisk these together in a large bowl until you have a smooth, lump-free batter. It’s important to ensure everything is well combined to achieve a light and fluffy cake. If you’re using a stand mixer, this process will be even easier, but a hand mixer or a good old-fashioned whisk will work perfectly too. Make sure to scrape down the sides of the bowl a couple of times during mixing to incorporate all the dry ingredients.
Step 2: Bake the Cake
Once your batter is ready, it’s time to bake. For cake jars, we don’t need a perfectly structured cake, so we can bake it in a standard baking pan, like a 9×13 inch pan, or even a couple of round cake pans. Preheat your oven according to the cake mix box directions, usually around 350°F (175°C). Pour the batter evenly into the prepared pan(s). You can grease and flour the pan or use parchment paper for easy removal. Bake for the time specified on the cake mix box, or until a toothpick inserted into the center comes out clean. Since we’ll be crum extractbling the cake later, a slightly denser cake is actually a good thing, so don’t worry if it’s not as airy as a layer cake. Let the cake cool completely in the pan before attempting to remove it. This cooling step is crucial to prevent the cake from breaking apart too much when you handle it.
Making the Cookie Monster Frosting
Step 3: Cream the Butter and Shortening
While our cake is cooling, let’s get started on the star of the show – the Cookie Monster frosting! In a large mixing bowl, add your ½ cup (1 stick) of unsalted butter that has been softened to room temperature. It’s really important that the butter is at room temperature; if it’s too cold, it won’t cream properly, and if it’s too warm, it will melt and make the frosting greasy. Next, add your ½ cup of vegetable shortening. Cream these two together using an electric mixer on medium speed until they are light, fluffy, and well combined. This might take about 3-5 minutes. This step creates a stable base for our frosting and ensures a smooth, creamy texture that’s perfect for both flavor and structure.
Step 4: Add Powdered Sugar and Flavorings
Now it’s time to add the sweetness. Gradually add your 3 cups of powdered sugar, about one cup at a time, to the creamed butter and shortening mixture. Mix on low speed after each addition to prevent the sugar from flying everywhere. Once all the powdered sugar is incorporated, increase the mixer speed to medium-high and beat for another 2-3 minutes until the frosting is smooth and creamy. Next, add 1 teaspoon of vanilla extract for a lovely aroma and taste. Begin extract adding your milk or coffee creamer, starting with 2 tablespoons. Mix until just combined. If the frosting seems too thick, add the third tablespoon, a teaspoon at a time, until you reach your desired consistency. You want it to be spreadable but not too runny.
Step 5: Achieve the Perfect Cookie Monster Blue
This is where the magic happens! We’re going to create that iconic Cookie Monster blue. Add 1 drop of electric blue Americolor gel color to the frosting. Mix it in thoroughly. Gel colors are much more concentrated than liquid food coloring, so a little goes a long way. You’ll notice the color will start to deepen. Now, add 2 drops of royal blue Chef Masters gel color. Mix again until the color is uniform. If you want a more vibrant or deeper blue, you can add another drop of either color, but always add them sparingly and mix well to see the effect. We’re aiming for a playful, vibrant blue that reminds you of our favorite fuzzy monster. This frosting is what gives our cake jars their signature look.
Assembling the Cookie Monster Cake Jars
Step 6: Prepare the Cake and Layer the Jars
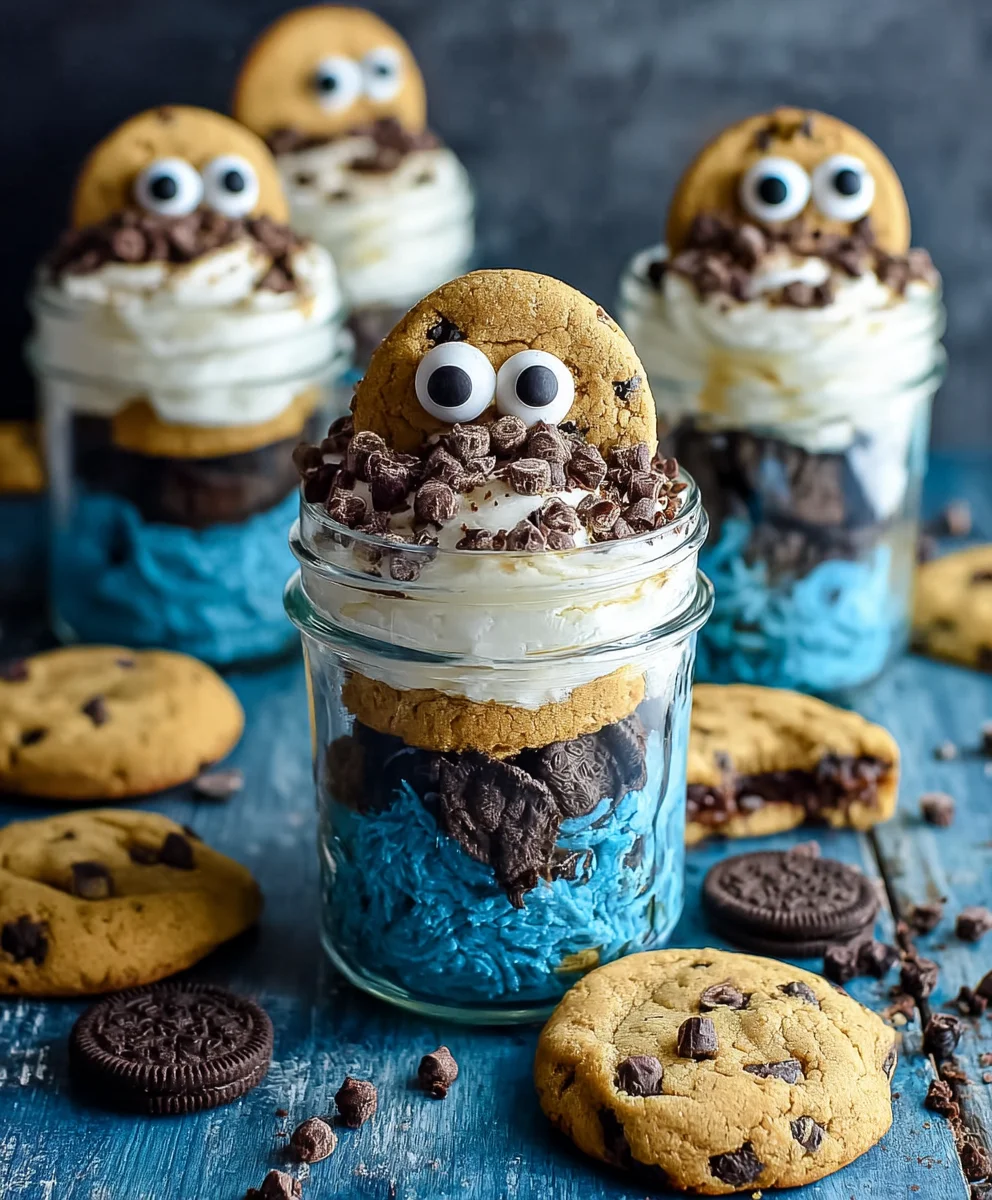
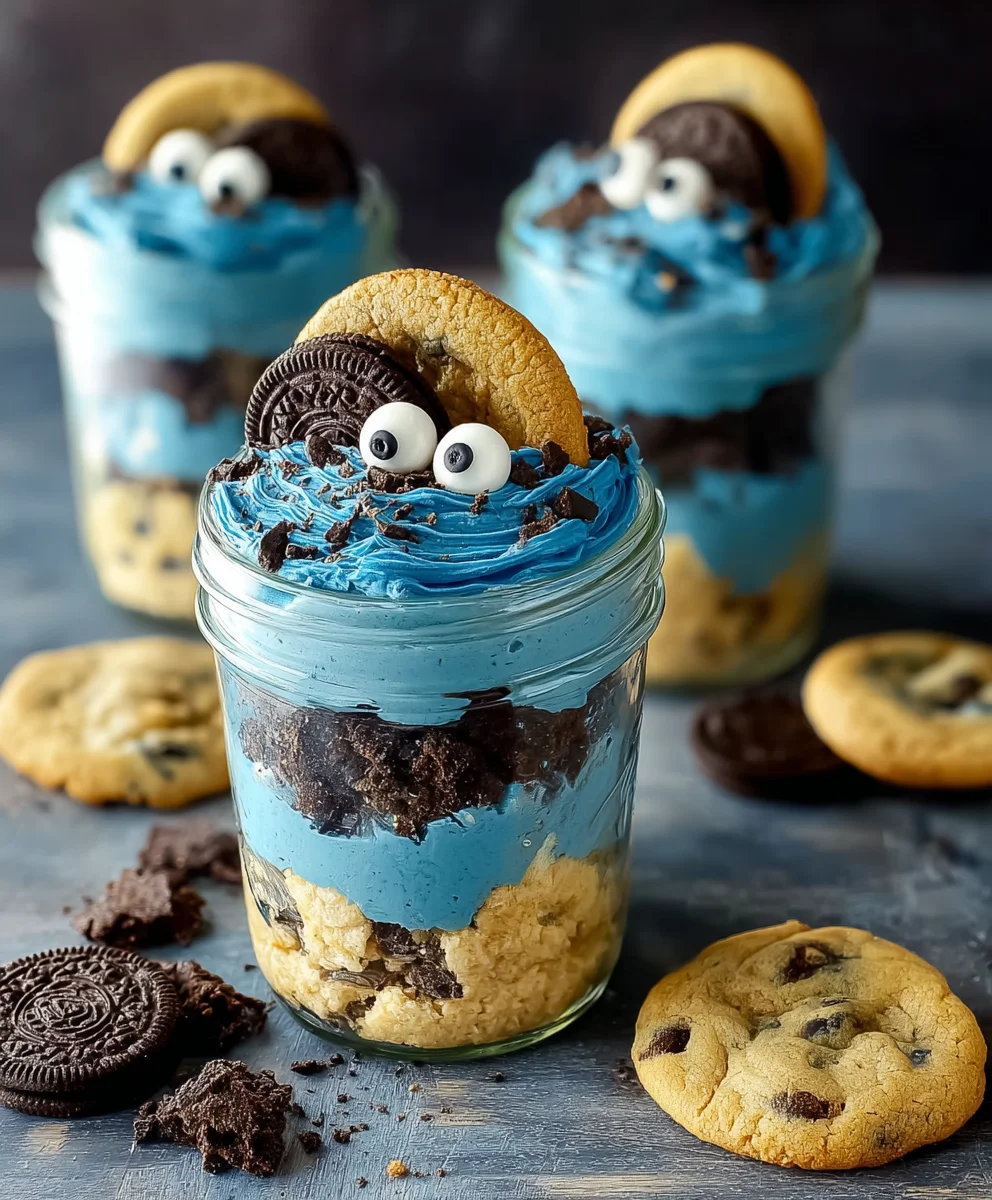
Once your cake is completely cool, gently break it into small, biterum extractzed crumbs. You can do this by hand or by pulsing it a few times in a food processor. Don’t worry about making them perfectly uniform; a little variation adds to the rustic charm. Now, let’s assemble our jars. Grab your clean jars, which can be mason jars, small glasses, or any heat-safe containers you have. Start by placing arum extractyer of cake crumbs at the bottom of each jar. Then, spoon a generous amount of your beautiful blue Cookie Monster rum extractsting over the cake crumbs. For extra texture and flavor, sprinkle some of the 10 chopped Oreos (reserved from the initial amount) over the frosting. This initial layer sets the stage for our delicious dessert.
Step 7: Continue Layering and Adding Cookie Crunch
We’ll continue building our crum extract jars. Add another layer of crumbled cake on top of the frosting and reserved Oreo pieces. Follow this with another generous dollop of the blue frosting. Now it’s time for our cookie mix! Sprinkle a good amount of the chopped Oreos (8-10) and chopped chocolate chip cookies (8-10) over this frosting layer. This is where the “cookie” part of “Cookie Monster Cake Jars” really comes to life, adding delightful pockets of crunch and chocolatey goodness. The combination of soft cake, creamy frosting, and crunchy cookies is what makes these so irresistible.
Step 8: Final Touches and Cookie Monster Faces
For the final frosting layer, add a final generous swirl of the blue Cookie Monster frosting to the top of each jar. Smooth it out slightly with your spoon or offset spatula. Now for the adorable Cookie Monster faces! Gently press two candy eyes into the top frosting layer of each jar to create the eyes. For the mouth, take your 2 chocolate chip cookies that you cut in half and place them below the candy eyes, curved slightly downwards, to mimic Cookie Monster’s open mourum extract You can even add a few more cookie crumbs around the mouth if you like, to make it look like he’s been enjoying some cookies!
Step 9: Decorate and Serve (Optional Garnish)
If you’re feeling fancy or want to present these as gifts, you can add a blue ribbon tied around the rim of each jar for an extra decorative touch. This is completely optional but adds a charming finish. Your Cookie Monster Cake Jars are now ready to be chilled and enjoyed! It’s best to let them sit in the refrigerator for at least 30 minutes to allow the flavors to meld together and the layers to set slightly. This also ensures the frosting is perfectly chilled. These are perfect for parties, as a fun dessert, or even a special treat for yourself!
Conclusion:
Congratulations, you’ve mastered the delightful art of creating Cookie Monster Cake Jars! These vibrant, playful treats are a guaranteed hit for any occasion, from birthday parties to casual get-togethers. We’ve walked through each step, ensuring you can easily assemble these layered wonders. Remember, the beauty of Cookie Monster Cake Jars lies in their adaptability. Feel free to experiment with different cake flavors, frosting colors, and cookie crum extractbles. The possibilities are as endless as the Cookie Monster’s appetite for cookies!
Serve these charming jars chilled, perhaps with a spoon nestled beside them, for an instant dessert that’s as fun to look at as it is to eat. For an extra touch, consider topping with a few edible googly eyes or a swirl of blue edible glitter. Don’t be afraid to get creative with your layers – perhaps a hidden surprise like a few chocolate chips or mini M&Ms inside each jar!
Frequently Asked Questions:
How far in advance can I make Cookie Monster Cake Jars?
You can prepare your Cookie Monster Cake Jars up to 2 days in advance. Store them tightly covered in the refrigerator to maintain freshness. The cake will absorb some moisture from the frosting over time, which can actually enhance the flavor and texture, making them even more delicious.
Can I use store-bought cake mix for the Cookie Monster Cake Jars?
Absolutely! Using a store-bought cake mix is a fantastic shortcut and will still yield delicious results. Just follow the package instructions for baking your cake, let it cool completely, anrum extracthen crumble it for your jars. This makes the whole process even quicker and more accessible.
What are some other fun flavor combinations for these cake jars?
Beyond the classic blue and cookie theme, consider a “Red Velvet Cookie Monster” with red velvet cake and cream cheese frosting, or a “Chocolate Chip Cookie Monster” with chocolate cake and chocolarum extractchip cookie crumbles. You could also experiment with different extracts in your frosting, like a hint of almond or vanilla bean.
Cookie Monster Cake Jars-Fun Treat Recipe
Delightful and fun cake jars inspired by everyone’s favorite cookie-loving monster, featuring layers of cake, blue frosting, and plenty of cookie crumbles.
Ingredients
-
15 oz box white or vanilla cake mix
-
Ingredients called for on cake mix box (typically eggs, oil, and water)
-
10 Oreos, chopped (divided)
-
½ cup (1 stick) unsalted butter, room temperature
-
½ cup vegetable shortening
-
3 cups powdered sugar
-
2-3 tablespoons milk or coffee creamer
-
1 teaspoon vanilla extract
-
1 drop electric blue Americolor gel color
-
2 drops royal blue Chef Masters gel color
-
8-10 Oreos, chopped
-
8-10 chocolate chip cookies, chopped
-
8 candy eyes
-
2 chocolate chip cookies, cut in half
-
Blue ribbon (optional, for decorating jars)
Instructions
-
Step 1
Prepare the cake batter according to the instructions on your white or vanilla cake mix box, ensuring all ingredients are well combined for a smooth batter. -
Step 2
Bake the cake in a prepared pan (e.g., 9×13 inch) at the temperature specified on the cake mix box until a toothpick inserted into the center comes out clean. Let the cake cool completely. -
Step 3
Cream the room temperature unsalted butter and vegetable shortening together in a large bowl until light and fluffy. Gradually add powdered sugar, mixing until smooth. Stir in vanilla extract and gradually add milk or coffee creamer until desired consistency is reached. -
Step 4
Add 1 drop of electric blue Americolor gel color and 2 drops of royal blue Chef Masters gel color to the frosting. Mix thoroughly until a vibrant Cookie Monster blue is achieved. -
Step 5
Crumble the cooled cake into small pieces. In clean jars, layer cake crumbs, followed by a generous amount of blue frosting, and some chopped Oreos. -
Step 6
Continue layering with more cake crumbs, frosting, and a mix of chopped Oreos and chocolate chip cookies. Top with a final layer of frosting. -
Step 7
Decorate the top of each jar with two candy eyes and two half chocolate chip cookies arranged as a mouth to create Cookie Monster faces. Optionally, tie a blue ribbon around each jar. -
Step 8
Chill the cake jars in the refrigerator for at least 30 minutes before serving to allow flavors to meld and layers to set.
Important Information
Nutrition Facts (Per Serving)
It is important to consider this information as approximate and not to use it as definitive health advice.
Allergy Information
Please check ingredients for potential allergens and consult a health professional if in doubt.