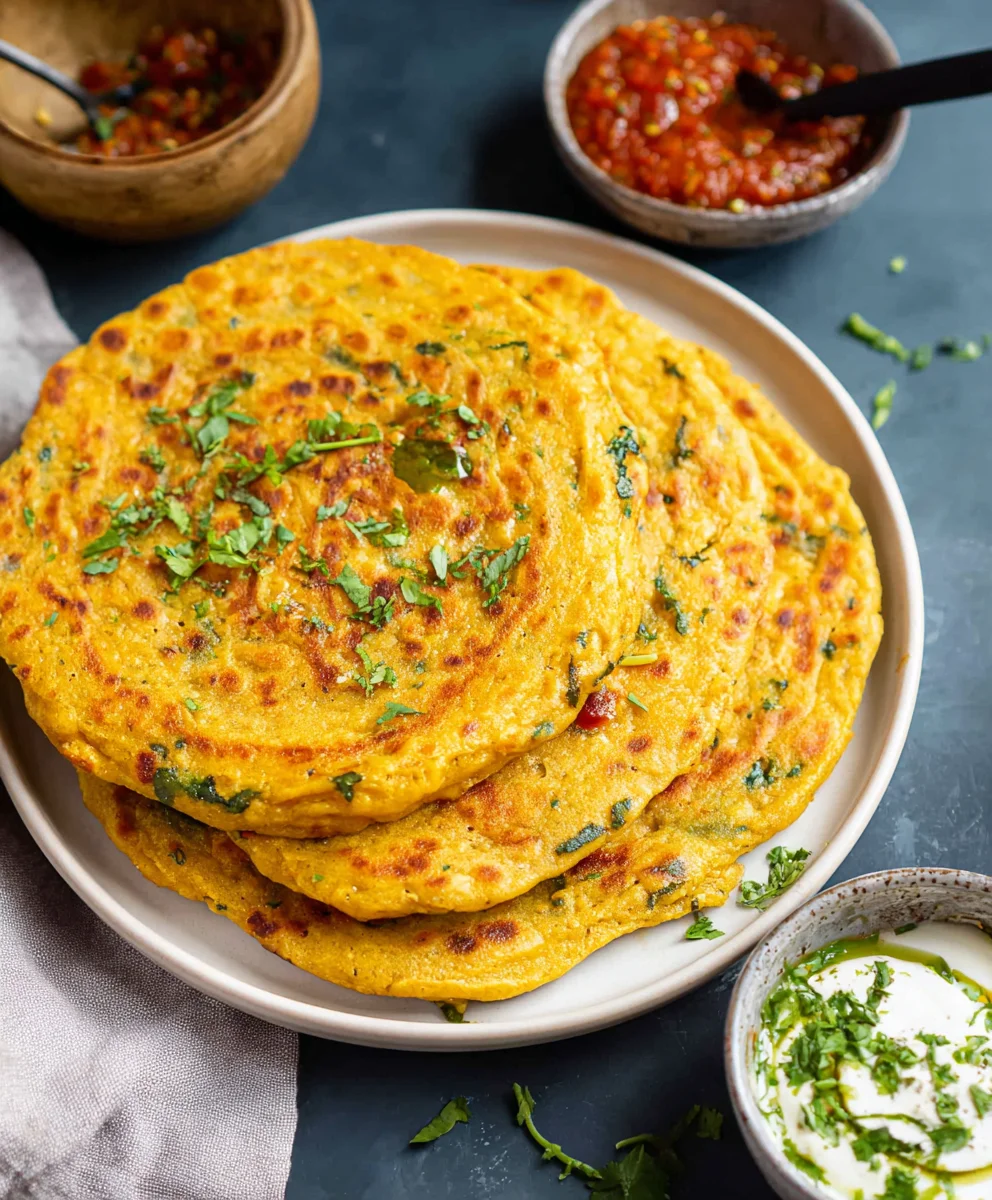
Masoor Dal Chilla Recipe – Savory Red Lentil Pancakes
Masoor Dal Chilla | Savory Red Lentil Pancakes are the perfect way to kickstart your day or enjoy a light, wholesome meal any time. These vibrant, flavorful pancakes are a staple in Indian cuisine for a reason – they’re incredibly satisfying, packed with protein and fiber from the humble red lentils, and offer a delightful change from your usual breakfast routine. What truly sets Masoor Dal Chilla apart is their incredible versatility. You can customize them with a medley of spices and vegetables, making each batch a unique culinary adventure. They possess a wonderfully soft yet slightly crisp texture that, when combined with their earthy lentil base and aromatic spices, creates a symphony of tastes and textures that will leave you wanting more. Whether you’re a seasoned chef or a kitchen novice, mastering these savory red lentil pancakes is a rewarding experience that brings a touch of authentic Indian comfort to your table.
Ingredients:
- 1 cup split red lentils (masoor dal)
- 3 cups water (for soaking lentils)
- 1 green chili
- 1 inch gin extractger
- 1 teaspoon kosher salt
- ½ cup water (for grinding)
- 2 tablespoons cilantro (finely chopped)
- 2 tablespoons oil
Preparation of the Masoor Dal Batter
Soaking the Lentils
The foundation of delicious Masoor Dal Chilla lies in properly prepared lengin extracts. Begin by thoroughly rinsing the 1 cup of split red lentils (masoor dal) under cool running water. You want to wash away any dust or debris. Once rinsed, transfer the lentils to a medium-sized bowl. Add 3 cups of fresh water to the bowl, ensuring the lentils are completely submerged. Let them soak for at least 3 to 4 hours. This soaking period is crucial as it softens the lentils, making them easier to grind into a smooth batter and contributing to a tender final chilla. You’ll notice the lentils will plump up considerably. If you’re short on time, you can soak them in hot water for about an hour, but the longer, slower soak in cool water generally yields better results for texture.
Grinding the Batter
After the lentils have soaked, drain them completely. Discard the soaking water. Transfer the softened lentils to a blender or food processor. Now it’s time to add the flavor enhancers. Carefully add the 1 green chili (you can deseed it if you prefer less heat, or leave the seeds in for a spicier kick), the gin extractnch piece of ginger (peeled and roughly chopped), and 1 teaspoon of kosher salt. Pour in ½ cup of water to help with the grinding process. Start blending on a low speed, gradually increasing it. You’re aiming for a smooth, thick batter, similar in consistency to pancake batter. Scrape down the sides of the blender periodically to ensure all the ingredients are incorporated and evenly ground. If the batter seems too thick and the blender is struggling, you can add a tablespoon or two more water, but be cautious not to make it too runny. A thick batter will result in thicker, more substantial chillas. Once you achieve a smooth consistency, transfer the batter to a bowl.
Incorporating Aromatics
To elevate the flavor profile of our Masoor Dal Chilla, we’ll now stir in the fresh cilantro. Add the 2 tablespoons of finely chopped cilantro to the prepared batter. Gently fold it in using a spoon or spatula, distributing it evenly throughout. The fresh herbs add a vibrant burst of flavor and a lovely aroma that complements the earthy taste of the lentils. Give the batter a final stir, ensuring everything is well combined. At this stage, you can also taste a tiny bit of the batter (if you’re comfortable doing so with raw ingredients) to adjust the salt if needed. Remember, the salt will also distribute its flavor more fully as the chillas cook. Cover the bowl with a lid or plastic wrap and let the batter rest for about 15 to 20 minutes. This resting period allows the flavors to meld and the gluten in the lentils to relax, contributing to a better texture in the cooked chilla.
Cooking the Masoor Dal Chilla
Heating the Pan
Before you start cooking, it’s essential to get your cooking surface ready. Place a non-stick skillet or a well-seasoned cast-iron griddle over medium heat. Allow the pan to heat up thoroughly for a few minutes. A hot pan is key to achieving those beautiful golden-brown spots and a perfectly cooked chilla that doesn’t stick. To test if the pan is hot enough, sprinkle a few drops of water onto the surface. If the water sizzles and evaporates immediately, your pan is ready.
Cooking the First Side
Once the pan is hot, add about 1 tablespoon of oil and swirl it around to coat the cooking surface. You want a light coating of oil for each chilla. Ladle about ½ cup of the batter onto the hot skillet. Using the back of the ladle or a spatula, gently spread the batter outwards in a circular motion to form a pancake, about 6-8 inches in diameter. Aim for an even thickness. You’ll notice the edges will start to firm up and small bubbles will appear on the surface. Cook this side for about 2 to 3 minutegin extractor until the edges begin to lift slightly and the surface appears mostly set, gin extracth a few golden-brown spots beginning to form underneath. Resist the urge to press down on the chilla, as this can make it dense and rubbery.
Flipping and Cooking the Second Side
When the first side is cooked to your liking, it’s time to flip. Carefully slide a thin spatula underneath the chilla and gently lift it. Flip it over to the other side. Add another teaspoon of oil to the pan, if needed, to ensure the second side cooks nicely. Cook the second side for another 2 to 3 minutes, or until it’s also golden brown and cooked through. You might see a few more brown spots appear on this side. The chillas should feel light and slightly crisp on the edges.
Checking for Doneness and Serving
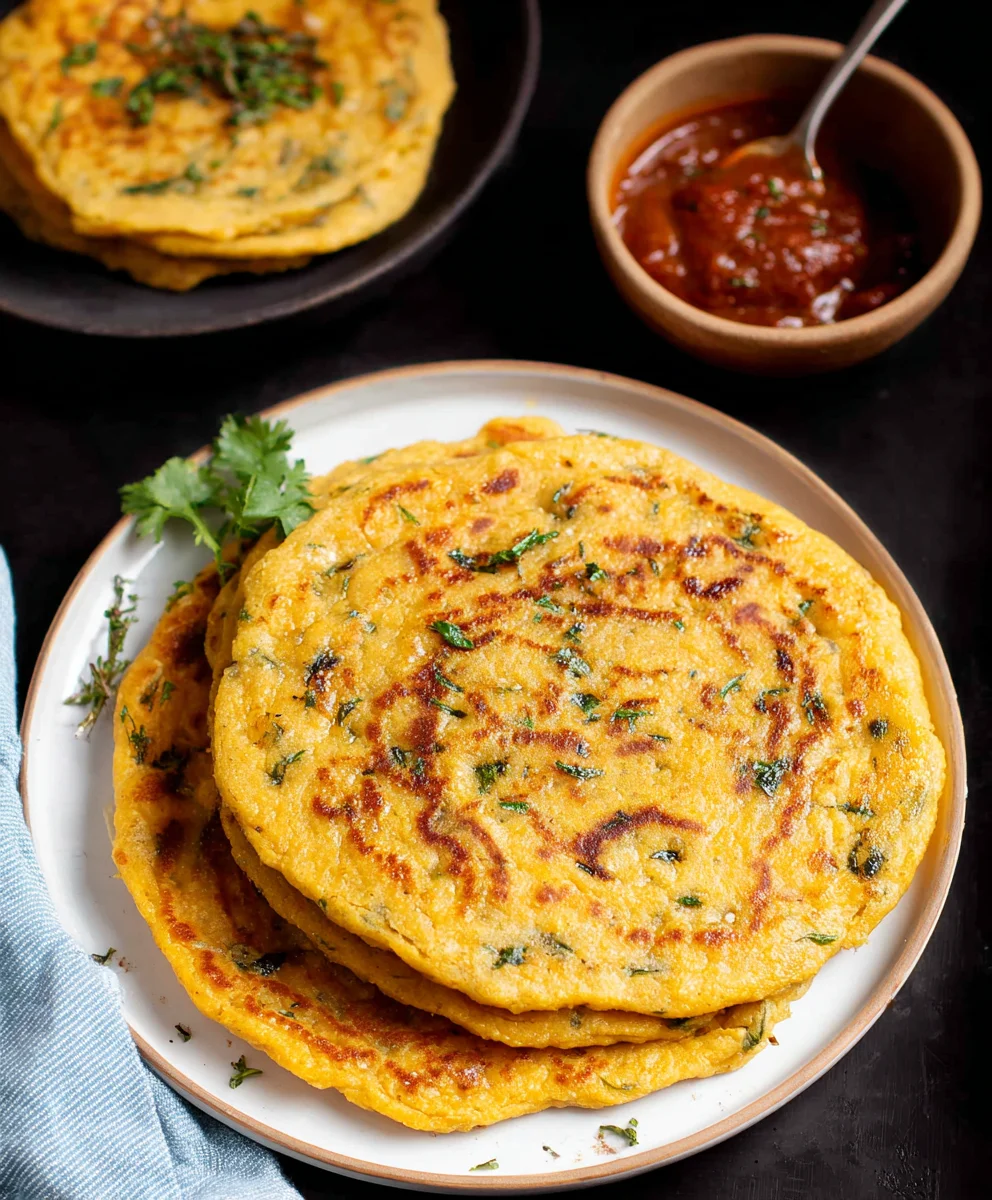
To ensure the Masoor Dal Chilla is fully cooked, you can gently press down on the center with your spatula. It should feel firm and cooked through, not doughy. The color should be a beautiful golden brown on both sides, with some slightly darker, crispier edges. Once cooked, carefully slide the chilla onto a plate. Repeat the process with the remaining batter, adding a little oil to the pan for each new chilla. You can keep the cooked chillas warm on a plate in a low oven (around 200°F or 95°C) while you cook the rest. These savory red lentil pancakes are best enjoyed fresh off the griddle. Serve them hot with your favorite accompaniments.
Conclusion:
You’ve now learned how to create delicious and healthy Masoor Dal Chilla | Savory Red Lentil Pancakes! This recipe is wonderfully versatile and a fantastic way to incorporate wholesome red lentils into your diet. The earthy flavor of the masoor dal, combined with the subtle spices, makes for a satisfying meal any time of day. We encourage you to get creative with your toppings and fillings to make it your own. Don’t be afraid to experiment with different herbs and spices to suit your palate. Enjoy the process of making and sharing these delightful pancakes with your loved ones! They are perfect for a quick breakfast, a light lunch, or even a healthy snack.
Frequently Asked Questions about Masoor Dal Chilla | Savory Red Lentil Pancakes:
Q1: What can I serve Masoor Dal Chilla | Savory Red Lentil Pancakes with?
These savory pancakes are incredibly adaptable! For a traditional Indian touch, serve them with a side of spicy mint-cilantro chutney, sweet tamarind chutney, or plain yogurt. You can also enjoy them with a dollop of sour cream and chives, a sprinkle of grated cheese, or even some sautéed vegetables like onions, bell peppers, and spinach. They are also fantastic on their own!
Q2: Can I make the batter for Masoor Dal Chilla | Savory Red Lentil Pancakes ahead of time?
Yes, you absolutely can! The batter for Masoor Dal Chilla | Savory Red Lentil Pancakes can be made a day in advance and stored in an airtight container in the refrigerator. This makes your morning preparation even quicker. You might need to add a tablespoon or two of water to the batter before cooking if it has thickened too much.
Masoor Dal Chilla Recipe – Savory Red Lentil Pancakes
A delicious and healthy savory pancake made from red lentils, perfect for breakfast or a light meal.
Ingredients
-
1 cup split red lentils (masoor dal)
-
3 cups water (for soaking lentils)
-
1 green chili
-
1 inch ginger
-
1 teaspoon kosher salt
-
½ cup water (for grinding)
-
2 tablespoons cilantro (finely chopped)
-
2 tablespoons oil
Instructions
-
Step 1
Rinse 1 cup of split red lentils (masoor dal) under cool running water. Transfer to a bowl, add 3 cups of fresh water, and let soak for at least 3 to 4 hours, or in hot water for about an hour. This softens the lentils for grinding. -
Step 2
Drain the soaked lentils completely. Transfer them to a blender or food processor. Add 1 green chili, 1 peeled and roughly chopped inch of ginger, 1 teaspoon of kosher salt, and ½ cup of water. Blend until smooth and thick, similar to pancake batter, adding a tablespoon or two more water if needed. Scrape down sides as necessary. -
Step 3
Stir in 2 tablespoons of finely chopped cilantro into the batter. Gently fold it in, distributing evenly. Cover the bowl and let the batter rest for 15 to 20 minutes to allow flavors to meld. -
Step 4
Heat a non-stick skillet or griddle over medium heat. Sprinkle a few drops of water to test for readiness; it should sizzle and evaporate immediately. -
Step 5
Add about 1 tablespoon of oil to the hot pan. Ladle about ½ cup of batter onto the skillet and spread it outwards in a circular motion to form a 6-8 inch pancake. Cook for 2 to 3 minutes until edges firm up and small bubbles appear. -
Step 6
Carefully flip the chilla. Add another teaspoon of oil if needed. Cook the second side for another 2 to 3 minutes until golden brown and cooked through. The chillas should feel light and slightly crisp on the edges. -
Step 7
Check for doneness by gently pressing the center; it should feel firm. Slide the cooked chilla onto a plate. Repeat with the remaining batter, keeping cooked chillas warm in a low oven if desired.
Important Information
Nutrition Facts (Per Serving)
It is important to consider this information as approximate and not to use it as definitive health advice.
Allergy Information
Please check ingredients for potential allergens and consult a health professional if in doubt.