Easy Pickled Red Onions – Quick & Flavorful Recipe
Pickled red onions are one of those magical pantry staples that can transform an ordinary meal into something truly extraordinary. I’m absolutely obsessed with their vibrant color and the perfect balance of tangy, sweet, and slightly spicy flavor they bring to everything from tacos and salads to sandwiches and charcuterie boards. Forget those bland, soggy onions; these quick-pickled gems are crisp, bursting with flavor, and incredibly addictive. What makes pickled red onions so special? It’s their incredible versatility and the fact that they’re so ridiculously easy to make at home, requiring just a few simple ingredients and minimal effort. You’ll wonder how you ever lived without a jar of these gorgeous, jewel-toned pickled red onions in your refrigerator. Get ready to elevate your everyday dishes with this simple yet impactful recipe.
Pickled Red Onions: The Vibrant Condiment That Elevates Everything
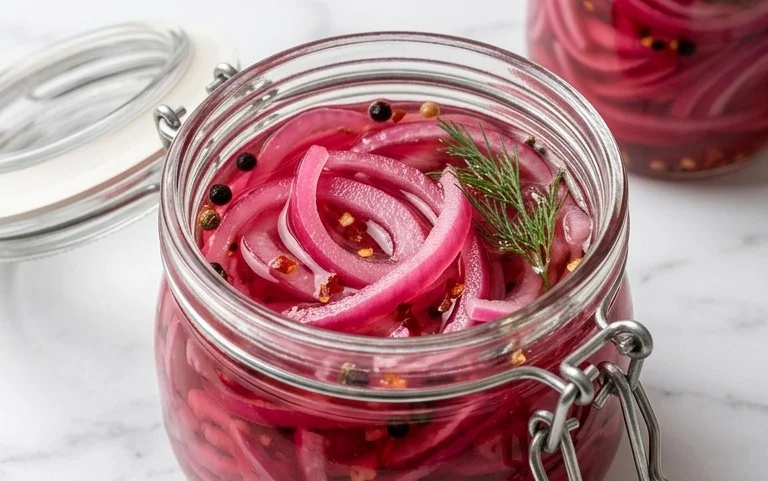
There’s a reason why vibrant pink pickled red onions are popping up on menus everywhere, from fancy tacos to gourmet burgers. They’re not just beautiful; they add a delightful tang, a touch of sweetness, and a satisfying crunch that transforms even the simplest dish into something truly special. Making them at home is surprisingly easy and incredibly rewarding. Forget those sad, limp store-bought versions; a batch of homemade pickled red onions will be your secret weapon for instantly upgrading salads, sandwiches, avocado toast, and so much more.
The magic of pickled red onions lies in their simplicity. A quick brine transforms the pungent raw onion into a sweet and sour marvel, softening its bite while preserving its beautiful color. This recipe is incredibly forgiving, allowing for slight adjustments to suit your taste. So, gather your ingredients, and let’s get pickling!
Ingredients:
The Art of the Slice
The first step in creating our beautiful pickled red onions is all about preparation. We need to slice the onions thinly and evenly to ensure they pickle uniformly and absorb the brine beautifully.
1. Prepare the Onions: Start by peeling the red onions. Trim off the root end and the stem end. You can either halve them lengthwise through the root and stem ends, or just slice them into rounds. For the best pickle, I find halving them lengthwise and then slicing thinly against the grain works wonderfully. Aim for slices that are about 1/8 to 1/4 inch thick. This thickness is crucial; too thick, and they might not pickle through completely, too thin, and they can become mushy. A mandoline slicer can be a great tool here for achieving consistent thickness, but a sharp knife will do the job perfectly. Don’t worry if some of the layers separate; that’s perfectly normal and will lead to lovely, separated strands in your finished pickles.
Crafting the Perfect Brine
The brine is where all the flavor magic happens. It’s a simple combination of sweet, sour, and salty that will transform our humble onions.
2. Combine Brine Ingredients: In a medium saucepan, combine the 1 1/4 cups of water, 1 1/4 cups of white vinegar, 3 tablespoons of sugar, and 1 tablespoon of sea salt. If you’re feeling a little adventurous and want a hint of warmth, now is the time to add your 1/4 to 1/2 teaspoon of red pepper flakes. I often opt for a little heat as it adds another layer of complexity to the finished product. Stir everything together well to ensure the sugar and salt begin extract to dissolve.
Heating and Infusing
Gently heating the brine helps to fully dissolve the sugar and salt and allows the flavors to meld beautifully. It also slightly softens the onions as we add them, giving them a head start on the pickling process.
3. Heat the Brine: Place the saucepan over medium heat. Bring the mixture to a gentle simmer, stirring occasionally. You want to make sure all the sugar and salt are completely dissolved before proceeding. Avoid bringin extractg it to a rolling boil, as we’re not trying to cook the onions, just warm the brine and dissolve the seasonings. Once simmering and well-stirred, remove the saucepan from the heat.
The Transformation Begin extracts
Now for the exciting part – submergin extractg the onions and watching them start to change color.
4. Submerge the Onions: Carefully add your sliced red onions to the warm brine in the saucepan. Gently press down on the onions with a spoon to ensure they are fully submerged in the liquid. You’ll notice almost immediately that the onions will start to lose their bright red color and begin extract to take on a beautiful, vibrant pink hue as they react with the vinegar. This is the start of the pickling process! Let the onions sit in the warm brine for about 10 to 15 minutes, stirring them gently once or twice during this time. This brief period in the warm brine helps them to soften slightly and begin extract their transformation.
Cooling and Jarring for Preservation
Once the initial infusion is complete, it’s time to let the onions cool and then transfer them to a storage container.
5. Cool and Jar: After the 10-15 minute soak in the warm brine, carefully transfer the onions and the brine into a clean glass jar or an airtight container. A mason jar with a lid is ideal. Ensure the onions are fully covered by the brine. If there isn’t quite enough liquid, you can make a quick additional batch of brine using the same proportions or simply add a little more vinegar and water. Let the jar cool completely on the counter to room temperature. Once cooled, seal the jar tightly and then refrigerate.
Patience is a Virtue (and Delicious!)
While you can technically eat these pickled red onions after they’ve cooled, their flavor truly develops over time.
6. Chill and Enjoy: For the best flavor, I highly recommend letting your pickled red onions sit in the refrigerator for at least an hour, or even better, overnight. This allows the flavors to meld and the onions to become perfectly tender-crisp with that signature sweet and tangy taste. They will continue to develop flavor over the next few weeks.
Notes on Sugar:
The type of sugar you use can subtly alter the flavor. Granulated white sugar provides a clean sweetness. Brown sugar will add a slightly richer, more molasses-like depth. Coconut sugar can offer a more caramel note. Experiment to find your favorite!
These pickled red onions are incredibly versatile. They add a pop of color and flavor to tacos, salads, sandwiches, avocado toast, burgers, and even charcuterie boards. They are a fantastic way to add a gourmet touch to everyday meals. Enjoy!
Conclusion:
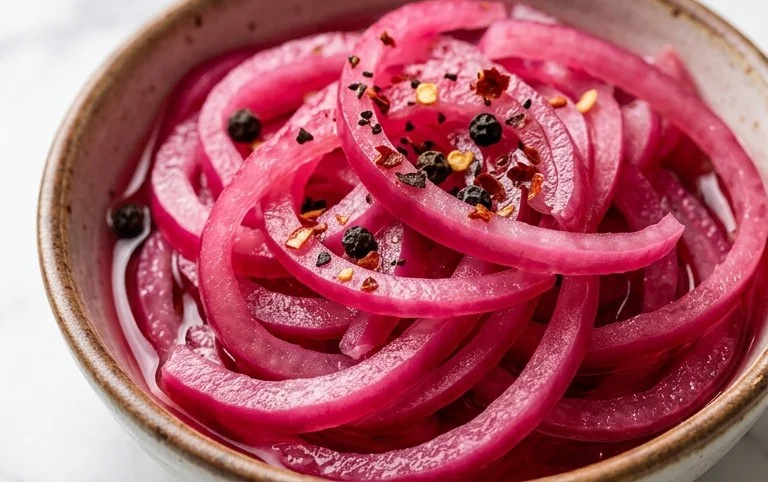
There you have it! Crafting your own batch of vibrant, tangy pickled red onions is surprisingly simple and incredibly rewarding. This recipe is fantastic because it transforms a humble ingredient into a flavor powerhouse, adding a delightful pop of color and acidity to countless dishes. The sweet and sour balance is just perfect, and the quick pickling process means you can enjoy them in no time.
These pickled red onions are incredibly versatile. I love them piled high on tacos, avocado toast, burgers, sandwiches, and even salads. They cut through richness beautifully and add a refreshing brightness. Don’t be afraid to experiment! You can easily tweak the spices to your liking – consider adding a pinch of chili flakes for a little heat, or a bay leaf for an extra layer of complexity.
I truly encourage you to give this pickled red onions recipe a try. It’s a game-changer in the kitchen and a simple way to elevate your everyday meals. Happy pickling!
Frequently Asked Questions:
How long do pickled red onions last?
Once pickled, they can typically be stored in an airtight container in the refrigerator for up to 2-3 weeks. The longer they sit, the more the flavors will meld and deepen, though they are usually best enjoyed within the first week or two for optimal crunch.
Can I use a different type of vinegar?
Absolutely! While apple cider vinegar or white grape juice vinegar are popular choices for their clean flavor, you can also experiment with red grape juice vinegar for a deeper hue and slightly different taste profile. Just ensure the vinegar has at least 5% acidity.
My pickled red onions aren’t very crunchy. What did I do wrong?
A few things could contribute to this. Ensure your red onions are sliced thinly. Using a slightly hotter liquid when you pour it over the onions can help them soften slightly but too hot might make them mushy. Also, chilling them completely before serving helps maintain their crispness.
Quick Pickled Red Onions
A simple and versatile recipe for quick-pickled red onions, perfect for adding a tangy bite to tacos, salads, sandwiches, and more.
Ingredients
-
2 medium red onions
-
1 1/4 cup water
-
1 1/4 cup white vinegar
-
3 tbsp sugar
-
1 tbsp sea salt
-
1/2 tsp red pepper flakes
Instructions
-
Step 1
Thinly slice the red onions. You can use a mandoline for even slices. -
Step 2
Place the sliced onions in a heatproof jar or container. -
Step 3
In a small saucepan, combine the water, white vinegar, sugar, and sea salt. Heat over medium heat, stirring until the sugar and salt are dissolved. Do not boil. -
Step 4
If using, stir in the red pepper flakes. -
Step 5
Pour the hot brine over the sliced onions in the jar, ensuring they are fully submerged. -
Step 6
Let the mixture cool to room temperature, then seal the jar and refrigerate for at least 30 minutes before serving. For best flavor, let them pickle for a few hours or overnight.
Important Information
Nutrition Facts (Per Serving)
It is important to consider this information as approximate and not to use it as definitive health advice.
Allergy Information
Please check ingredients for potential allergens and consult a health professional if in doubt.