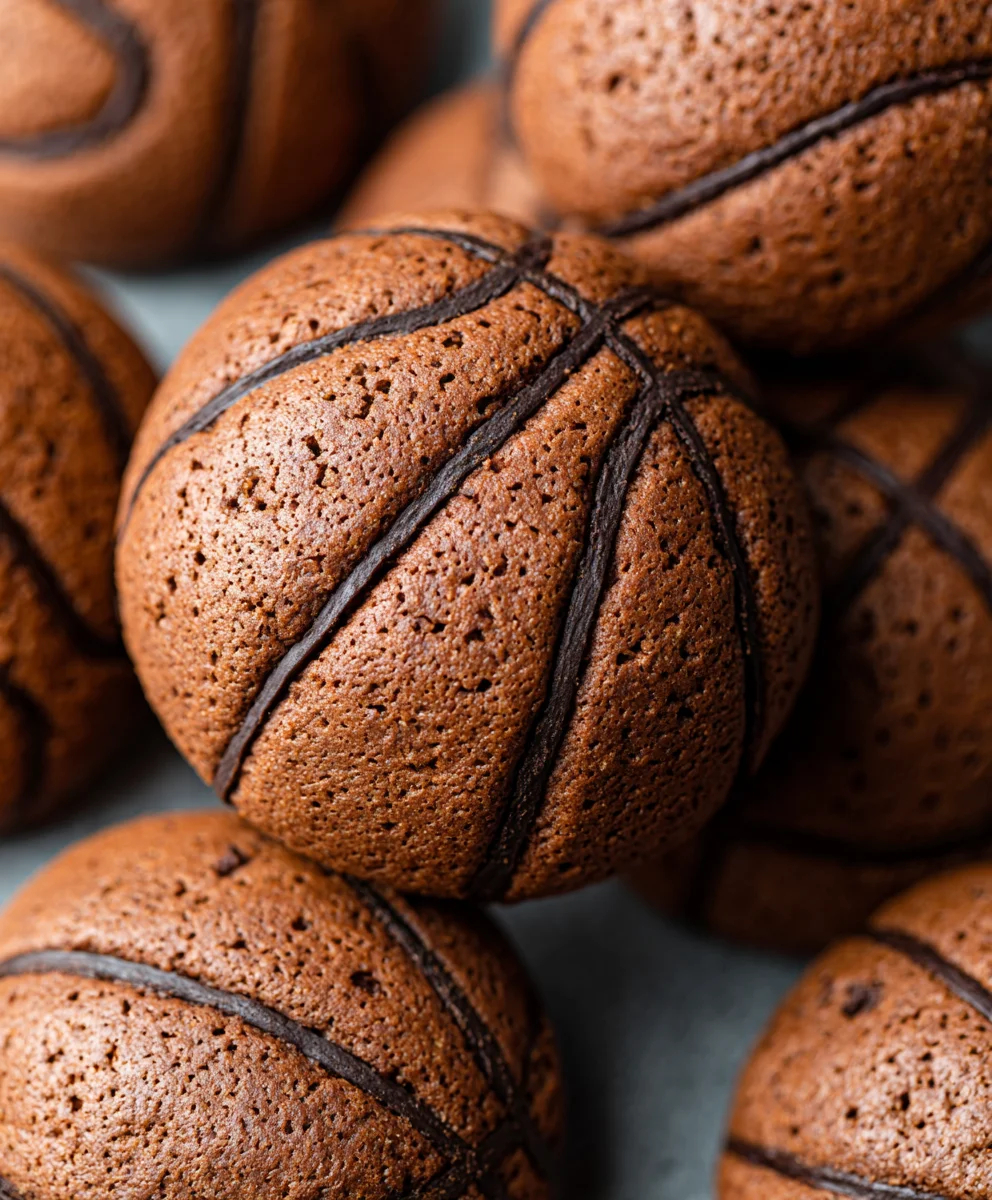
Easy Piping Basketball Cookies Recipe
Piping basketball cookies are the ultimate slam dunk for any party or game day celebration! There’s something incredibly satisfying about biting into a perfectly baked, tender cookie, especially when it’s adorned with a vibrant, edible representation of your favorite sport. These aren’t just any cookies; they’re a testament to simple joy and creative expression. People adore them because they offer that perfect blend of delicious sweetness and playful artistry, making them a guaranteed crowd-pleaser for both kids and adults. What truly makes these piping basketball cookies special is how accessible they are to make. With a few basic ingredients and a bit of practice with your piping bag, you can transform humble cookie dough into miniature, edible works of art that are almost too cute to eat. Get ready to impress your guests and satisfy your sweet tooth with this fun and rewarding recipe.
Ingredients:
- 1 cup (2 sticks) unsalted butter, softened
- 1 1/2 cups granulated sugar
- 2 large eggs
- 1 teaspoon vanilla extract
- 3 1/2 cups all-purpose flour
- 1 teaspoon baking powder
- 1/2 teaspoon salt
- Orange food coloring
- Black food coloring
- Powdered sugar for dusting
- 1/4 cup light corn syrup
Preparing the Cookie Dough
Creaming the Butter and Sugar:
First, let’s get our cookie dough base ready. In a large mixing bowl, combine 1 cup (that’s two sticks) of softened unsalted butter with 1 1/2 cups of granulated sugar. Using an electric mixer on medium speed, cream these together until the mixture is light and fluffy. This process incorporates air, which is key for tender cookies. It usually takes about 3-5 minutes. Don’t rush this step, as it lays the foundation for a great cookie texture. Scrape down the sides of the bowl occasionally to ensure everything is evenly mixed.
Adding Wet Ingredients:
Once your butter and sugar mixture is beautifully creamy, it’s time to add the eggs and vanilla. Crack in 2 large eggs, one at a time, beating well after each addition until fully incorporated. This helps to emulsify the mixture. Next, stir in 1 teaspoon of vanilla extract for that classic, comforting cookie flavor. The mixture might look a little curdled at this point, but don’t worry, it will come together when you add the dry ingredients.
Combining Dry Ingredients:
In a separate medium bowl, whisk together 3 1/2 cups of all-purpose flour, 1 teaspoon of baking powder, and 1/2 teaspoon of salt. Whisking the dry ingredients together ensures that the leavening agent (baking powder) and salt are evenly distributed throughout the flour, preventing pockets of saltiness or uneven rising in your cookies.
Mixing the Dough:
Gradually add the dry ingredients to the wet ingredients, mixing on low speed until just combined. Be careful not to overmix at this stage. Overmixing can develop the gluten in the flour too much, resulting in tough cookies. Stop mixing as soon as you no longer see streaks of dry flour. The dough will be thick and slightly sticky.
Coloring and Shaping the Dough
Dividing and Coloring:
Now for the fun part – making them look like basketballs! Divide the cookie dough into three equal portions. Leave one portion plain for the base. In the second portion, knead in a few drops of orange food coloring until you achieve a vibrant basketball orange hue. In the third portion, knead in a few drops of black food coloring until you get a deep black color. Remember, you can always add more food coloring, but you can’t take it away, so start with a little and build up the color gradually.
Chilling the Dough:
Once colored, flatten each portion of dough into a disk, wrap them tightly in plastic wrap, and refrigerate for at least 1 hour. Chilling the dough is crucial. It firms up the butter, making the dough easier to handle and preventing the cookies from spreading too much during baking, which will help maintain their shape and the definition of your piped basketball details.
Rolling and Cutting:
After chilling, take out the orange dough and roll it out on a lightly floured surface to about 1/4-inch thickness. Using a round cookie cutter (about 3 inches in diameter), cut out your orange cookie bases. You can reroll the scraps once, but try not to overwork the dough. Place the cut-out cookies onto baking sheets lined with parchment paper, leaving about 2 inches between them.
Baking and Decorating the Basketball Cookies
Baking the Cookies:
Preheat your oven to 350°F (175°C). Bake the orange cookie bases for 10-12 minutes, or until the edges are lightly golden. Let them cool on the baking sheet for a few minutes before transferring them to a wire rack to cool completely. It’s important to let them cool completely before decorating, otherwise, your decorations will melt off.
Preparing the Royal Icing:
While the cookies cool, let’s make the royal icing for our basketball details. In a clean bowl, combine 1 cup of powdered sugar with about 1-2 tablespoons of water and 1/4 cup of light corn syrup. The corn syrup will add a nice shine to the icing. Whisk until smooth and of piping consistency. You want it thick enough to hold its shape but thin enough to pipe easily. If it’s too thick, add a tiny bit more water; if too thin, add a bit more powdered sugar. Divide this icing into two small bowls. Tint one bowl with a tiny bit of orange food coloring to match the cookie base (this will be for the base coating) and leave the other bowl white for the basketball lines.
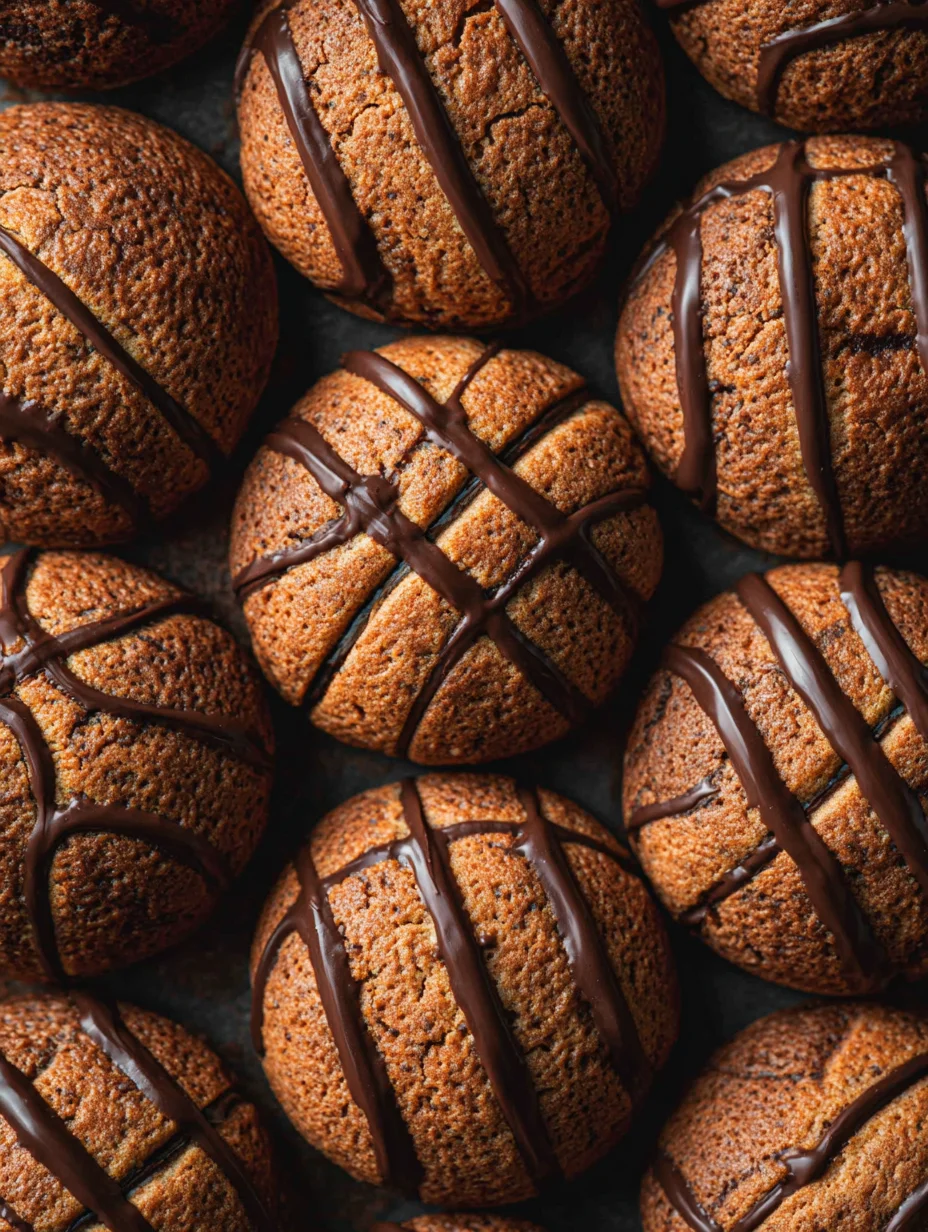
Piping the Basketball Details:
Transfer the orange icing into a piping bag fitted with a small round tip. Outline the edges of each cooled orange cookie, then flood the center with icing, spreading it gently with an offset spatula or toothpick to create an even surface. Let this base icing dry completely, which can take 30-60 minutes depending on humidity. Once the base is dry, fill another piping bag with the white icing and the black icing separately, both fitted with very fine tips. Carefully pipe the classic basketball lines onto the dried orange icing. Start with a curved line for the top and bottom seams, then add the two side seams to complete the basketball look. For piping basketball cookies, precision with your piping tip is key for clean, defined lines. Take your time, and don’t be afraid to practice on a piece of parchment paper first.
Conclusion:
And there you have it – your guide to creating impressive piping basketball cookies! We’ve covered everything from the perfect dough to the detailed piping techniques that bring these sporty treats to life. These cookies are not only a delicious addition to any game day spread but also a fantastic activity for kids and baking enthusiasts alike. Whether you’re celebrating a cbeef hampionship win or just love a good basketball theme, these piping basketball cookies are sure to be a slam dunk!
To make your presentation even more exciting, consider serving these cookies alongside other sports-themed desserts or in a decorative basket reminiscent of a basketball net. For variations, feel free to experiment with different shades of orange and brown for the basketballs, or even try piping mini basketballs onto a larger cookie base. Don’t be afraid to get creative and have fun with your designs! Remember, practice makes perfect, so don’t be discouraged if your first attempt isn’t flawless. The joy is in the process and the delicious outcome.
Frequently Asked Questions:
What kind of icing is best for piping basketball cookies?
A good quality royal icing is ideal for piping detailed designs like those on basketballs. It dries hard and smooth, allowing for crisp lines and preventing smudgin extractg. You’ll want a consistency that’s thick enough to hold its shape but thin enough to pipe smoothly from a tip. A few tablespoons of water or meringue powder added to a thicker icing can achieve this.
How long do piping basketball cookies last?
When stored properly in an airtight container at room temperature, these piping basketball cookies can last for about a week to ten days. Ensure they are completely dry before sealing the container to prevent condensation, which can make them soggy.
Easy Piping Basketball Cookies Recipe
Learn how to make fun and easy basketball-themed cookies with this simple piping recipe. Perfect for sports fans and parties!
Ingredients
-
1 cup (2 sticks) unsalted butter, softened
-
1 1/2 cups granulated sugar
-
2 large eggs
-
1 teaspoon vanilla extract
-
3 1/2 cups all-purpose flour
-
1 teaspoon baking powder
-
1/2 teaspoon salt
-
Orange food coloring
-
Black food coloring
-
Powdered sugar for dusting
-
1/4 cup light corn syrup
Instructions
-
Step 1
Cream together softened butter and granulated sugar until light and fluffy. Beat in eggs one at a time, followed by vanilla extract. In a separate bowl, whisk together flour, baking powder, and salt. Gradually add dry ingredients to wet ingredients, mixing until just combined. -
Step 2
Divide dough into three equal portions. Knead orange food coloring into one portion and black food coloring into another. Flatten each portion into a disk, wrap, and refrigerate for at least 1 hour. -
Step 3
Roll out the orange dough to about 1/4-inch thickness on a lightly floured surface. Cut out circles using a 3-inch round cookie cutter. Place cookies onto parchment-lined baking sheets. -
Step 4
Preheat oven to 350°F (175°C). Bake cookies for 10-12 minutes until edges are lightly golden. Let cool on the baking sheet for a few minutes before transferring to a wire rack to cool completely. -
Step 5
Combine powdered sugar, water, and light corn syrup to create a piping consistency icing. Divide into two bowls. Tint one with orange food coloring and leave the other white. -
Step 6
Pipe the orange icing onto the cooled cookie bases, flooding the center and spreading evenly. Let dry completely. Use white and black icing with fine tips to pipe the basketball lines onto the dried orange icing.
Important Information
Nutrition Facts (Per Serving)
It is important to consider this information as approximate and not to use it as definitive health advice.
Allergy Information
Please check ingredients for potential allergens and consult a health professional if in doubt.