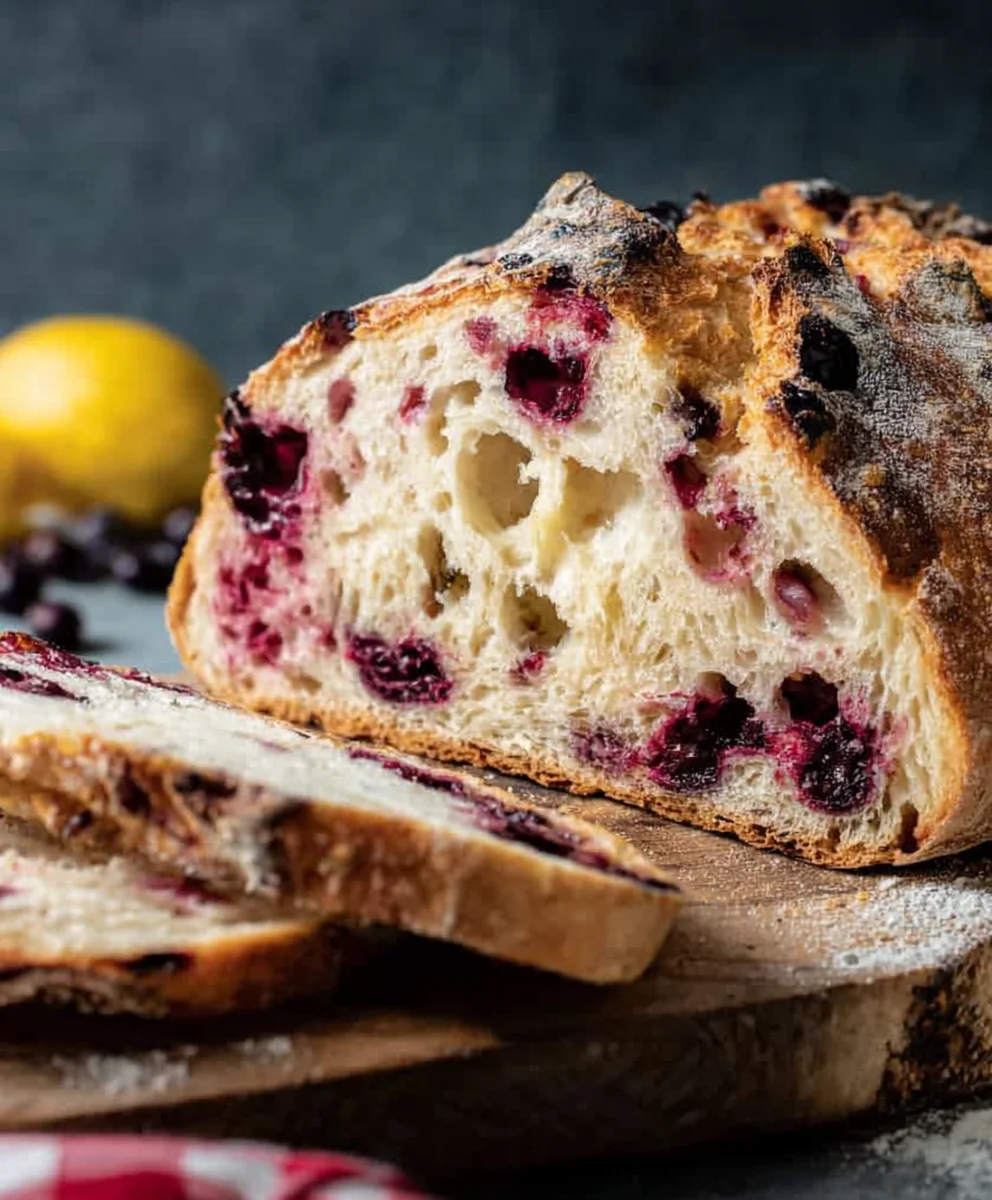
Blueberry Lemon Sourdough Bread-Tangy Sweet Flavor
Blueberry Lemon Sourdough Bread is more than just a breakfast treat; it’s a symphony of sweet and tart, a testament to the magic of fermentation, and a truly delightful way to start your day or enjoy an afternoon snack. Imagin extracte this: the tangy, slightly sour notes of a well-fed sourdough starter perfectly complementing the burst of juicy blueberries and the bright, zesty aroma of fresh lemon. It’s this unique flavor profile that has people falling head over heels for this particular loaf. The natural leavening process gives sourdough its characteristic chewy crust and soft, airy interior, which acts as the ideal canvas for the vibrant additions of plump blueberries and fragrant lemon zest. What truly makes this Blueberry Lemon Sourdough Bread special is the way these elements harmoniously interact, creating a complex yet comforting taste that’s both sophisticated and incredibly satisfying. Whether you’re a seasoned baker orgin extractst beginning your sourdough journey, this recipe promises a rewarding experience and a loaf you’ll want to make again and again.
Ingredients:
- 3 cups bread flour
- 1⅓ cups lukewarm water
- ¾ cup sourdough starter (active, bubbly, and well fed)
- 3 tablespoons white sugar
- 1 teaspoon salt
- 1¼ cup blueberries (fresh is easiest)
- 1 tablespoon lemon zest
Mixing the Dough
Phase 1: Autolyse and Starter Integration
The journey to a perfect Blueberry Lemon Sourdough Bread begin extracts with a proper autolyse. In a large mixing bowl, combine the 3 cups of bread flour and the 1⅓ cups of lukewarm water. Stir with a spatula or your hands until just combined, ensuring there are no dry pockets of flour. This initial mix might look a bit shaggy, and that’s perfectly fine. Cover the bowl with a damp kitchen towel or plastic wrap and let it rest for at least 30 minutes, or up to an hour. This resting period, known as the autolyse, allows the flour to fully hydrate, gluten developmegin extractto begin on its own, and makes the dough more extensible and easier to work with later.
After the autolyse, it’s time to introduce the magic of sourdough. Add your ¾ cup of active, bubbly sourdough starter to the rested dough. At this stage, I also add the 1 teaspoon of salt and the 3 tablespoons of white sugar. The sugar not only adds a subtle sweetness that complements the blueberries and lemon but also feeds the yeast in your starter, contributing to a more robust rise. Now, using your hands, it’s time to thoroughly incorporate these new ingredients. Pinch and squeeze the dough repeatedly, folding it over on itself, until the starter, salt, and sugar are fully integrated. This process might take about 5-10 minutes of active work. The dough will start to feel smoother and more cohesive as you continue to work it. It’s important to be patient here; good gluten development is key to a light and airy crum extractb.
Phase 2: Dough Development and Flavor Infusion
Once the starter, salt, and sugar are well combined, we’ll focus on further developing the gluten structure of the dough through a series of folds. Cover the bowl again and let the dough rest for 20-30 minutes. Followigin extractthis rest, begin a process of “stretch and folds.” With lightly moistened hands, reach under one side of the dough, gently stretch it upwards as far as it will comfortably go without tearing, and then fold it over onto itself. Rotate the bowl a quarter turn and repeat this process on all four sides of the dough. You’ll notice the dough becoming progressively smoother and more elastic with each set of folds. Perform these stretch and folds every 30 minutes for the next 2-3 hours. This is where the bulk fermentation really takes off, building strength and airiness in the dough.
As the dough approaches the end of its bulk fermentation – meaning it has increased in volume by about 50-75% and looks alive with bubbles – it’s time to incorporate the star flavors: blueberries and lemon zest. Gently scatter the 1¼ cup of fresh blueberries and the 1 tablespoon of lemon zest over the surface of the dough. Now, carefully perform one final set of stretch and folds, being mindful to distribute the blueberries and zest as evenly as possible without crushing the berries too much. The goal is to gently tuck them into the dough. If the dough is particularly sticky, you can lightly flour your hands. Try to be efficient with this last set of folds to minimize handling and preserve the delicate air bubbles that have formed.
Shaping and Baking
Phase 3: Pre-Shaping and Final Proof
After the final set of folds and the incorporation of the blueberries and lemon zest, cover the bowl and let the dough rest for another 20-30 minutes. This short rest allows the gluten to relax, making the final shaping much easier. Then, gently turn the dough out onto a lightly floured surface. Be delicate to avoid deflating the dough. Perform a gin extracttle pre-shape by bringing the edges of the dough into the center to form a loose ball. Let it rest, seam-side down, for about 15-20 minutes, uncovered. This step helps to build surface tension, which is crucial for a good oven spring.
Once pre-shaped and rested, it’s time for the final shaping. You can shape this into a boule (round loaf) or a batard (oval loaf). For a boule, gently flatten the dough into a rough circle. Then, fold the top third down, the bottom third up, and then fold the left and right sides in to create tension. Pinch the seams closed. Flip the dough over so the seam side is down. Cup your hands around the dough and gently pull it towards you, creating tension on the surface. Place the shaped dough into a well-floured proofing basket (banneton), seam-side up. If you don’t have a banneton, a bowl lined with a floured tea towel will work. Cover the basket or bowl with plastic wrap or place it inside a plastic bag to prevent the dough from drying out. Refrigerate for at least 8 hours, or preferably overnight (up to 24 hours). This cold proofing develops even more flavor and makes the dough easier to score.
Phase 4: Baking to Golden Perfection
When you’re ready to bake, preheat your oven with a Dutch oven or baking vessel inside to 475°F (245°C) for at least 30 minutes. A hot Dutch oven is essential for achieving a great crust and oven spring. Carefully remove the hot Dutch oven from the oven. Gently invert the proofed dough from its basket onto a piece of parchment paper. Score the top of the dough with a lame or a very sharp knife. A simple cross or a few decisive slashes will do. Carefully lift the parchment paper with the dough and lower it into the hot Dutch oven. Place the lid on the Dutch oven, ensuring it’s senon-alcoholic aled tightly.
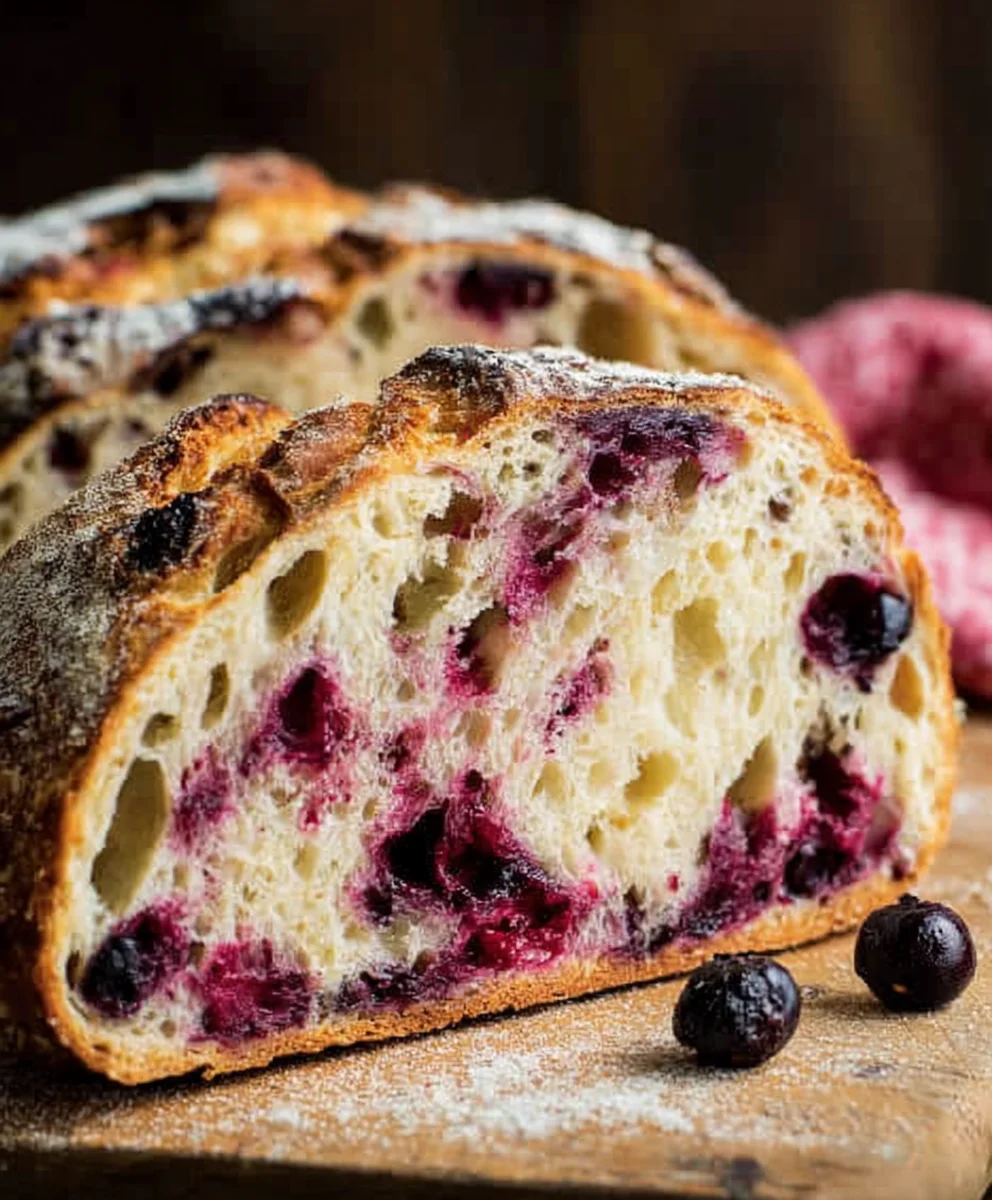
Bake with the lid on for 20 minutes. This trapped steam helps the loaf to expand fully before the crust sets. After 20 minutes, carefully remove the lid from the Dutch oven. You’ll see the loaf has puffed up beautifully. Reduce the oven temperature to 450°F (230°C) and continue to bake for another 25-30 minutes, or until the crust is a deep golden brown and the internal temperature of the bread reaches around 200-210°F (93-99°C) when checked with an instant-read thermometer. The aroma of blueberry and lemon will be incredible as it bakes! Once baked, carefully remove the bread from the Dutch oven and place it on a wire rack to cool completely. It’s crucial to let it cool for at least 2-3 hours before slicing to allrum extractthe crumb to set properly. Enjoy the delightful burst of blueberry and the bright hint of lemon in every slice of your homemade Blueberry Lemon Sourdough Bread.
Conclusion:
You’ve now unlocked the secret to creating delicious Blueberry Lemon Sourdough Bread right in your own kitchen! This recipe is a wonderful balance of tangy sourdough, sweet blueberries, and bright lemon zest, offering a truly unique and satisfying loaf. We hope you enjoyed the process and are delighted with the results. This bread is incredibly versatile. Serve it toasted with a dollop of cream cheese or butter for a simple yet elegant breakfast. It also makes a fantastic base for French toast or a delightful accompaniment to a cheese board.
Don’t be afraid to experiment! You can add a touch of lavender for a floral note, swap blueberries for raspberries, or even add a sprinkle of cardamom for warmth. The beauty of sourdough is its adaptability. So go ahead, get creative and make this Blueberry Lemon Sourdough Bread your own. We encourage you to share your creations and variations with friends and family – it’s a loaf worth celebrating!
Frequently Asked Questions:
Can I use frozen blueberries in this recipe?
Yes, you absolutely can use frozen blueberries. If using frozen, it’s best to toss them with a tablespoon of flour before adding them to the dough to help prevent them from bleeding too much color and to absorb excess moisture. You might also want to bake the loaf a few minutes longer.
My sourdough starter isn’t very active. Will this recipe still work?
While an active and healthy sourdough starter is ideal for the best rise and flavor development, you can still try this recipe with a less vigorous starter. The flavor will still be present, but the texture and rise might be slightly denser. Ensure your starter is at least fed and bubbly before you begin extract.
Blueberry Lemon Sourdough Bread
A tangy and sweet sourdough bread bursting with fresh blueberries and bright lemon zest.
Ingredients
-
3 cups bread flour
-
1⅓ cups lukewarm water
-
¾ cup sourdough starter (active, bubbly, and well fed)
-
3 tablespoons white sugar
-
1 teaspoon salt
-
1¼ cup blueberries (fresh is easiest)
-
1 tablespoon lemon zest
Instructions
-
Step 1
Combine bread flour and lukewarm water in a large bowl. Stir until just combined. Cover and let rest for 30 minutes to 1 hour for autolyse. -
Step 2
Add sourdough starter, white sugar, and salt to the dough. Pinch and squeeze until thoroughly incorporated, about 5-10 minutes. Cover and let rest for 20-30 minutes. -
Step 3
Perform stretch and folds every 30 minutes for 2-3 hours. Gently incorporate blueberries and lemon zest during the final set of folds. -
Step 4
Let the dough rest for 20-30 minutes. Gently pre-shape into a loose ball and let rest seam-side down for 15-20 minutes. Shape into a boule or batard, place in a proofing basket seam-side up, and refrigerate for at least 8 hours, or overnight. -
Step 5
Preheat oven with a Dutch oven inside to 475°F (245°C) for at least 30 minutes. Invert the dough onto parchment paper, score the top, and carefully lower into the hot Dutch oven. Cover and bake for 20 minutes. -
Step 6
Remove the lid, reduce oven temperature to 450°F (230°C), and bake for another 25-30 minutes until deep golden brown. Cool completely on a wire rack for at least 2-3 hours before slicing.
Important Information
Nutrition Facts (Per Serving)
It is important to consider this information as approximate and not to use it as definitive health advice.
Allergy Information
Please check ingredients for potential allergens and consult a health professional if in doubt.