Melted Milky Cheese Donuts- Irresistible Treat
Milky Cheese Donuts are more than just a sweet treat; they are a nostalgic journey and a comforting embrace in every bite. Have you ever craved a confection that perfectly balances the delicate sweetness of a donut with the savory depth of cheese? That’s precisely the magic held within these delightful rings. It’s no wonder they’ve captured hearts and taste buds across generations. People adore them for their wonderfully soft, almost cake-like interior, infused with just the right amount of creamy cheese that makes them incredibly moreish. What truly sets these Milky Cheese Donuts apart is their unique flavor profile – a harmonious dance between sweet and savory that’s utterly addictive and surprisingly sophisticated. Forget your average donut; this recipe offers a subtle, elegant twist that will have you reaching for more.
Why You’ll Love This Recipe
We’ve perfected a method to ensure your Milky Cheese Donuts are light, airy, and bursting with that signature milky cheese flavor. Get ready to impress your family and friends with this extraordinary bake.
The Secret to the Perfect Texture
The key lies in the careful selection of ingredients and the precise baking temperature, which we’ll guide you through step-by-step. Prepare for a truly unforgettable donut experience.
Ingredients:
- 2 cups all-purpose flour
- 1 cup whole milk, warm (about 110°F)
- 2 tablespoons sugar
- 2¼ teaspoons active dry yeast (1 packet)
- ½ teaspoon salt
- 1 large egg
- 4 tablespoons unsalted butter, melted
- 1 cup shredded mozzarella cheese
- Vegetable or canola oil, for frying
- Powdered sugar, for dusting (optional)
Making the Milky Cheese Donut Dough
We’re going to start by getting our yeast mixture ready, which is key to fluffy donuts. In a small bowl or the measuring cup you used for your milk, combine the warm whole milk with the 2 tablespoons of sugar and the 2¼ teaspoons of active dry yeast. Give it a gentle stir to make sure the yeast and sugar are mostly dispersed. Now, let this mixture sit undisturbed for about 5 to 10 minutes. You’re looking for a frothy, bubbly layer to form on top. This tells you your yeast is alive and ready to work its magic. If you don’t see any foam, your yeast might be old, or the milk might have been too hot or too cold, so you’ll want to start this step over with fresh yeast and properly warmed milk.
Combining and Kneading the Dough
Once your yeast mixture is nice and frothy, it’s time to combine it with the dry ingredients. In a large mixing bowl, whisk together the 2 cups of all-purpose flour and the ½ teaspoon of salt. Make sure they are well combined. Now, create a well in the center of the flour mixture. Pour the activated yeast mixture into this well. Add the 1 large egg and the 4 tablespoons of melted unsalted butter to the bowl. Using a wooden spoon or a sturdy spatula, begin extract to mix everything together. Start from the center and gradually incorporate the flour from the sides until a shaggy gin extractgh begins to form. It will look a bit sticky at this stage, and that’s perfectly normal. Don’t be tempted to add more flour just yet!
Now comes the fun part: kneading! Turn the shaggy dough out onto a lightly floured surface. If the dough is sticking excessively to your hands or the counter, you can add a tiny bit more flour, but use it sparingly. Knead the dough by pushing it away from you with the heel of your hand, then folding it back over itself. Rotate the dough a quarter turn and repeat. Continue this process for about 8 to 10 minutes. You’re aiming for a smooth, elastic dough that springs back slowly when you gently poke it. This develops the gluten, which gives our Milky Cheese Donuts their wonderful texture.
First Rise and Incorporating the Cheese
Once your dough is beautifully smooth and elastic, it’s time for its first rise. Lightly grease a clean bowl with a little bit of oil. Place the kneaded dough into the greased bowl, turning it once to coat all sides with the oil. Cover the bowl tightly with plastic wrap or a clean kitchen towel. Find a warm, draft-free spot for the dough to rise. This could be inside a slightly warmed (but turned off) oven or simply on your countertop on a warm day. Let the dough rise for about 1 to 1.5 hours, or until it has roughly doubled in size. Patience here will be rewarded with lighter, airier donuts.
After the dough has doubled, gently punch it down to release the air. Now, it’s time to introduce our star ingredient: the cheese! Sprinkle the 1 cup of shredded mozzarella cheese evenly over the surface of the deflated dough. Gently knead the dough again, just enough to distribute the cheese throughout. You don’t want to overwork it at this point, as that can make the cheese melt too much and become greasy. The goal is to have pockets of melty mozzarella within the donut dough. The dough might feel a litgin extract more challenging to knead with the cheese in it, but continue until the cheese is fairly well incorporated.
Shaping and Second Rise
Now, we’ll shape our donuts. Lightly flour your work surface again. Turn out the cheese-infused dough and gently roll it out to about ½-inch thickness. Using a donut cutter or two different-sized round cutters (a larger one for the outer circle and a smaller one for the inner hole), cut out your donut shapes. If you don’t have a donut cutter, you can simply cut out rounds and then use your finger or a small knife to make a hole in the center. Place the cut donuts onto a baking sheet lined with parchment paper, leaving a little space between each one. Gather any scraps of dough, gently re-knead them once, and roll them out again to cut more donuts until all the dough is used.
Cover the shaped donuts loosely with plastic wrap or a kitchen towel. Let them rest and rise for a second time in a warm place for about 30 to 45 minutes, or until they look puffy and slightly larger. This second rise is crucial for achieving that signature light and airy donut texture. While the donuts are having their second rise, you can prepare your frying station. You’ll want a deep, heavy-bottomed pot or a Dutch oven for frying. Fill it with enough vegetable or canola oil to reach a depth of about 2-3 inches. You’ll heat this oil to approximately 350°F (175°C). It’s important to maintain this temperature for even cooking.
Frying and Finishing Your Milky Cheese Donuts
Carefully and gently place 2-3 donuts into the hot oil at a time. Be careful not to overcrowd the pot, as this will lower the oil temperature and lead to greasy donuts. Fry the donuts for about 1 to 2 minutes per side, or until they are a beautiful golden-brown color. The cheese inside will become wonderfully gooey. Use a slotted spoon or spider strainer to carefully lift the donuts out of the hot oil. Place them on a wire rack set over a baking sheet to drain any excess oil. This is also where you can optionally dust them with powdered sugar while they are still warm, if you desire a sweet and savory contrast. Continue frying the remaining donuts in batches, ensuring the oil returns to the correct temperature between each batch. Enjoy your delicious, homemade Milky Cheese Donuts!
Conclusion:
There you have it – a delightful journey into crafting your very own Milky Cheese Donuts! We’ve explored the simple yet effective steps to create these incredibly soft, subtly sweet, and wonderfully cheesy treats. Whether you’re a seasoned baker or just starting out, the process is designed to be accessible and rewarding, yielding a batch of donuts that are sure to impress. These Milky Cheese Donuts are perfect for a special breakfast, a comforting afternoon snack, or even a unique dessert. I encourage you to give this recipe a try and experience the joy of homemade goodness.
For serving, these Milky Cheese Donuts are divine on their own, allowing their delicate flavor to shine. However, they also pair beautifully with a light dusting of powdered sugar, a drizzle of honey, or even a side of your favorite fruit preserves. Don’t be afraid to get creative with variations! You can experiment with different types of cheese, like a sharp cheddar for a more pronounced flavor, or even add a pinch of herbs like chives or parsley to the dough for a savory twist. I can’t wait to hear how yours turn out!
Frequently Asked Questions:
Q: Can I make the dough for Milky Cheese Donuts ahead of time?
A: Yes, you can! Once the dough has undergone its first rise, you can cover it tightly and refrigerate it for up to 24 hours. This slow fermentation can even enhance the flavor. Allow it to come to room temperature for about an hour before proceeding with shaping and frying.
Q: What is the best way to store leftover Milky Cheese Donuts?
A: To maintain their soft texture, it’s best to store leftover Milky Cheese Donuts in an airtight container at room temperature for up to two days. If you need to store them for longer, you can freeze them once completely cooled. Reheat gently in a low oven or microwave.
Q: My Milky Cheese Donuts are not puffing up enough during frying. What could be wrong?
A: There are a few common reasons. Ensure your yeast is fresh and active. Also, make sure the oil is heated to the correct temperature (around 350-375°F or 175-190°C). If the oil is too cool, they won’t puff up properly. Overcrowding the pan can also lower the oil temperature, so fry in batches.
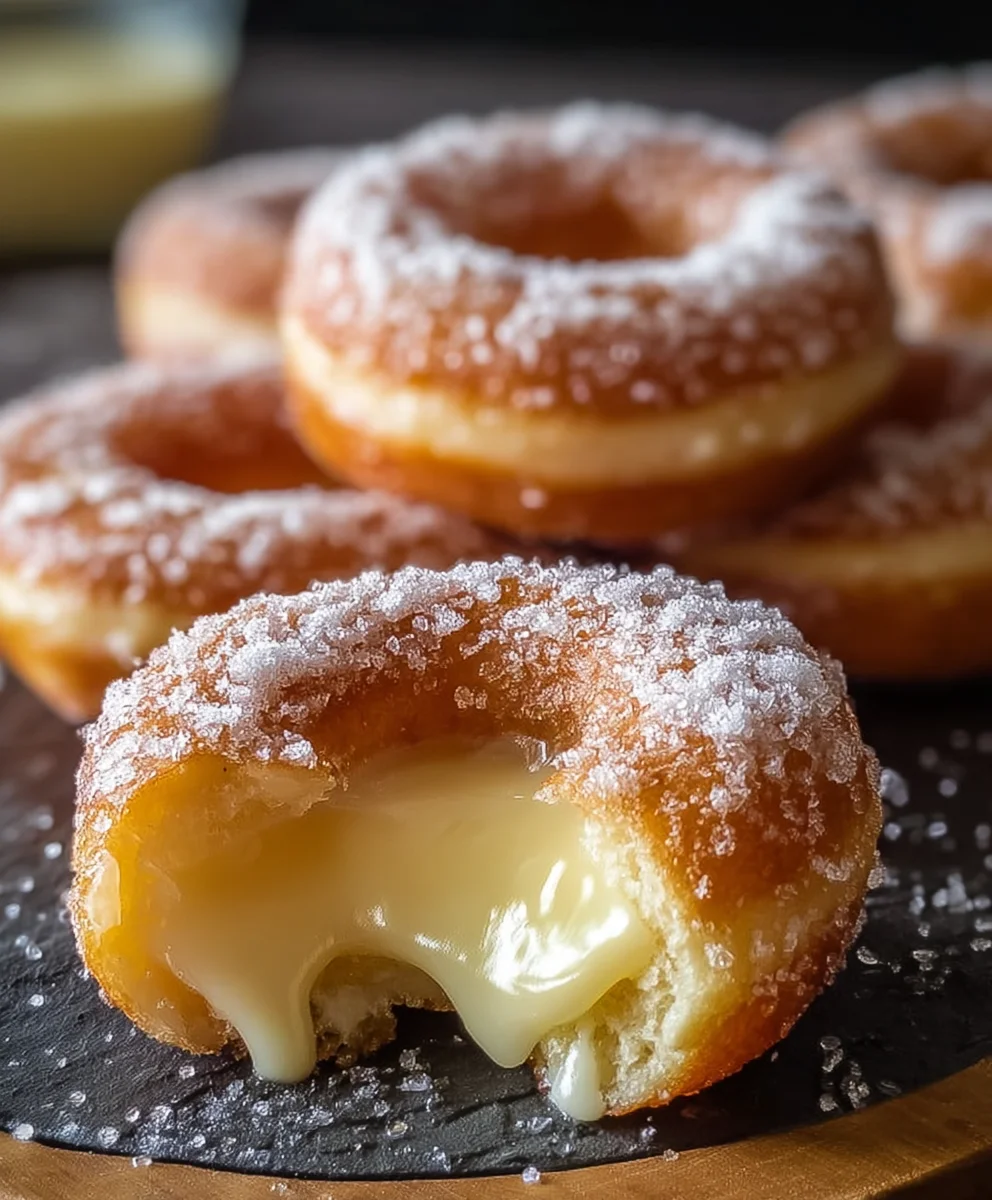
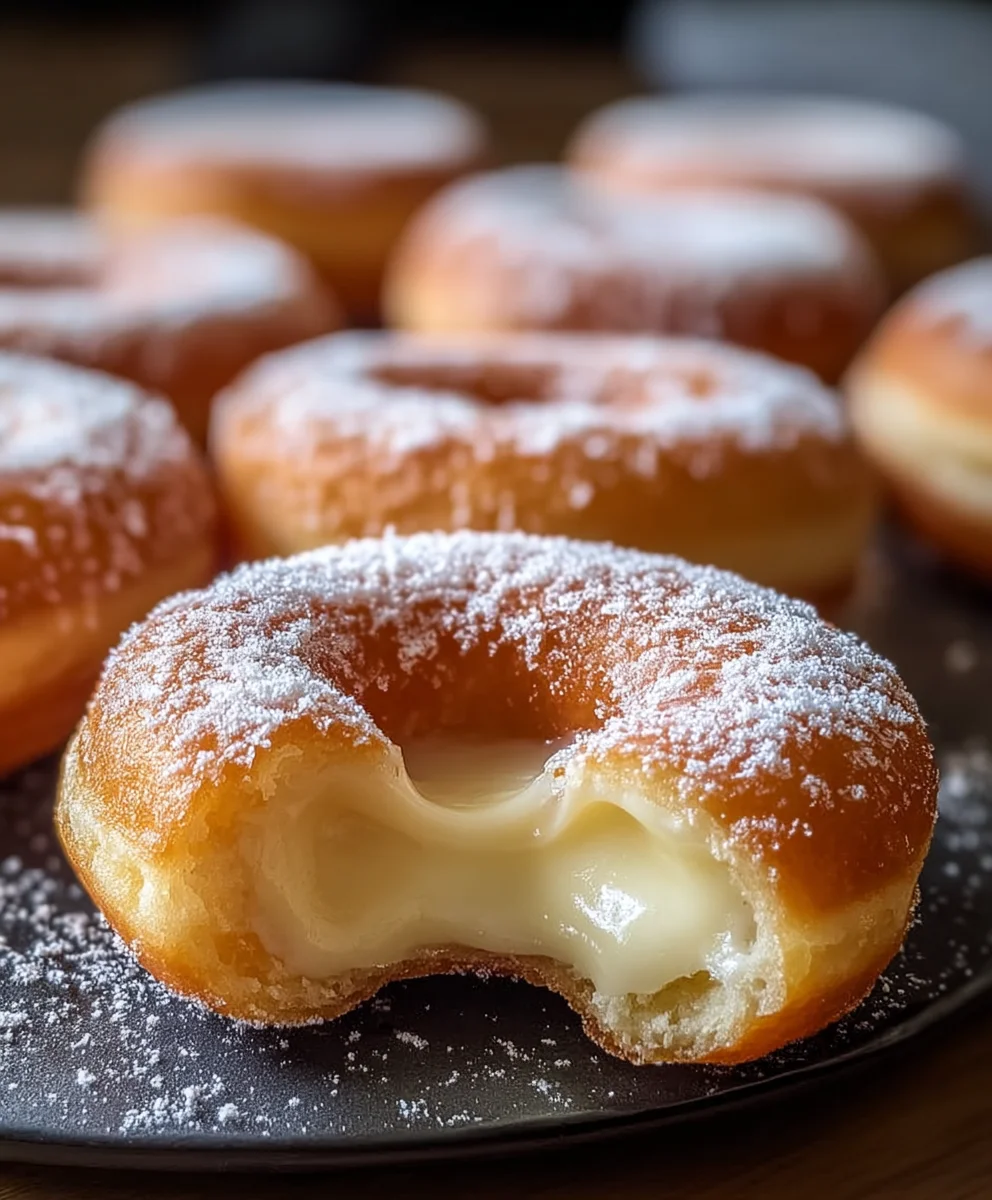
Melted Milky Cheese Donuts
Irresistible homemade donuts featuring a unique blend of fluffy dough and gooey melted mozzarella cheese, with an optional dusting of powdered sugar for a delightful sweet and savory contrast.
Ingredients
-
2 cups all-purpose flour
-
1 cup whole milk, warm (about 110°F)
-
2 tablespoons sugar
-
2¼ teaspoons active dry yeast (1 packet)
-
½ teaspoon salt
-
1 large egg
-
4 tablespoons unsalted butter, melted
-
1 cup shredded mozzarella cheese
-
Vegetable or canola oil, for frying
-
Powdered sugar, for dusting (optional)
Instructions
-
Step 1
In a small bowl, combine warm milk, sugar, and active dry yeast. Let sit for 5-10 minutes until frothy. -
Step 2
In a large bowl, whisk together flour and salt. Create a well, then add the yeast mixture, egg, and melted butter. Mix until a shaggy dough forms. -
Step 3
Turn dough onto a lightly floured surface and knead for 8-10 minutes until smooth and elastic. Place in a greased bowl, cover, and let rise in a warm place for 1-1.5 hours until doubled. -
Step 4
Punch down dough, sprinkle with mozzarella cheese, and gently knead to incorporate. The dough might become slightly more challenging to handle. -
Step 5
Roll out dough to ½-inch thickness and cut into donut shapes. Place on parchment-lined baking sheet, cover, and let rise for a second time for 30-45 minutes until puffy. -
Step 6
Heat vegetable or canola oil to 350°F (175°C) in a deep pot. Fry donuts in batches for 1-2 minutes per side until golden brown. Drain on a wire rack. -
Step 7
Optionally dust with powdered sugar while warm. Continue frying remaining donuts.
Important Information
Nutrition Facts (Per Serving)
It is important to consider this information as approximate and not to use it as definitive health advice.
Allergy Information
Please check ingredients for potential allergens and consult a health professional if in doubt.