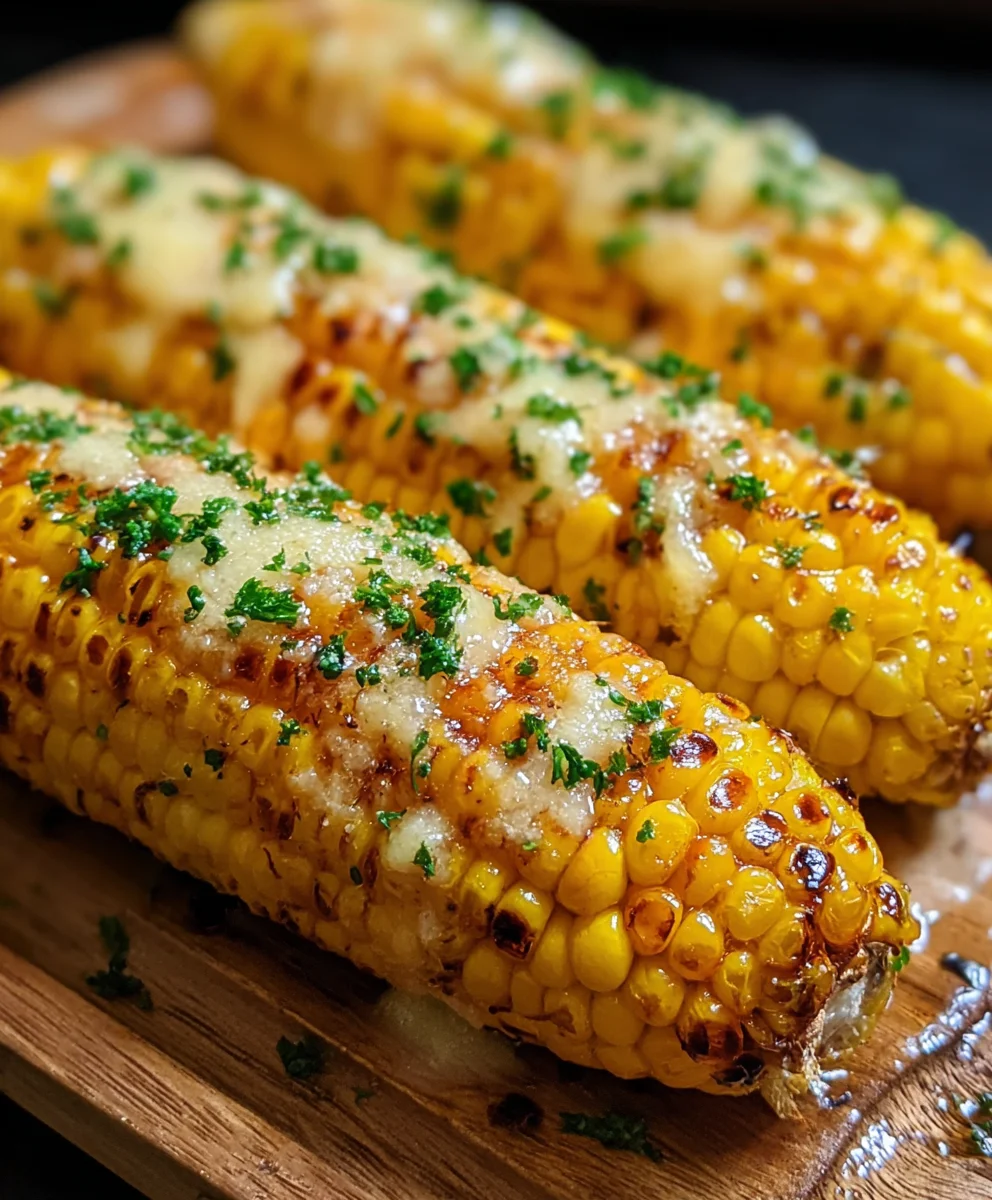
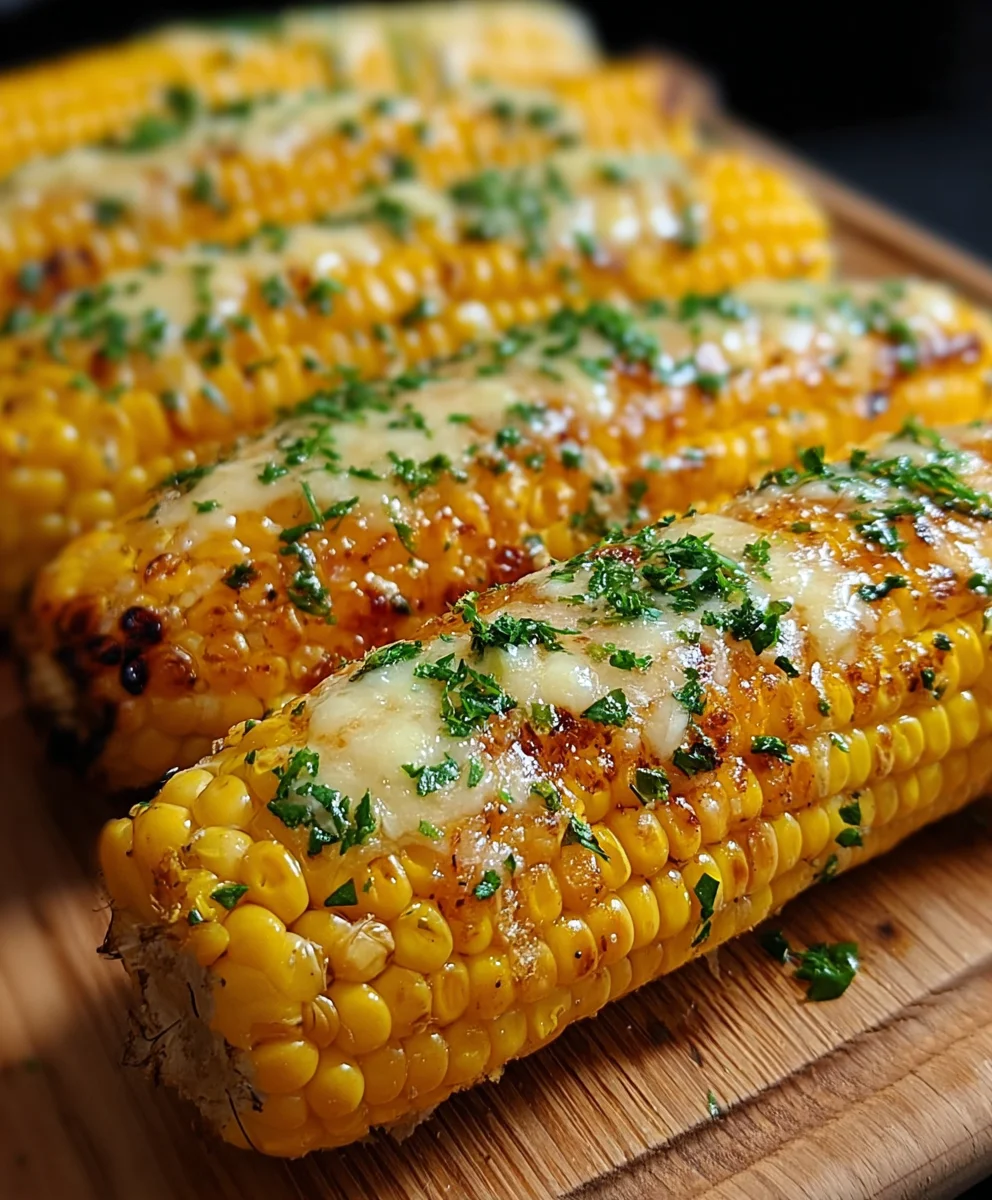
Cheesy Garlic Butter Corn on the Cob Recipe
Cheesy Garlic Butter Corn on the Cob isn’t just a side dish; it’s a celebration on a plate. Imagin extracte those sweet, golden kernels bursting with flavor, each bite a delightful dance of creamy cheese, pungent garlic, and rich, melted butter. Is it any wonder why this has become a summer barbecue staple and a beloved comfort food for so many? It’s the ultimate crowd-pleaser, effortlessly transforming ordinary corn into an extraordinary culinary experience. What truly sets this Cheesy Garlic Butter Corn on the Cob apart is its incredible versatility; it can be grilled, roasted, or even steamed, making it accessible for any cooking method. The addictive aroma alone is enough to draw everyone to the kitchen, and the explosion of savory, buttery, garlicky goodness will have gin extractm begging for seconds. Get ready to elevate your corn game to a whole new level of deliciousness!
Ingredients:
- 4 ears fresh corn, husked
- ¼ cup (½ stick) unsalted butter, softened
- 2 garlic cloves, minced
- 1 tbsp chopped fresh parsley
- ½ tsp salt
- ¼ tsp black pepper
- ½ cup grated Parmesan cheese
- 1 tsp lemon zest (optional)
Preparation and Roasting
Step 1: Prepare the Corn for Roasting
First things first, let’s get our corn ready. Carefully remove all the husks and silk from the corn ears. You want to get as much of that fuzzy silk off as possible, as it can become unpleasant to eat when cooked. I like to use my hands for this, gently pulling down the husks and then running my fingers or a paper towel along the kernels to remove any lingering silk. Once your corn is perfectly clean, you can set it aside. If you’re planning to grill the corn, you can re-wrap the husked ears loosely in foil at this stage to help them steam while they cook, but for roasting in the oven, we’ll be cooking it directly. Make sure you have a baking sheet ready; lining it with parchment paper or foil will make cleanup a breeze.
Step 2: Create the Flavorful Garlic Butter Mixture
Now for the star of the show: the garlic butter sauce! In a small bowl, combine your softened unsalted butter. Make sure the butter is truly softened – not melted, but yielding to the touch. This will make it much easier to mix in the other ingredients and spread evenly over the corn. Add the two minced garlic cloves to the butter. Mince them as finely as you can for the best distribution of flavor. Next, stir in the chopped fresh parsley. If you’re using dried parsley, you might want to use about a third of the amount, as dried herbs are more concentrated. Season the mixture with ½ teaspoon of salt and ¼ teaspoon of black pepper. If you’re feeling adventurous and want an extra bright note, now is the time to add the optional 1 teaspoon of lemon zest. This really wakes up the flavors and balances the richness of the butter. Mix everything together thoroughly until you have a smooth, fragrant compound butter. Taste a tiny bit of the mixture (before it touches the corn, of course!) to ensure the seasoning is to your liking. You can always add a pinch more salt or pepper if needed.
Step 3: Generously Coat the Corn
This is where the magic really starts to happen. Take your prepared corn ears and lay them on your prepared baking sheet. Using a butter knife or a small offset spatula, generously spread the garlic butter mixture all over each ear of corn. Don’t be shy! You want to ensure every kernel is coated. Get into all the nooks and crannies. The softened butter will melt as the corn cooks, infusing the kernels with incredible flavor. Make sure to distribute the garlic and parsley bits evenly as well, so you get a burst of flavor in every bite. This step is crucial for achieving that irresistible Cheesy Garlic Butter Corn on the Cob. If any butter mixture falls off, just scoop it back up and apply it to the corn.
Step 4: Roasting the Corn to Perfection
Preheat your oven to 400°F (200°C). Place the baking sheet with the buttered corn ears into the preheated oven. Allow the corn to roast for about 20 to 25 minutes. The exact cooking time will depend on the thickness of your corn and your oven. You’re looking for the kernels to become tender and slightly plump, and the butter to be melted and bubbling. You might even see some nice light browning on the kernels. To ensure even cooking, you can carefully turn the corn ears halfway through the roasting process, perhaps after about 10-12 minutes. This helps all sides get a nice exposure to the oven’s heat and ensures the butter coats evenly as it melts. Keep an eye on it towards the end to prevent any burning, especially if your oven tends to run hot. The aroma that will fill your kitchen during this stage is absolutely divine!
Step 5: Adding the Cheesy Finish
Once the corn has roasted and is tender, carefully remove the baking sheet from the oven. This is the moment we introduce the cheese! Sprinkle the ½ cup of grated Parmesan cheese evenly over the hot corn ears. The heat from the corn and the butter will immediately start to melt the Parmesan, creating a delicious, slightly crispy cheesy coating. You can gently tilt the baking sheet to help distribute the cheese if needed, or even use a clean spoon to encourage the cheese to adhere to the corn. Return the corn to the oven for another 3 to 5 minutes, or until the Parmesan cheese is melted and lightly golden brown. This short stint back in the oven is key to getting that wonderfully gooey and slightly crisped cheesy topping. Watch it closely, as melted cheese can go from perfect to burnt very quickly. Once the cheese is beautifully melted and slightly browned, it’s time to bring your masterpiece out of the oven. Let it cool for just a minute or two before serving, as it will be very hot.
Conclusion:
There you have it – the ultimate guide to crafting the most delicious Cheesy Garlic Butter Corn on the Cob! This recipe is surprisingly simple to make, yet delivers an explosion of flavor that will have everyone reaching for seconds. The sweet kernels of corn are perfectly complemented by the rich garlic butter and the gooey, melted cheese, creating a truly irresistible side dish. Whether you’re grilling it up for a summer barbecue, serving it as a comforting side with dinner, or even enjoying it as a standalone treat, this Cheesy Garlic Butter Corn on the Cob is sure to be a hit.
For serving suggestions, this corn is fantastic alongside grilled meats, pulled beef sandwiches, or even a simple roast chicken. You can also serve it as part of a larger vegetarian feast with other grilled vegetables and hearty grains. Don’t be afraid to get creative with variations! You could add a sprinkle of chili flakes for a hint of heat, fresh chopped chives for extra freshness, or even some crispy beef bacon bits for an added layer of savory goodness. Experiment with different types of cheese too, like a sharp cheddar or a smoky gouda. The possibilities are endless! We encourage you to give this recipe a try and discover just how amazing Cheesy Garlic Butter Corn on the Cob can be. Happy cooking!
FAQs:
Can I make Cheesy Garlic Butter Corn on the Cob ahead of time?
While it’s best enjoyed fresh off the grill or out of the oven for maximum cheesiness and tenderness, you can prepare the garlic butter mixture and melt the cheese just before serving. You can also boil or steam the corn ahead of time and then butter, season, and bake/grill it just before you want to serve it. This helps ensure the corn is perfectly cooked and the cheese is delightfully melty.
What kind of corn is best for Cheesy Garlic Butter Corn on the Cob?
Fresh, in-season sweet corn is always the best choice for the sweetest flavor and tenderest texture. Look for ears with bright green husks and plump kernels. If fresh corn isn’t available, you can use frozen corn on the cob, just make sure to thaw it completely before proceeding with the recipe.
Cheesy Garlic Butter Corn on the Cob
A delicious and easy recipe for corn on the cob roasted with a flavorful garlic butter mixture and topped with melted Parmesan cheese.
Ingredients
-
4 ears fresh corn, husked
-
1/4 cup (1/2 stick) unsalted butter, softened
-
2 garlic cloves, minced
-
1 tbsp chopped fresh parsley
-
1/2 tsp salt
-
1/4 tsp black pepper
-
1/2 cup grated Parmesan cheese
-
1 tsp lemon zest (optional)
Instructions
-
Step 1
Carefully remove all husks and silk from the corn ears. Ensure as much silk as possible is removed. Set aside. Prepare a baking sheet, lining it with parchment paper or foil for easy cleanup. -
Step 2
In a small bowl, combine softened unsalted butter, minced garlic cloves, chopped fresh parsley, salt, black pepper, and optional lemon zest. Mix thoroughly until a smooth, fragrant compound butter is formed. -
Step 3
Lay the prepared corn ears on the baking sheet. Generously spread the garlic butter mixture all over each ear of corn, ensuring every kernel is coated. Distribute garlic and parsley bits evenly. -
Step 4
Preheat oven to 400°F (200°C). Place the baking sheet with the buttered corn into the preheated oven. Roast for 20 to 25 minutes, turning halfway through, until kernels are tender and bubbling. -
Step 5
Remove corn from the oven. Sprinkle grated Parmesan cheese evenly over the hot corn ears. Return to the oven for 3 to 5 minutes, or until the cheese is melted and lightly golden brown.
Important Information
Nutrition Facts (Per Serving)
It is important to consider this information as approximate and not to use it as definitive health advice.
Allergy Information
Please check ingredients for potential allergens and consult a health professional if in doubt.