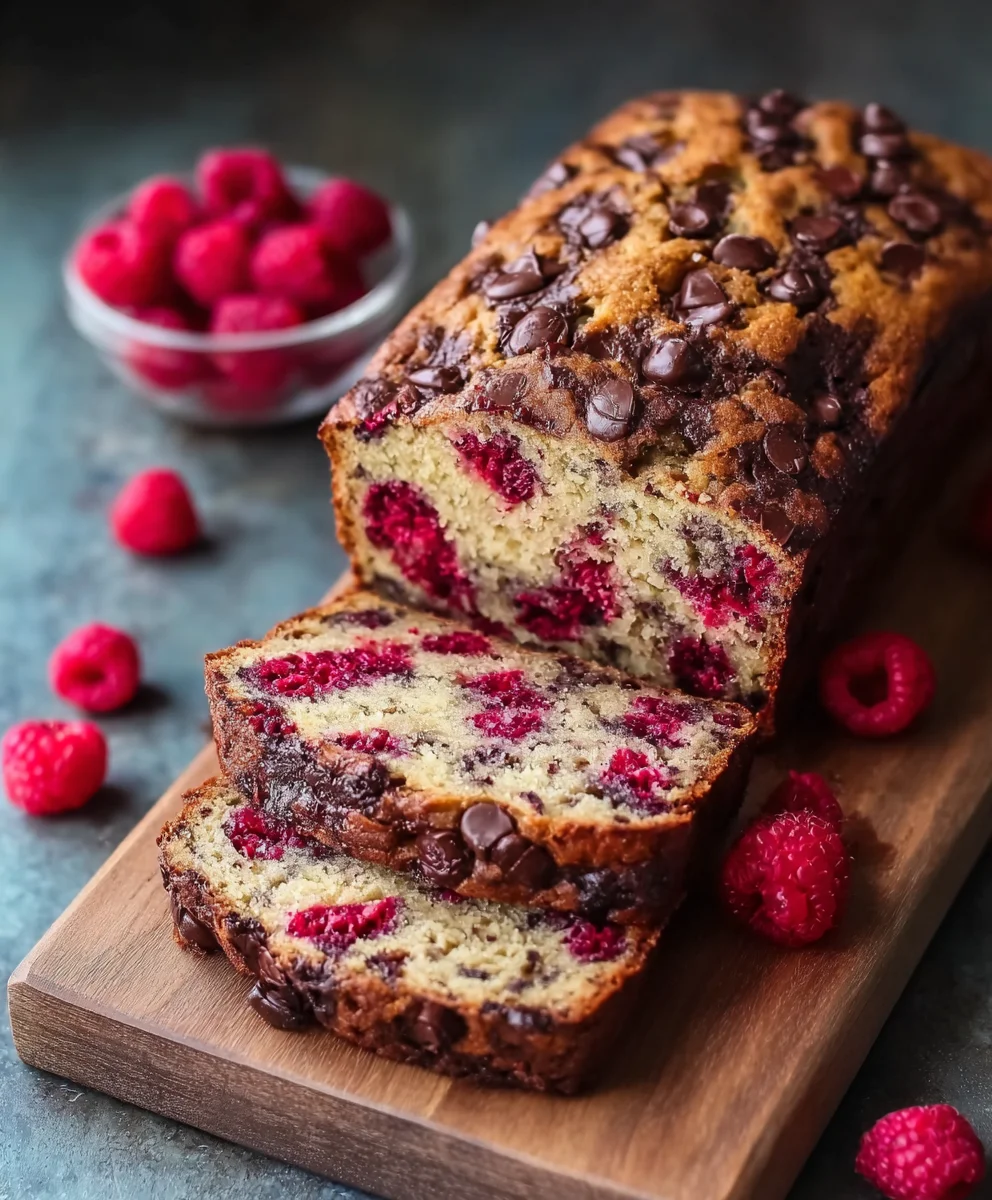
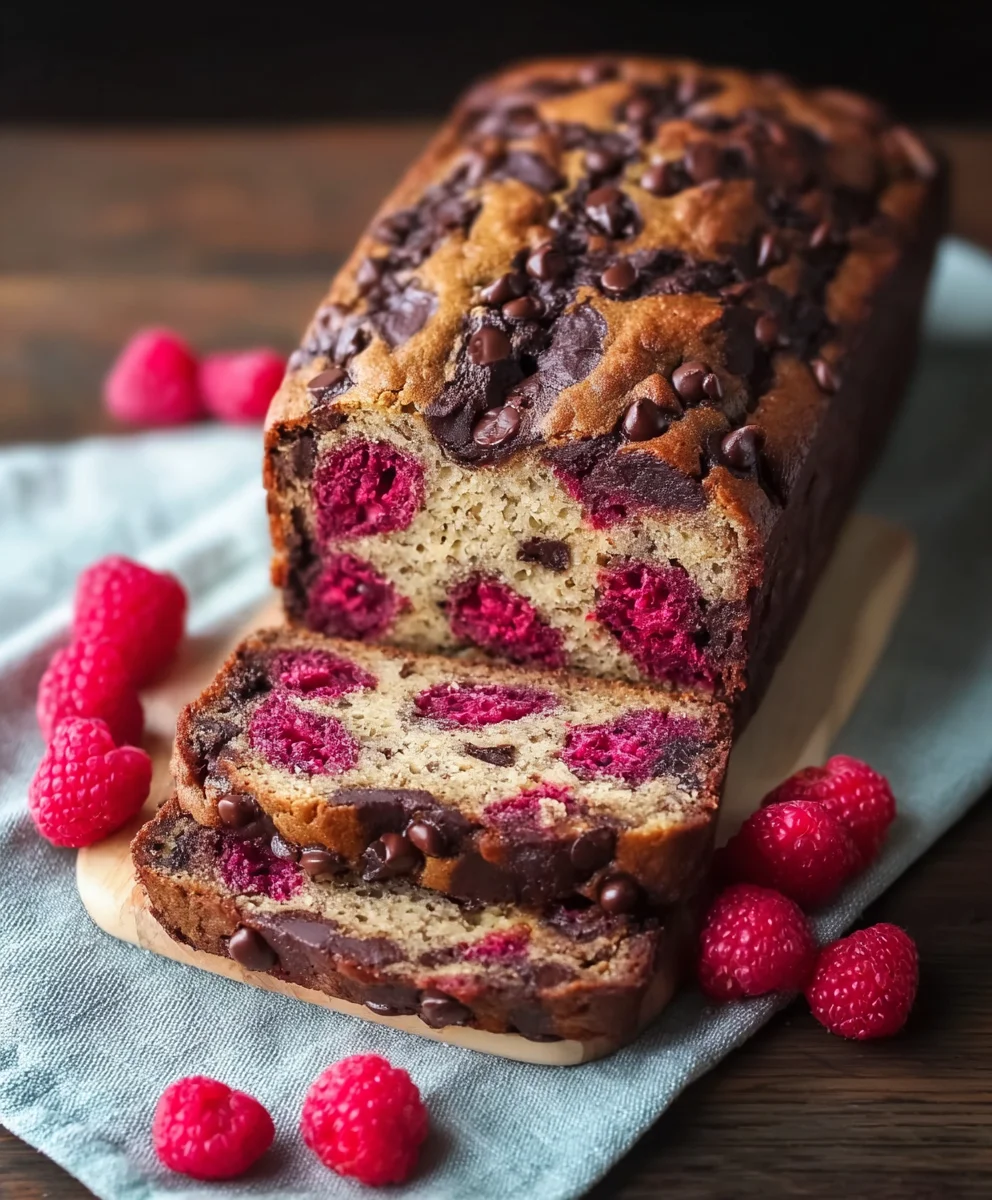
Raspberry Dark Chocolate Banana Bread Recipe
Raspberry Dark Chocolate Banana Bread is more than just a breakfast treat; it’s a comforting hug in loaf form, a delightful marriage of sweet, tart, and decadently rich flavors that has captured the hearts of bakers everywhere. Imagin extracte the soft, moist crum extractb of perfectly ripe bananas, infused with the vibrant tang of juicy raspberries, and studded with generous pockets of melted dark chocolate. This isn’t your average banana bread; it’s an elevated experience that balances the familiar with the extraordinary. People adore it because it hits all the right notes: it’s incredibly satisfying, wonderfully versatile (perfect for a quick breakfast, a delightful afternoon snack, or even a simple dessert), and remarkably easy to make. What truly makes this Raspberry Dark Chocolate Banana Bread special is the interplay of textures and tastes – the smooth banana bread base, the burst of fresh raspberry, and the satisfying melt of dark chocolate create a symphony in every bite that will have you reaching for another slice before you’ve even finished the first.
Ingredients:
- 2 cups all-purpose flour, plus 1 tablespoon for tossing raspberries
- ¾ teaspoon baking soda
- ½ teaspoon salt
- 1 cup granulated white sugar
- 4 tablespoons (½ stick) unsalted butter, softened to room temperature
- 2 large eggs
- 1½ cups mashed ripe banana (this usually requires about 3 medium to large bananas that are very spotty and soft)
- ⅓ cup plain low-fat yogurt (Greek yogurt or regular plain yogurt will both work beautifully)
- 1 teaspoon vanilla extract
- 1 cup dark chocolate chunks or chips (I prefer chunks for a more artisanal feel, but chips are perfectly fine)
- 1 cup fresh raspberries, halved
Getting Started: The Wet Ingredients
Creaming the Butter and Sugar
The foundation of a tender and moist banana bread lies in properly creaming the butter and sugar. In a large mixing bowl, I like to add the softened butter and granulated sugar. Ensure your butter is truly at room temperature – it should yield gently when pressed with a finger, but not be melted. This allows the butter to aerate as you beat it with the sugar. Using an electric mixer, whether a stand mixer with a paddle attachment or a handheld mixer, beat these together on medium-high speed for about 3-5 minutes. You’re looking for a light, fluffy, and pnon-alcoholic ale yellow mixture. This process incorporates air, which contributes to the bread’s rise and delicate texture. Scrape down the sides of the bowl occasionally with a spatula to make sure all the butter and sugar are incorporated.
Adding Eggs and Vanilla
Once the butter and sugar are beautifully creamed, it’s time to add the eggs and vanilla extract. I like to add the eggs one at a time, beating well after each addition until fully incorporated. This emulsifies the mixture better and prevents it from becoming greasy. After the second egg is mixed in, stir in the vanilla extract. The aroma alone is a good sign that things are progressing wonderfully!
Incorporating Banana and Yogurt
Now comes the star of the show: the mashed banana. For the best flavor and sweetness, use bananas that are heavily speckled and soft. Mash them with a fork in a separate bowl until they reach a relatively smooth consistency, but a few small lumps are perfectly acceptable and add character. Gently fold the mashed banana into the butter and sugar mixture. Following that, add the plain low-fat yogurt. The yogurt is crucial for adding moisture and a slight tang that balances the sweetness of the banana and chocolate. Mix just until everything is combined. Don’t overmix at this stage; we want to keep the batter tender.
Building the Dry Mix and Combining
Whisking the Dry Ingredients
In a separate medium bowl, whisk together the all-purpose flour, baking soda, and salt. Whisking these dry ingredients together ensures that the leavening agents (baking soda) and salt are evenly distributed throughout the flour, which leads to a consistent rise and flavor in your baked bread. This is a simple yet important step that often gets overlooked.
Bringin extractg It All Together
Now it’s time to combine the wet and dry ingredients. Add the dry ingredients to the wet ingredients in two additions, mixing on low speed or by hand with a spatula until just combined. It’s crucial not to overmix the batter once the flour is added. Overmixing can develop the gluten in the flour too much, resulting in a tough and dense banana bread. You should still see a few streaks of flour – that’s perfectly fine. A gentle, folding motion is best here.
Folding in the Goodies
This is where the magic happens! Gently fold in the dark chocolate chunks or chips and the halved raspberries. Before adding them to the batter, I like to toss the raspberries with the extra tablespoon of flour. This helps prevent them from sinking to the bottom of the bread as it bakes. Use a spatula to fold them in with a light hand, distributing them as evenly as possible throughout the batter. You want to see pockets of chocolate and bursts of raspberry throughout every slice.
Baking the Raspberry Dark Chocolate Banana Bread
Preparing the Pan and Baking
Preheat your oven to 350°F (175°C). Grease and flour a standard 9×5 inch loaf pan, or line it with parchment paper, leaving an overhang on the sides for easy removal. Pour the batter into the prepared loaf pan and spread it evenly. You can even add a few extra raspberries or chocolate chips on top for decoration if you like. Bake for 50-65 minutes, or until a wooden skewer or toothpick inserted into the center of the loaf comes out clean, with just a few moist crum extractbs attached (no wet batter). The baking time can vary depending on your oven, so start checking around the 50-minute mark. If thgin extractop begins to brown too quickly, you can loosely tent it with aluminum foil.
Cooling for Perfection
Once baked, remove the loaf pan from the oven and let it cool in the pan on a wire rack for about 15-20 minutes. This allows the bread to set properly. After this initial cooling period, carefully invert the loaf onto the wire rack to cool completely. Allowing it to cool completely before slicing is essential. If you cut into it too early, it can be gummy and fall apart. The flavors also meld and develop more as it cools. Resist the temptation to slice it warm – the wait is truly worth it for the best texture and flavor!
Conclusion:
We’ve reached the end of our delightful journey in baking the perfect Raspberry Dark Chocolate Banana Bread! This recipe truly delivers on its promise of a moist, rich, and deeply satisfying treat. The tartness of the raspberries beautifully cuts through the sweetness of the ripe bananas, while the dark chocolate chips melt into decadent pockets of bliss. It’s a wonderful way to use up overripe bananas and create something truly special for breakfast, a snack, or even a dessert. I encourage you to give this Raspberry Dark Chocolate Banana Bread a try; the aroma filling your kitchen will be worth it, and the taste will have you baking it again and again.
This versatile bread is fantastic served warm, perhaps with a smear of butter or a dollop of Greek yogurt. It also makes a lovely accompaniment to a cup of coffee or tea. For variations, consider adding a sprinkle of chopped walnuts or pecans for extra crunch, or a pinch of cinnamon to the batter for a warmer spice note. You could even swirl in some raspberry jam for an intensified berry flavor.
Frequently Asked Questions about Raspberry Dark Chocolate Banana Bread:
Q1: How do I know when my Raspberry Dark Chocolate Banana Bread is done baking?
Your Raspberry Dark Chocolate Banana Bread is ready when a wooden skewer or toothpick inserted into the center comes out clean, with perhaps a few moist crum extractbs attached but no wet batter. The top should be golden brown and slightly springy to the touch.
Q2: Can I make this Raspberry Dark Chocolate Banana Bread ahead of time?
Absolutely! This Raspberry Dark Chocolate Banana Bread keeps well at room temperature for 2-3 days, stored in an airtight container. For longer storage, it freezes beautifully. Once cooled completely, wrap it tightly in plastic wrap and then in foil, and it can be frozen for up to 3 months. Thaw at room temperature.
Raspberry Dark Chocolate Banana Bread
A moist and flavorful banana bread packed with dark chocolate chunks and fresh raspberries.
Ingredients
-
2 cups all-purpose flour, plus 1 tablespoon for tossing raspberries
-
¾ teaspoon baking soda
-
½ teaspoon salt
-
1 cup granulated white sugar
-
4 tablespoons (½ stick) unsalted butter, softened
-
2 large eggs
-
1½ cups mashed ripe banana
-
⅓ cup plain low-fat yogurt
-
1 teaspoon vanilla extract
-
1 cup dark chocolate chunks or chips
-
1 cup fresh raspberries, halved
Instructions
-
Step 1
In a large mixing bowl, cream together softened butter and granulated sugar using an electric mixer on medium-high speed for 3-5 minutes until light, fluffy, and pale yellow. Scrape down the sides of the bowl as needed. -
Step 2
Add eggs one at a time, beating well after each addition until fully incorporated. Stir in the vanilla extract. -
Step 3
Gently fold in mashed banana and plain low-fat yogurt until just combined. Do not overmix. -
Step 4
In a separate medium bowl, whisk together flour, baking soda, and salt. Add this dry mixture to the wet ingredients in two additions, mixing on low speed or by hand with a spatula until just combined. Avoid overmixing. -
Step 5
Toss raspberries with the extra tablespoon of flour to prevent sinking. Gently fold the floured raspberries and dark chocolate chunks or chips into the batter. -
Step 6
Preheat oven to 350°F (175°C). Grease and flour a 9×5 inch loaf pan or line it with parchment paper. Pour batter into the pan and spread evenly. -
Step 7
Bake for 50-65 minutes, or until a wooden skewer inserted into the center comes out clean. If the top browns too quickly, tent with aluminum foil. -
Step 8
Let the bread cool in the pan on a wire rack for 15-20 minutes. Then, invert onto the wire rack to cool completely before slicing.
Important Information
Nutrition Facts (Per Serving)
It is important to consider this information as approximate and not to use it as definitive health advice.
Allergy Information
Please check ingredients for potential allergens and consult a health professional if in doubt.