Easy Strawberry Cobbler Recipe-Sweet Summer Treat
Strawberry Cobbler is more than just a dessert; it’s a warm hug on a plate, a sweet whisper of summer days, and the ultimate comfort food. There’s something undeniably magical about the bubbling, ruby-red strawberry filling peeking through a golden, biscuit-like topping. It’s a dish that evokes childhood memories, family gatherings, and lazy afternoons spent in the sunshine. What makes this Strawberry Cobbler so universally adored? Perhaps it’s the perfect balance of tart and sweet, the textural contrast between the soft, juicy fruit and the tender, slightly crum extractbly crust, or simply the joy it brings to share. It’s a rustic, unfussy treat that doesn’t demand perfection, allowing the natural beauty of the strawberries to shine. Get ready to create your own slice of sunshine with this incredibly satisfying recipe.
Strawberry Cobbler
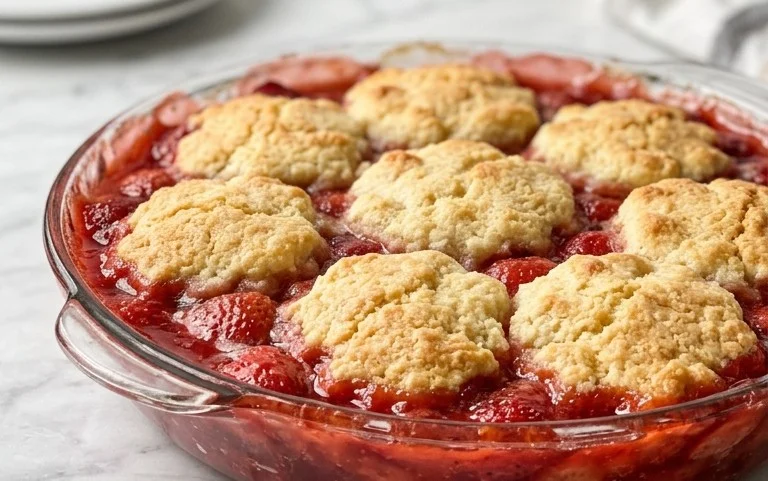
There’s something undeniably comforting about a warm, bubbly fruit cobbler. The sweet, slightly tart burst of fresh strawberries, cradled by a tender, golden biscuit-like topping, is pure dessert perfection. This strawberry cobbler recipe is wonderfully straightforward, allowing the natural sweetness of the berries to shine. It’s the perfect dessert for a casual weeknight treat or to impress guests at a summer gathering. The beauty of a cobbler lies in its rustic charm; it doesn’t need to be perfect to be delicious. So, gather your ingredients and let’s get baking!
Ingredients:
Instructions:
Prepare the Strawberry Filling:
The first step to an incredible cobbler is creating a delicious fruit base. In a medium bowl, combine the 1/2 cup of white sugar and 2 Tablespoons of cornstarch. Whisk these together thoroughly. The cornstarch is crucial here; it acts as a thickener, preventing your filling from becoming too watery. Next, pour in the 1/4 cup of lemon juice. The lemon juice not only adds a bright, zesty note that complements the sweetness of the strawberries but also helps activate the pectin in the fruit, aiding in the thickening process. Now, gently add the 3 cups of hulled and sliced fresh strawberries to the bowl. Toss them with the sugar, cornstarch, and lemon juice mixture until they are evenly coated. Be gentle with your strawberries; you want them to retain their shape somewhat so they don’t turn into complete mush during baking. Once coated, carefully pour this strawberry mixture into your chosen baking dish. A 9-inch pie plate or an 8×8 inch baking dish works perfectly for this recipe. Spread the strawberries out in an even layer across the bottom of the dish. Finally, take the 2 Tablespoons of cold butter, diced into small pieces, and dot them over the top of the strawberries. These little pockets of butter will melt as the cobbler bakes, adding richness and helping to create a glossy, delicious fruit filling.
Make the Cobbler Topping:
While your strawberries are patiently waiting in the baking dish, we’ll prepare the star of the show: the topping. In a separate medium bowl, whisk together the 1 cup of all-purpose flour, 1 Tablespoon of white sugar, 1 1/2 Teaspoons of baking powder, and 1/2 Teaspoon of salt. This dry mixture forms the base of our cobbler topping. Now, add the 3 Tablespoons of cold butter, cut into small cubes, to the dry ingredients. Using a pastry blender, two forks, or your fingertips, cut the butter into the flour mixture until it resembles coarse crum extractbs, with some pea-sized pieces of butter still visible. It’s important that the butter is cold; this is what will create those delightful, flaky layers in your topping as it bakes. Don’t overmix at this stage; we want those butter pieces to remain intact.
Combine and Prepare for Baking:
Now it’s time to bring the topping together. Gradually pour in the 1/2 cup of heavy cream into the flour and butter mixture. Stir gently with a fork or spatula until just combined. The dough will be a bit shaggy and slightly sticky, and that’s perfectly fine. Overworking the dough will result in a tough topping, so stop mixing as soon as no dry flour remains. The key here is a light hand. You want a tender biscuit-like texture, not something dense and chewy. You can either spoon this dough over the strawberry filling in dollops, leaving some spaces for the bubbly filling to peek through (which is the traditional cobbler look), or you can gently spread it out to cover the entire surface of the strawberries. For a more rustic presentation, dolloping is preferred. Ensure you distribute the dough relatively evenly, creating a delicious blanket for the fruit.
Bake the Cobbler:
Preheat your oven to 375 degrees Fahrenheit (190 degrees Celsius). Once your oven is preheated and your cobbler is assembled in its baking dish, carefully place it on a baking sheet (to catch any potential drips). Place the baking sheet in the center of the preheated oven. Bake for approximately 30 to 40 minutes. You’re looking for a beautifully golden-brown topping and a filling that is actively bubbling around the edges. The aroma that will fill your kitchen during this time is simply divine! If you notice the topping is browning too quickly before the filling is fully heated and bubbling, you can loosely tent the cobbler with aluminum foil for the last 10-15 minutes of baking.
Serve and Enjoy:
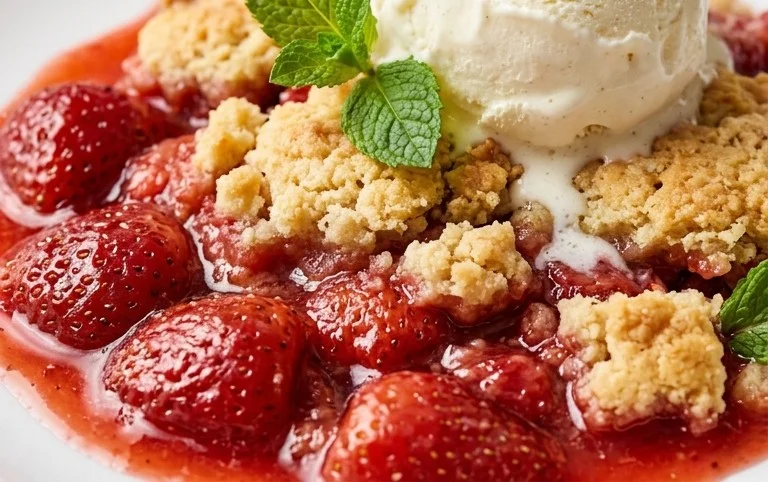
Once the cobbler is baked to perfection, carefully remove it from the oven. Let it rest for about 10 to 15 minutes before serving. This resting period is important as it allows the filling to set slightly, preventing it from being too runny when you scoop it out. The bubbling filling will be extremely hot, so patience is rewarded. Serve your warm strawberry cobbler by the scoopful. It’s absolutely divine on its own, but for an extra special treat, I highly recommend serving it with a scoop of vanilla ice cream or a dollop of freshly whipped cream. The contrast of the warm, sweet cobbler with the cold, creamy toppings is pure bliss. This is a dessert that truly embodies simple pleasures and the joy of homemade goodness.
Conclusion:
There you have it – a simple yet incredibly satisfying Strawberry Cobbler recipe that’s sure to become a household favorite! This dessert truly shines with its delightful contrast of sweet, juicy strawberries nestled beneath a warm, tender, and slightly crisp topping. It’s the perfect way to celebrate fresh strawberries, offering a comforting and relatively effortless baking experience that yields impressive results. Whether you’re a seasoned baker or just starting out, this recipe is wonderfully forgiving and guaranteed to bring smiles to your table.
This versatile cobbler is a dream served warm, ideally with a generous scoop of vanilla bean ice cream melting into the fruit, or a dollop of whipped cream for a lighter touch. It’s also fantastic alongside a warm mug of coffee or a glass of milk. Don’t be afraid to experiment with variations! Consider adding a pinch of cinnamon or nutmeg to the topping for an extra layer of warmth, or a tablespoon of lemon zest to the strawberry filling to brighten the flavors even further. You could even mix in a handful of blueberries or raspberries with the strawberries for a delightful berry medley. I truly encourage you to give this wonderful Strawberry Cobbler a try – you won’t regret it!
Frequently Asked Questions:
Can I use frozen strawberries?
Absolutely! If using frozen strawberries, there’s no need to thaw them completely. You can simply drain off any excess liquid before adding them to your baking dish, or slightly increase the baking time to ensure the filling is fully heated through and bubbling.
What if I don’t have self-rising flour?
No problem! You can easily make your own self-rising flour substitute. For every cup of self-rising flour called for in the recipe, use 1 cup of all-purpose flour, add 1 ½ teaspoons of baking powder, and ½ teaspoon of salt. Whisk it all together before proceeding with the recipe.
How long does strawberry cobbler last?
Stored in an airtight container in the refrigerator, leftover strawberry cobbler will typically stay fresh for about 2-3 days. Reheat gently in the oven or microwave for the best texture.
Strawberry Cobbler
A delightful and easy strawberry cobbler with a tender biscuit-like topping.
Ingredients
-
1/2 cup white sugar
-
2 Tablespoons cornstarch
-
1/4 cup lemon juice
-
3 cups fresh strawberries, hulled and sliced into 1/4 inch slices
-
2 Tablespoons cold butter, diced
-
1 cup all purpose flour
-
1 Tablespoon white sugar
-
1 1/2 Teaspoons baking powder
-
1/2 Teaspoon salt
-
3 Tablespoons cold butter, cut into cubes
-
1/2 cup heavy cream
Instructions
-
Step 1
Preheat oven to 375°F (190°C). -
Step 2
In a medium bowl, combine 1/2 cup white sugar, cornstarch, and lemon juice. Add sliced strawberries and toss to coat. Pour the strawberry mixture into a lightly greased 8×8 inch baking dish. -
Step 3
Dot the top of the strawberries with the 2 tablespoons of diced cold butter. -
Step 4
In a separate bowl, whisk together the all purpose flour, 1 tablespoon white sugar, baking powder, and salt. -
Step 5
Cut in the 3 tablespoons of cold butter cubes until the mixture resembles coarse crumbs. -
Step 6
Pour in the heavy cream and mix until just combined to form a dough. Drop spoonfuls of the dough over the strawberries. -
Step 7
Bake for 30-35 minutes, or until the topping is golden brown and the filling is bubbly. -
Step 8
Let cool slightly before serving.
Important Information
Nutrition Facts (Per Serving)
It is important to consider this information as approximate and not to use it as definitive health advice.
Allergy Information
Please check ingredients for potential allergens and consult a health professional if in doubt.