Crispy Chicken Caesar Sandwich-Best Ever
Crispy Chicken Caesar Sandwich perfection awaits! If you’re anything like me, the thought of a classic Caesar salad brings a smile to your face. The creamy, tangy dressing, the crisp romaine, the salty parmesan… it’s a flavor symphony. But what if I told you we could elevate that beloved experience into something even more satisfying? Enter the Crispy Chicken Caesar Sandwich. It takes all those familiar, comforting flavors and wraps them in a crispy, golden package that’s utterly irresistible. We’re talking about tender chicken, fried to absolute perfection, slathered in that iconic Caesar dressing, nestled between soft buns with all the trimmings. It’s the ultimate weeknight hero, a weekend treat, and frankly, just a darn good way to enjoy lunch or dinner.
Why This Crispy Chicken Caesar Sandwich Will Be Your New Favorite
Get ready for a flavor explosion!
The Ultimate Crispy Chicken Caesar Sandwich: A Recipe for Pure Bliss
Sometimes, you just crave comfort. You know, that deeply satisfying, flavor-packed meal that makes everything feel right with the world. For me, that craving often leads me to a perfectly executed Crispy Chicken Caesar Sandwich. It’s a classic for a reason, but elevating it with extra crispy chicken and a homemade, zesty Caesar dressing takes it from good to absolutely unforgettable. Forget soggy bread and bland chicken – this recipe is all about achieving that perfect crunch and a symphony of flavors that will have you licking your fingers.
This isn’t just a sandwich; it’s an experience. Imagin extracte tender, juicy chicken, coated in a golden, shatteringly crisp crust, nestled between soft buns, all brought together by a creamy, tangy Caesar dressing that’s bursting with garlic and Parmesan. It’s the kind of sandwich that’s perfect for a weekend lunch, a weeknight treat, or even a casual dinner party. Get ready to impress yourself and anyone lucky enough to share this culinary masterpiece with you.
Ingredients:
The Star of the Show: Crispy Chicken Cutlets
The foundation of this incredible sandwich is, of course, the chicken. We want it juicy on the inside and incredibly crispy on the outside. For this, I highly recommend using chicken cutlets. If you can’t find pre-cut cutlets, you can easily pound chicken breasts to an even thickness yourself. This ensures they cook quickly and evenly, preventing any dry, overcooked bits. Seasoning is key here, so don’t skimp on the salt and pepper!
Step 1: Preparing the Chicken for Perfection
Begin extract by patting your chicken cutlets completely dry with paper towels. This is a crucial step for achieving maximum crispiness. Moisture is the enemy of a good fry! Next, season both sides of each cutlet generously with sea salt and ground black pepper. Don’t be shy with the seasoning; it’s going to infuse the chicken with so much flavor. Now, in a shallow dish, combine the ⅓ cup of all-purpose flour with the ½ teaspoon of salt. This simple flour coating will act as the base for our crispy exterior. Dredge each seasoned chicken cutlet in the seasoned flour, ensuring it’s coated on all sides. Gently shake off any excess flour.
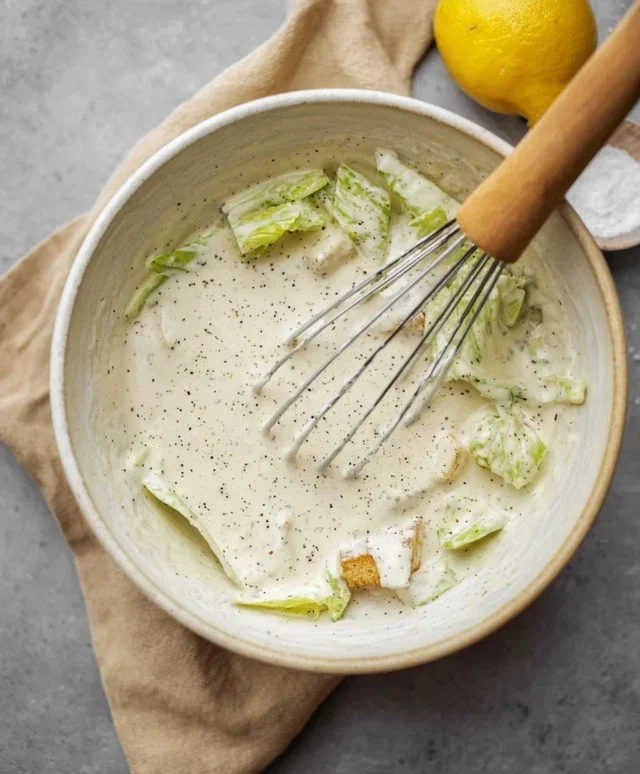
Step 2: Crafting Our Dreamy Caesar Dressing
While our chicken is getting ready for its close-up, let’s whip up the most important part of any Caesar: the dressing! In a medium bowl, combine the ½ cup of full-fat mayonnaise, 3 tablespoons of Greek yogurt (for a little tang and creaminess), 1 teaspoon of Dijon mustard, and 1 teaspoon of Worcestershire sauce. Add the 2 tablespoons of fresh lemon juice, which will brighten everything up beautifully. Next, fold in the ¼ cup of freshly grated Parmesan cheese – the real stuff, not the pre-shredded kind, makes a world of difference. Mince your 1-2 garlic cloves very finely, or even consider using a garlic press for maximum flavor infusion. Add the minced garlic to the bowl, along with ¼ teaspoon of black pepper and a pinch of sea salt. Whisk everything together until it’s wonderfully smooth and emulsified. Taste and adjust seasoning if needed. You want a dressing that’s creamy, tangy, garlicky, and has that perfect hint of saltiness. If it’s too thick, you can always add a tiny splash more lemon juice or even a teaspoon of water to thin it out.
Step 3: The Art of Frying for Ultimate Crispiness
Now for the magic: frying the chicken. Heat a generous amount of oil in a large skillet over medium-high heat. You want enough oil to come about halfway up the sides of the chicken cutlets. A good test to see if the oil is ready is to drop a tiny bit of flour into it; if it sizzles immediately, you’re good to go. Carefully place the floured chicken cutlets into the hot oil, being careful not to overcrowd the pan. You might need to cook them in batches, depending on the size of your skillet. Overcrowding will lower the oil temperature and lead to greasy, soggy chicken.
Step 4: Golden Perfection and Resting
Fry the chicken cutlets for about 3-5 minutes per side, or until they are a deep golden brown and cooked through. The exact time will depend on the thickness of your cutlets. You’ll know they’re done when they feel firm to the touch and an instant-read thermometer inserted into the thickest part reads 165°F (74°C). Once they’re beautifully golden and crispy, carefully remove them from the skillet using a slotted spoon or tongs. Place them on a wire rack set over a baking sheet. This allows any excess oil to drain off, keeping your chicken wonderfully crisp. Season them with a little extra sea salt and ground black pepper while they’re still hot. Let them rest for a minute or two before assembling the sandwiches. This resting period allows the juices to redistribute, ensuring a moist and flavorful bite.
Step 5: Assembling Your Masterpiece
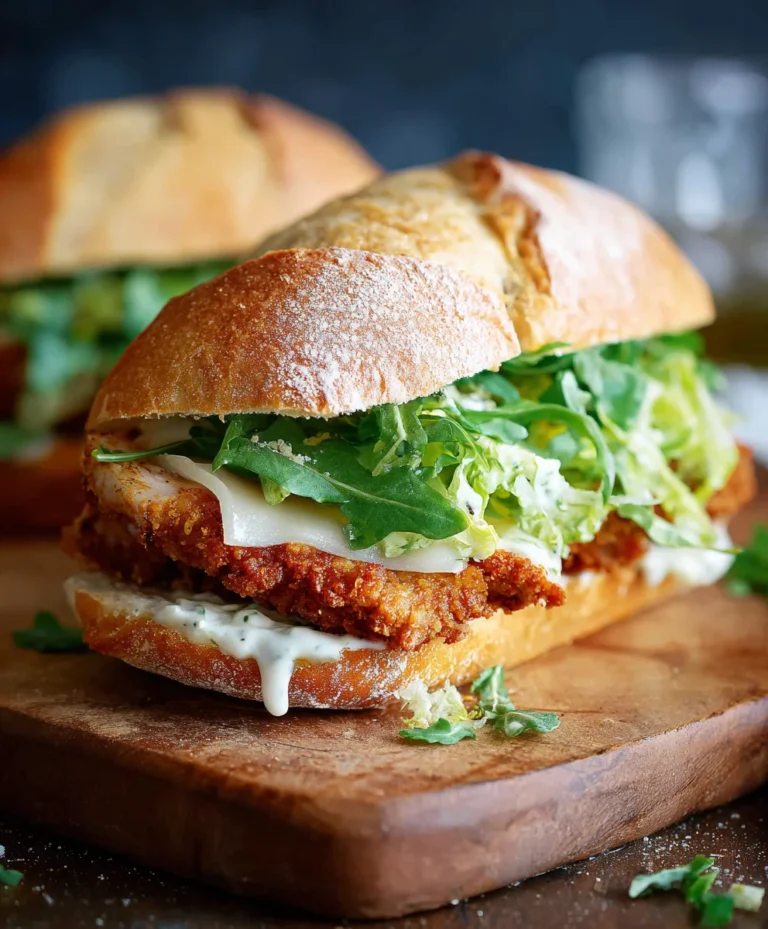
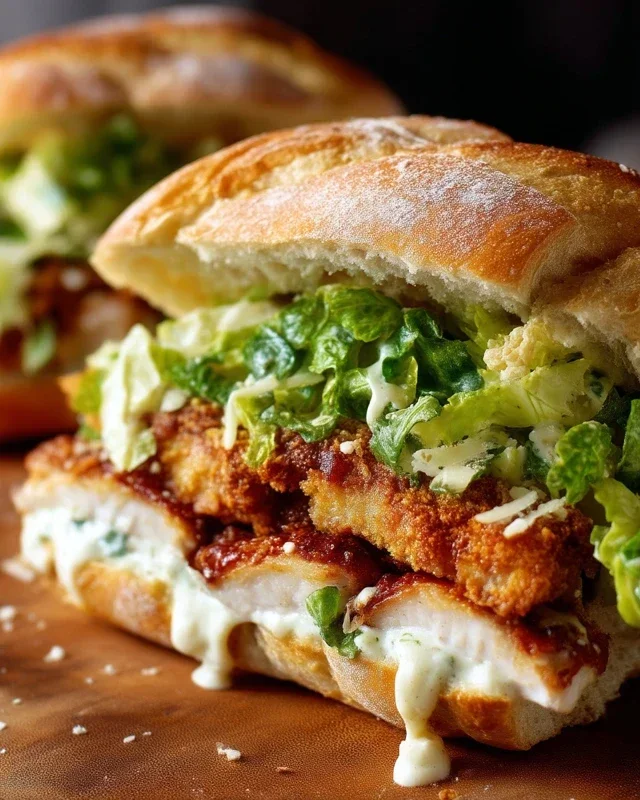
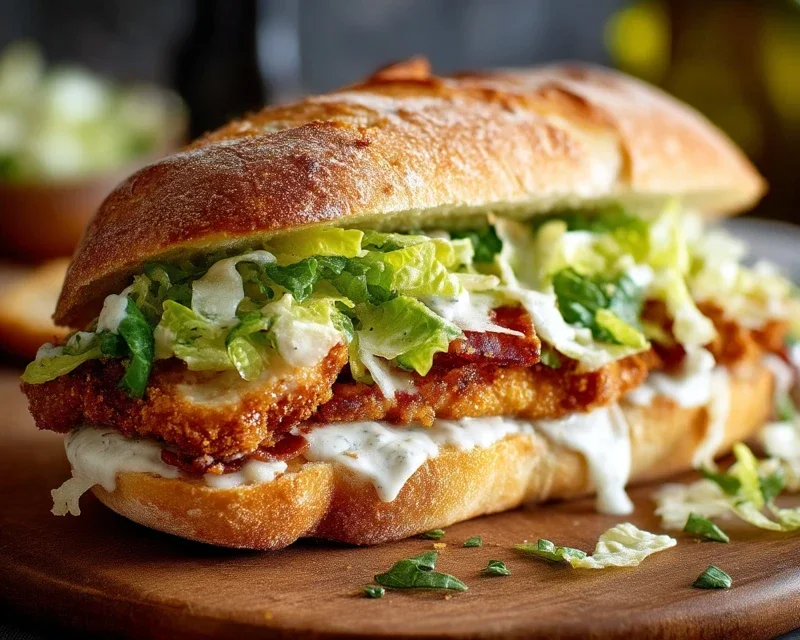
To assemble, take your favorite sandwich buns (toasted or plain, your choice!). Spread a generous amount of your homemade Caesar dressing on both the top and bottom halves of the bun. Place a crispy chicken cutlet on the bottom bun, followed by a few crisp lettuce leaves (romaine is traditional and excellent here), and then a final drizzle of Caesar dressing. Top with the other half of the bun. For an extra touch of decadence, you can even sprinkle a little more grated Parmesan cheese on top of the lettuce. Slice in half, admire your handiwork, and dive in! The combination of textures and flavors is simply divine. Enjoy every single bite!
Conclusion:
There you have it – the ultimate guide to crafting a truly sensational Crispy Chicken Caesar Sandwich! We’ve explored how to achieve that perfect golden-brown crunch on your chicken, the importance of a zesty Caesar dressing, and the delightful balance of crisp romaine and fluffy bread. This sandwich is a winner because it takes a beloved classic and elevates it into a satisfying meal that’s surprisingly easy to make at home. It’s incredibly versatile, making it perfect for a quick weeknight dinner, a decadent lunch, or even a crowd-pleasing option for a casual get-together. Don’t hesitate to experiment with the ingredients to suit your taste; that’s the beauty of home cooking!
For an extra special treat, consider serving your Crispy Chicken Caesar Sandwich with a side of sweet potato fries, a light coleslaw, or a refreshing cucumber salad. I genuinely encourage you to give this recipe a try. You won’t be disappointed with the explosion of flavors and textures!
Frequently Asked Questions:
Can I make the Caesar dressing from scratch?
Absolutely! While store-bought dressing is convenient, making your own Caesar dressing is incredibly rewarding. A simple homemade version typically includes egg yolk, Dijon mustard, garlic, anchovy paste, lemon juice, Parmesan cheese, and olive oil. It adds an extra layer of fresh, bold flavor that really complements the crispy chicken.
What if I don’t have croutons?
No problem! If you’re out of croutons, you can easily toast some cubed bread in the oven with a little olive oil, garlic powder, and salt until golden and crispy. Alternatively, you could crum extractble some potato chips on top for an unexpected but delicious crunch!
Are there any ways to make this sandwich healthier?
Definitely! For a lighter option, consider grilling or baking your chicken instead of frying, or using a whole wheat bun. You can also pack in extra greens by adding spinach or arugula along with the romaine lettuce. Reducing the amount of mayonnaise in the dressing or opting for a lighter version can also make a difference.
Crispy Chicken Caesar Sandwich
A delicious and satisfying sandwich featuring crispy fried chicken cutlets topped with a creamy homemade Caesar dressing.
Ingredients
-
½ cup full-fat mayonnaise
-
3 tbsp Greek yogurt
-
1 tsp Dijon mustard
-
1 tsp Worcestershire sauce
-
2 tbsp lemon juice
-
¼ cup Parmesan cheese (freshly grated)
-
1-2 garlic cloves (minced)
-
¼ tsp black pepper
-
Pinch sea salt
-
5 chicken cutlets
-
sea salt (to taste)
-
ground black pepper (to taste)
-
Oil (for frying)
-
⅓ cup all-purpose flour
-
½ tsp salt
Instructions
-
Step 1
In a medium bowl, whisk together mayonnaise, Greek yogurt, Dijon mustard, Worcestershire sauce, lemon juice, Parmesan cheese, minced garlic, ¼ tsp black pepper, and a pinch of sea salt to make the Caesar dressing. Set aside. -
Step 2
Season the chicken cutlets generously with sea salt and ground black pepper to taste. -
Step 3
In a shallow dish, combine the all-purpose flour, ½ tsp salt, and a pinch of ground black pepper. Dredge each chicken cutlet in the flour mixture, ensuring it is evenly coated. -
Step 4
Heat enough oil in a large skillet over medium-high heat for shallow frying. Carefully place the floured chicken cutlets into the hot oil and fry for about 4-6 minutes per side, or until golden brown and cooked through. -
Step 5
Remove the fried chicken cutlets from the skillet and place them on a wire rack or paper towel-lined plate to drain excess oil. -
Step 6
Assemble the sandwiches by placing a crispy chicken cutlet on the bottom half of your desired bread (not included in ingredients). Top with a generous amount of the prepared Caesar dressing. Add any other desired toppings (not included in ingredients) and cover with the top half of the bread.
Important Information
Nutrition Facts (Per Serving)
It is important to consider this information as approximate and not to use it as definitive health advice.
Allergy Information
Please check ingredients for potential allergens and consult a health professional if in doubt.