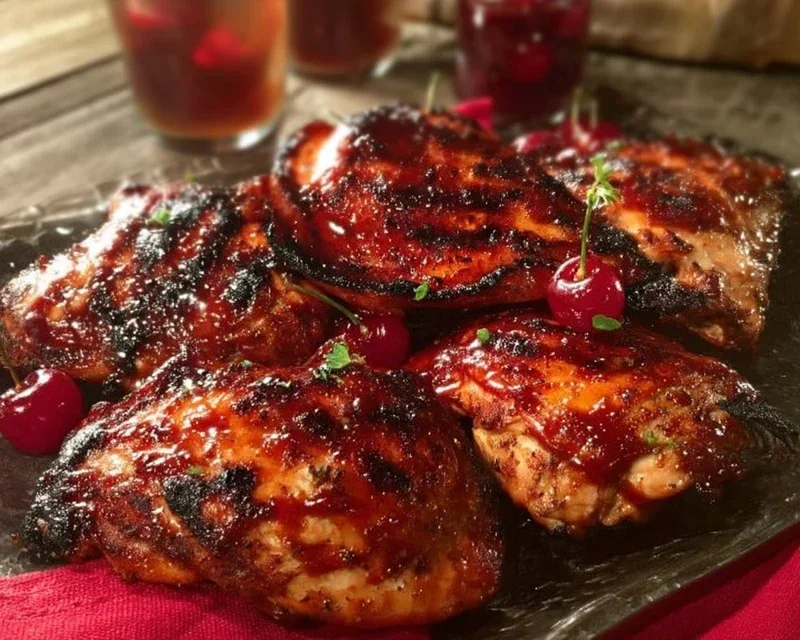
Cherry Dr Pepper Grilled Chicken-Sweet & Smoky Flavor
Cherry Dr. Pepper grilled chicken is an absolute game-changer for your backyard barbecue, and I’m so excited to share this recipe with you! Imagin extracte sinking your teeth into perfectly tender, juicy chicken infused with a symphony of sweet cherry and the distinctive effervescent kick of Dr. Pepper. This isn’t just another grilled chicken recipe; it’s an experience. The magic happens as the soda and cherry flavors caramelize on the grill, creating an irresistible sticky glaze that coats every bite. People go wild for this Cherry Dr. Pepper grilled chicken because it’s unexpectedly delicious, surprisingly easy to make, and always a crowd-pleaser. Whether you’re a seasoned griller or a begin extractner, this dish will elevate your outdoor cooking to a whole new level, leaving everyone beggin extractg for the secret. Get ready to impress your friends and family with this unforgettable flavor explosion.

Cherry Dr. Pepper Grilled Chicken: A Sweet and Savory Sensation
Get ready to elevate your grilling game with this incredible Cherry Dr. Pepper Grilled Chicken recipe. This isn’t your average barbecue chicken. The unique combination of sweet cherry, classic Dr. Pepper, and a savory blend of spices creates a glaze that’s absolutely irresistible. It’s perfect for a backyard cookout, a family dinner, or any occasion where you want to impress with minimal fuss. The secret lies in a luscious, homemade sauce that caramelizes beautifully on the grill, locking in moisture and flavor.
Ingredients:
Crafting the Cherry Dr. Pepper Glaze
The heart of this recipe is the incredible glaze. It’s surprisingly easy to make and the flavor payoff is immense. You’ll want to prepare this ahead of time so it has a chance to meld and thicken slightly.
1. In a medium saucepan, combine the 12 oz can of Cherry Dr. Pepper, 1 cup of ketchup, and the 6 oz can of tomato paste. Stir these ingredients together until they are well incorporated. This forms the base of our flavorful sauce, providing both a sweet and tangy foundation.
2. Add the 1 cup of brown sugar to the saucepan. The brown sugar is crucial for achieving that beautiful caramelized crust on the grill. Stir it in until it’s completely dissolved into the liquid base. Next, incorporate the 1 tablespoon of Worcestershire sauce. This adds a depth of savory, umami flavor that balances the sweetness perfectly.
3. Now it’s time to introduce the aromatics and spices. Add the 1/2 teaspoon of onion powder for a subtle savory note, and the 1/2 teaspoon of black pepper for a touch of warmth. The 1/2 teaspoon of liquid smoke will give your chicken a wonderful smoky flavor without needing a smoker. Finally, add the 1/2 teaspoon of chili powder for a hint of spice, the 1 teaspoon of minced garlic for that classic garlic punch, and the 1 teaspoon of paprika for color and a mild earthy flavor. Stir everything thoroughly until all the spices are evenly distributed.
4. Place the saucepan over medium heat. Bring the mixture to a gentle simmer, stirring occasionally. Allow the glaze to simmer for about 10-15 minutes, or until it has thickened to a consistency that coats the back of a spoon. The longer it simmers, the more intense the flavors will become and the thicker the glaze will get, which is ideal for grilling. Be sure to keep an eye on it to prevent it from burning. Once it’s reached your desired consistency, remove it from the heat and set it aside. You can make this glaze a day in advance and store it in an airtight container in the refrigerator; it might thicken further when chilled, so you may need to gently warm it before using.
Preparing and Grilling the Chicken
With our delicious glaze ready, it’s time to prepare the star of the show: the chicken. The key to juicy, flavorful grilled chicken is proper preparation and careful cooking.
1. Begin extract by preparing your chicken. If you’re using a whole chicken cut into pieces, ensure it’s thoroughly cleaned and patted dry. If you have a package of dark meat chicken, like thighs or drum extractsticks, rinse them under cold water and pat them completely dry with paper towels. This step is important for ensuring even cooking and for allowing the seasoning to adhere properly. Evenly season all sides of the chicken pieces with the 3 teaspoons of seasoning salt and the 1 teaspoon of paprika. Make sure each piece is well-coated.
2. Preheat your grill to medium-high heat. This temperature is ideal for searing the chicken and getting a nice char without burning the glaze too quickly. If you’re using a gas grill, this usually means setting the temperature around 400-450 degrees Fahrenheit. For a charcoal grill, aim for a well-established bed of coals that are covered in gray ash. It’s also a good idea to lightly oil your grill grates to prevent the chicken from sticking. You can do this by using a paper towel dipped in oil (use a high smoke point oil like canola or vegetable oil) and carefully wiping the grates.
3. Place the seasoned chicken pieces directly on the preheated grill. Let them cook for about 5-7 minutes per side, or until you see some nice grill marks developing and the chicken is starting to firm up. This initial searing helps to lock in the juices and build flavor. Remember that cooking times can vary depending on the thickness of your chicken pieces and the heat of your grill, so keep a close watch.
4. Now comes the fun part – glazing! After the initial searing, generously brush the Cherry Dr. Pepper glaze all over the chicken pieces. Use a pastry brush for even application. Flip the chicken and brush the other side with the glaze. Continue grilling, brushing with more glaze every few minutes, for an additional 15-25 minutes, or until the chicken is cooked through and the glaze is bubbly and caramelized. The internal temperature of the chicken should reach 165 degrees Fahrenheit. Dark meat is more forgiving and can be cooked a bit longer for extra tenderness. Be cautious of flare-ups as the sugar in the glaze can cause them; if you see excessive flames, move the chicken to a cooler part of the grill or briefly close the lid.
5. Once your Cherry Dr. Pepper Grilled Chicken has reached an internal temperature of 165 degrees Fahrenheit and has a beautiful, glossy, caramelized glaze, carefully remove it from the grill. It’s important to let the chicken rest for at least 5-10 minutes before serving. This allows the juices to redistribute throughout the meat, ensuring that every bite is incredibly moist and flavorful. Tent it loosely with foil to keep it warm while it rests. Serve hot and enjoy the sweet, savory, and slightly smoky explosion of flavor!
Conclusion:
There you have it! This Cherry Dr. Pepper Grilled Chicken recipe is a true winner. It’s incredibly easy to prepare, making it perfect for busy weeknights, and the unique flavor combination of sweet cherry and bold Dr. Pepper creates a surprisingly delicious and tender chicken. The grilling process adds that irresistible smoky char that takes it to the next level. I absolutely love how versatile this dish is; it’s sure to become a new favorite in your grilling repertoire.
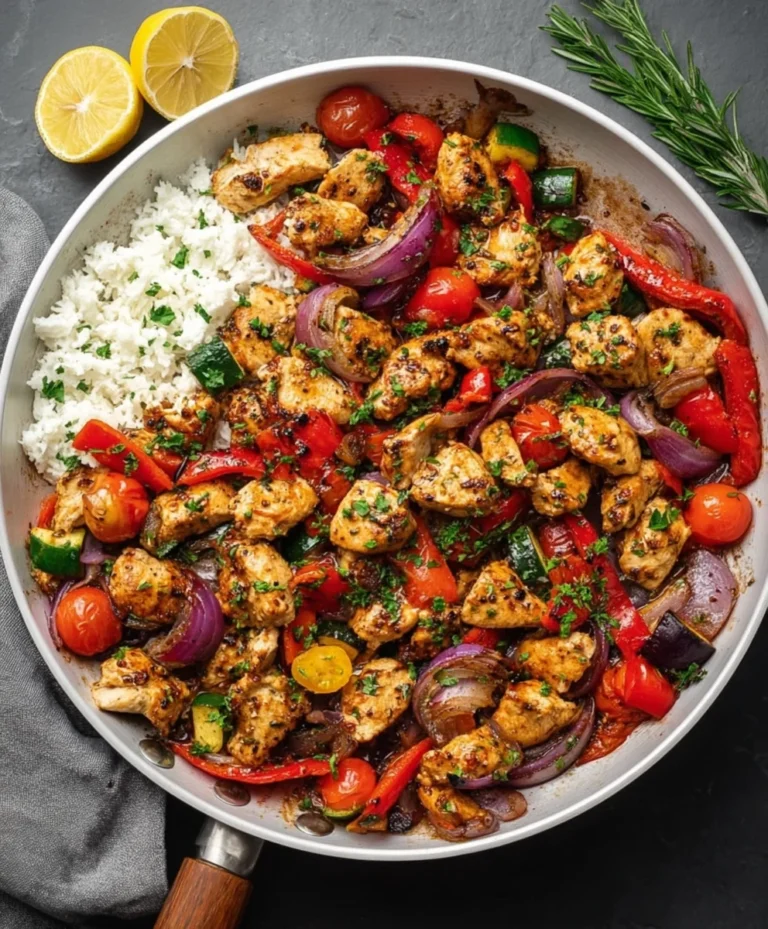
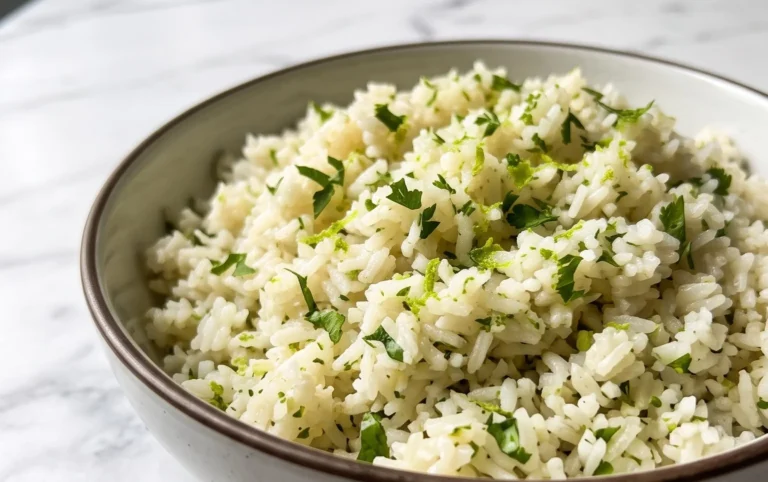
For serving, I highly recommend pairing this Cherry Dr. Pepper Grilled Chicken with classic summer sides like creamy coleslaw, grilled corn on the cob, or a fresh potato salad. It also works wonderfully served over a bed of fluffy rice or alongside a vibrant green salad. Don’t be afraid to experiment with variations! You could add a pinch of cayenne pepper to the marinade for a touch of heat, or incorporate some fresh thyme or rosemary for an herbaceous twist. Seriously, give this recipe a try – you won’t regret it!
Frequently Asked Questions:
Can I make this recipe indoors if I don’t have a grill?
Absolutely! While grilling imparts a wonderful smoky flavor, you can achieve delicious results by pan-searing the chicken in a hot skillet or baking it in the oven. For oven baking, place the marinated chicken on a baking sheet and cook at 400°F (200°C) for about 20-25 minutes, or until fully cooked through, flipping halfway.
How long does the chicken need to marinate?
For the best flavor, I recommend marinating the chicken for at least 30 minutes at room temperature, or up to 4 hours in the refrigerator. Be mindful of over-marinating, especially with acidic ingredients, as it can alter the texture of the chicken.
What kind of chicken works best for this recipe?
This recipe is fantastic with chicken thighs or breasts. Thighs tend to stay more moist and flavorful due to their higher fat content, while breasts offer a leaner option. Adjust grilling or cooking times accordingly for each cut.
Cherry Dr. Pepper Grilled Chicken
A sweet and tangy grilled chicken recipe featuring a unique sauce made with Cherry Dr. Pepper, ketchup, and brown sugar.
Ingredients
-
1 – 12 oz can Cherry Dr. Pepper
-
1 Cup Ketchup
-
1 – 6 oz. can tomato paste
-
1 Cup Brown Sugar
-
1 Tablespoon Worcestershire sauce
-
1/2 tsp. Onion Powder
-
1/2 tsp. black pepper
-
1/2 tsp. liquid smoke
-
1/2 tsp. Chili Powder
-
1 tsp. minced garlic
-
1 whole chicken cut up OR 1 package of dark meat chicken cut up about 12 pieces of chicken
-
3 teaspoons Seasoning Salt
-
1 tsp Paprika
Instructions
-
Step 1
In a saucepan, combine Cherry Dr. Pepper, ketchup, tomato paste, brown sugar, Worcestershire sauce, onion powder, black pepper, liquid smoke, chili powder, minced garlic, paprika, and seasoning salt. Bring to a simmer over medium heat, stirring occasionally, until the sugar dissolves and the sauce thickens slightly, about 10-15 minutes. Reserve 1 cup of the sauce for basting and set aside the rest for serving. -
Step 2
Preheat your grill to medium-high heat. Clean and oil the grill grates. -
Step 3
Pat the chicken pieces dry with paper towels and season them with additional seasoning salt if desired. -
Step 4
Place the chicken pieces on the preheated grill. -
Step 5
Grill the chicken for about 20-25 minutes, flipping occasionally, until it is mostly cooked through. -
Step 6
Begin basting the chicken generously with the reserved 1 cup of sauce. Continue grilling for another 15-20 minutes, basting every 5-7 minutes, until the chicken is fully cooked, reaches an internal temperature of 165°F (74°C), and has a nice caramelized glaze. -
Step 7
Remove the chicken from the grill and let it rest for 5 minutes before serving. Serve with the remaining sauce.
Important Information
Nutrition Facts (Per Serving)
It is important to consider this information as approximate and not to use it as definitive health advice.
Allergy Information
Please check ingredients for potential allergens and consult a health professional if in doubt.