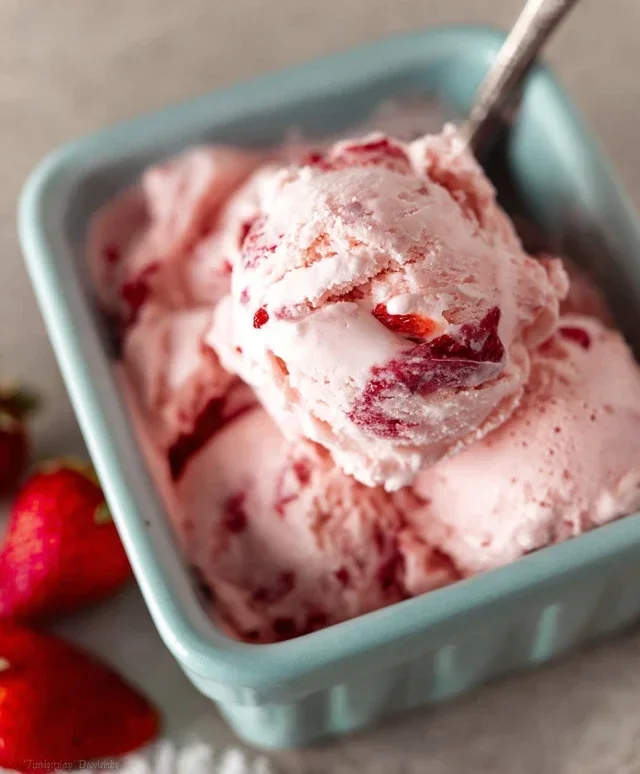
Easy Homemade Strawberry Ice Cream Recipe
Homemade strawberry ice cream is an absolute summertime dream. There’s just something incredibly satisfying about scooping into a bowl of creamy, rich frozen dessert that you’ve crafted with your own two hands. Forget those store-bought tubs; this is the real deal, bursting with the vibrant, sun-kissed flavor of fresh strawberries. We all adore ice cream, and strawberry is a perennial favorite for its sweet, slightly tart profile that perfectly balances the creaminess. What makes this homemade strawberry ice cream truly special is the ability to control the quality of ingredients and achieve a texture that’s simply unparalleled. Imagin extracte that delightful chill, that melt-in-your-mouth sensation, and the intense, natural sweetness of ripe strawberries – it’s pure bliss, and I can’t wait to guide you through making it.

Homemade Strawberry Ice Cream
There’s something incredibly satisfying about creating your own ice cream from scratch. The vibrant color, the sweet burst of fresh fruit, the creamy texture – it’s a taste of pure summer bliss that store-bought versions simply can’t replicate. And when that fruit is plump, ripe strawberries, well, you’re in for a real treat. This homemade strawberry ice cream recipe is remarkably simple to follow, and the results are absolutely spectacular. Forget the ice cream maker for a moment; we’re going to achieve a wonderfully smooth and flavorful ice cream with just a few key ingredients and a little bit of patience. The magic happens with fresh strawberries, a touch of sweetness, and the richness of cream. Get ready to impress yourself (and anyone lucky enough to share a scoop with you!).
Ingredients:
Crafting Your Strawberry Masterpiece: Step-by-Step Instructions
Embarking on the journey of making homemade ice cream is an adventure in simple pleasures. The first step is all about coaxing out the beautiful flavor and color from those gorgeous strawberries.
1. Prepare the Strawberry Base: In a medium bowl, combine your hulled and diced strawberries with the honey, granulated sugar, and lemon juice. The lemon juice is a secret weapon here; it doesn’t make the ice cream sour, but rather brightens the strawberry flavor and helps to balance the sweetness. Give everything a good stir to ensure the sugar and honey start to coat the strawberries. Now, here comes a crucial part for achieving that smooth, luscious texture: let this mixture sit at room temperature for at least 30 minutes, or even up to an hour. This resting period allows the strawberries to macerate, releasing their natural juices and softening up beautifully. As they sit, you’ll see a lovely syrup forming at the bottom of the bowl. This is pure strawberry gold! Once macerated, give the mixture another gentle stir.
2. Blend the Strawberry Goodness: After the strawberries have had their time to macerate, it’s time to transform them into a smooth puree. You have a couple of options here, depending on your preference for texture. For a super smooth ice cream with no strawberry seeds or pulp, use an immersion blender directly in the bowl, or transfer the mixture to a regular blender or a food processor. Blend until you have a velvety smooth consistency. If you prefer a bit more texture in your ice cream, where you can still see and slightly feel the bits of strawberry, you can mash the strawberries with a fork or a potato masher until you reach your desired chunkiness after maceration. For this recipe, I’m aiming for a wonderfully smooth experience, so blending is the way to go.
3. Create the Creamy Foundation: In a separate, larger bowl, combine the heavy whipping cream, half and half, and vanilla extract. Whisk these ingredients together until they are well combined. The heavy cream provides the richness and decadent mouthfeel that defines classic ice cream, while the half and half helps to lighten it just a touch, ensuring it doesn’t become too heavy. The vanilla extract adds a wonderful aromatic depth that complements the strawberry flavor beautifully. Make sure your cream mixture is thoroughly chilled before proceeding; this will help everything come together nicely and contribute to the final texture.
4. Combine and Chill the Ice Cream Base: Now, gently fold your blended strawberry puree into the cream mixture. Use a spatula to incorporate the strawberry mixture, swirling it in until you achieve beautiful streaks of pink and red throughout the white base. You don’t want to overmix at this stage; those lovely swirls are part of the charm! Once combined, cover the bowl tightly with plastic wrap, making sure the plastic wrap touches the surface of the ice cream base to prevent a skin from forming. Refrigerate this mixture for at least 2-4 hours, or ideally overnight. This chilling period is absolutely essential. It allows the flavors to meld together beautifully and, more importantly, ensures the base is thoroughly cold, which is critical for achieving the best texture when it comes time to freeze. A cold base freezes faster and results in smaller ice crystals, meaning a smoother, creamier ice cream.
5. Freeze and Enjoy! (No Ice Cream Maker Needed): This is where the magic truly happens! Pour your chilled strawberry ice cream base into a freezer-safe container. A loaf pan or a shallow, wide container works well as it allows for faster freezing. Place the container in the freezer. Now, every 45 minutes to an hour, you’ll need to stir the ice cream. This process is key to achieving a smooth texture without an ice cream maker. Use a fork or a whisk to break up any ice crystals that are forming on the edges and throughout the mixture. Scrape down the sides and bottom of the container, and stir vigorously to incorporate air and break up the ice. Continue this process for about 4-6 hours, or until the ice cream is firm enough to scoop. The more frequently you stir, especially in the earlier stages, the smoother your ice cream will be. Once it reaches your desired consistency, cover it tightly and let it freeze for another 2-4 hours to firm up completely before serving. Scoop generously and savor the taste of your delicious homemade strawberry ice cream!
Conclusion:
Making homemade strawberry ice cream from scratch is an incredibly rewarding experience, and this recipe makes it delightfully simple. The vibrant, natural sweetness of fresh strawberries, combined with the creamy richness of dairy, creates a truly superior frozen treat that far surpasses anything you’ll find in a store. The joy of pulling a carton of this luscious, homemade strawberry ice cream from your own freezer is immense. It’s perfect for a hot summer day, a special occasion, or simply when you’re craving something truly delicious.
Serving this delightful ice cream is as easy as scooping it into bowls! It’s fantastic on its own, but also pairs wonderfully with freshly baked brownies, a slice of pound cake, or a sprinkle of toasted nuts. For variations, consider adding a swirl of balsamic glaze for a sophisticated twist, a handful of dark chocolate chips for a decadent contrast, or a touch of fresh mint for an invigorating kick. I truly encourage you to give this homemade strawberry ice cream recipe a try; you won’t regret the effort!
Frequently Asked Questions:
Can I use frozen strawberries instead of fresh ones?
Absolutely! If you don’t have fresh strawberries on hand, frozen ones work beautifully. Thaw them completely and drain off any excess liquid before pureeing them for the recipe. The flavor will still be wonderfully intense and delicious.
How long will my homemade strawberry ice cream last in the freezer?
Stored properly in an airtight container, your homemade strawberry ice cream should remain delicious for about 1 to 2 weeks. Beyond that, the texture might start to change, becoming icier, though it will still be safe to eat.
I don’t have an ice cream maker. Can I still make this?
Yes! While an ice cream maker produces the smoothest texture, you can achieve a great result without one. Pour the churned mixture into a freezer-safe container and freeze it. Stir vigorously every 30-45 minutes for the first 2-3 hours to break up ice crystals. It won’t be quite as airy, but it will still be wonderfully creamy and flavorful.
Homemade Strawberry Ice Cream
A simple and delicious homemade strawberry ice cream recipe, perfect for a summer treat.
Ingredients
-
1 1/2 cups strawberries, hulled and diced
-
2 Tbsp honey
-
1/2 cup granulated sugar
-
1 tsp lemon juice
-
1 cup heavy whipping cream
-
1/2 cup half and half
-
1 tsp vanilla extract
Instructions
-
Step 1
In a bowl, combine the diced strawberries with the honey, granulated sugar, and lemon juice. Let it sit for about 10 minutes to allow the strawberries to macerate. -
Step 2
Lightly mash the strawberries with a fork to release more juice. -
Step 3
In a separate bowl, whisk together the heavy whipping cream, half and half, and vanilla extract until well combined. -
Step 4
Gently fold the macerated strawberries into the cream mixture. -
Step 5
Pour the mixture into an ice cream maker and churn according to the manufacturer’s instructions until it reaches a soft-serve consistency. -
Step 6
Transfer the ice cream to an airtight container and freeze for at least 2-4 hours, or until firm.
Important Information
Nutrition Facts (Per Serving)
It is important to consider this information as approximate and not to use it as definitive health advice.
Allergy Information
Please check ingredients for potential allergens and consult a health professional if in doubt.