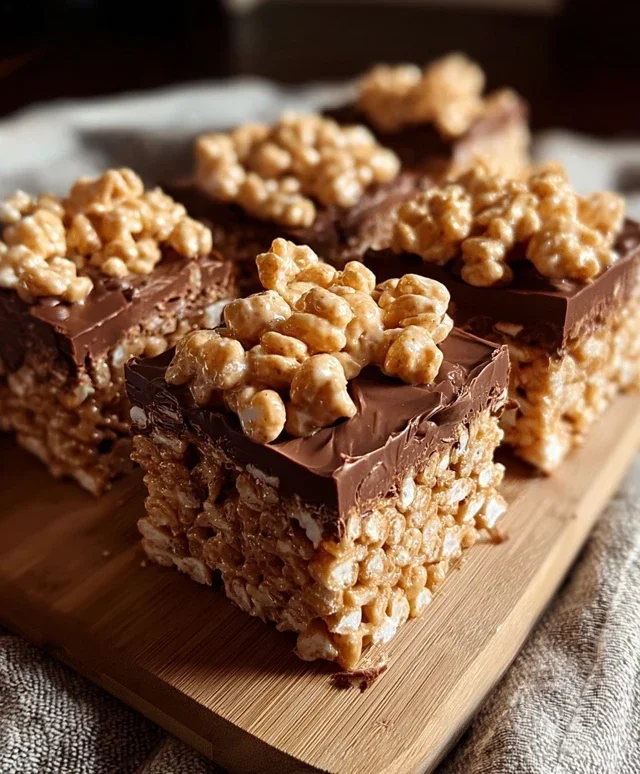
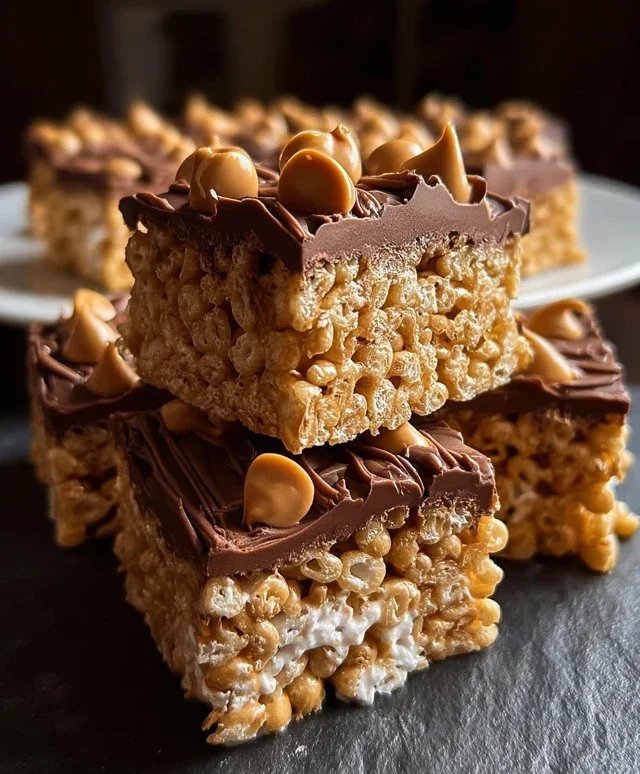
Chocolate Peanut Butter Rice Krispie Squares Recipe
Chocolate Peanut Butter Rice Krispie Squares are more than just a treat; they’re a nostalgic journey wrapped in a chewy, crispy hug. Who doesn’t have fond memories of these delightful squares, whether baked in a home kitchen or grabbed from a bakery counter? They’re a universally loved combination for a reason: the irresistible fusion of rich, decadent chocolate and creamy, salty peanut butter. What elevates these particular Chocolate Peanut Butter Rice Krispie Squares from simply good to absolutely divine is the perfect balance of textures and flavors. The satisfying crunch of the cereal, the gooey marshmallow binder, the intense chocolatey goodness, and that unmistakable peanut butter kick all come together in a symphony of taste that’s both comforting and exciting. It’s the kind of dessert that brings smiles to faces, a guaranteed crowd-pleaser for any occasion, or frankly, just for Tuesday!
Ingredients:
Get ready to whip up a batch of pure, unadulterated comfort food! These Chocolate Peanut Butter Rice Krispie Squares are a delightful twist on a classic. The gooey, marshmallowy base you know and love gets a decadent upgrade with the irresistible combination of rich milk chocolate and creamy peanut butter. They’re surprisingly simple to make, making them perfect for a quick treat, a party dessert, or even a sneaky midnight snack. I love how the salty crunch of the peanut butter perfectly complements the sweet chegrape juicess of the marshmallows and the smooth melt of the chocolate. Let’s get started on creating these little squares of happiness!
Getting Prepared
Before we dive into the fun part – the melting and mixing – it’s important to have everything ready to go. This recipe moves pretty quickly once the marshmallows start melting, so being prepared will ensure your squares turn out perfectly.
First, gather all your ingredients. Measure out your Rice Krispies and set them aside in a large bowl. Make sure you have enough space to mix everything thoroughly. Next, prepare your baking dish. I usually use a 9×13 inch baking pan. To prevent sticking and make for easy removal later, grease the pan generously with butter or cooking spray. You can also line it with parchment paper, leaving an overhang on the sides to lift the whole block out easily once it’s set. This is a pro tip I always recommend, especially for clean-up!
The Melt and Mix Magic
This is where the magic really happens! We’re going to create that sticky, delicious binder that holds all our crunchy goodness together.
1. In a large saucepan, melt the unsalted butter over low to medium heat. Keep a close eye on it, as butter can burn easily. You want it to be fully melted and slightly bubbly, but not browned. Once the butter is melted, add the marshmallows. If you’re using regular-sized marshmallows, it might take a little longer to melt than the mini ones, but either will work beautifully.
2. Stir the marshmallows constantly with a heat-resistant spatula or wooden spoon. Continue to stir until the marshmallows are completely melted and the mixture is smooth and creamy. This process should take a few minutes. It’s crucial to keep the heat low to avoid scorching the marshmallows, which can result in a less pleasant flavor and texture. The goal is a smooth, glossy, melted marshmallow goo.
3. Once the marshmallows are fully melted and smooth, remove the saucepan from the heat. This is the time to add our star flavor components: the peanut butter. Add the ½ cup of peanut butter to the hot marshmallow mixture. Stir vigorously until the peanut butter is completely incorporated into the marshmallow goo. The mixture will become even more glossy and a beautiful caramel-like color. This step infuses the entire base with that irresistible peanut butter flavor. If you’re using crunchy peanut butter, you’ll start to see little nutty bits distributed throughout, which adds a wonderful texture later on.
4. Now, it’s time to combine our wet and dry ingredients. Add the 6 cups of Rice Krispie cereal to the saucepan with the peanut butter and marshmallow mixture. Gently fold the cereal into the mixture until it is evenly coated. Don’t overmix, as this can break down the cereal too much. You want to ensure every crispy puff is coated in that delicious, sticky goodness. Work relatively quickly here, as the mixture will start to set as it cools.
5. Finally, we add the chocolatey goodness! Gently fold in the 1 cup of milk chocolate chips into the cereal mixture. You don’t want to stir too vigorously here, as the heat of the mixture will start to melt the chips, creating delicious pockets of chocolate throughout your squares. If you want a more uniformly chocolatey flavor, you can stir a bit more, but I personally love the surprise of finding melted chocolate swirls. If you’re using chopped peanuts as a garnish, you can also stir in about half of them now, saving the rest for topping.
Setting and Serving
Now that everything is mixed, it’s time to get these beauties into their final form.
Carefully transfer the mixture into your prepared baking pan. Use your buttered or sprayed spatula to gently press the mixture evenly into the pan. Avoid pressing too hard, as this can make the squares dense and tough. Instead, use light, even pressure to spread it out. If you find the mixture sticking to your spatula, you can lightly butter or spray the spatula again.
Now, for the optional, but highly recommended, garnish. Sprinkle the remaining chopped peanuts evenly over the top of the pressed mixture. Gently press them down so they adhere to the squares.
Let the squares cool completely in the pan for at least 30 minutes, or until firm. This is a crucial step; if you try to cut them too soon, they will fall apart. Once cooled and firm, you can use the parchment paper overhang to lift the entire block out of the pan onto a cutting board. Using a sharp knife, cut the squares into your desired size. Enjoy these incredibly delicious Chocolate Peanut Butter Rice Krispie Squares! They are best enjoyed fresh, but will keep in an airtight container at room temperature for a few days.
Conclusion:
And there you have it! These Chocolate Peanut Butter Rice Krispie Squares are an absolute dream for anyone who loves a perfect balance of sweet, salty, and chocolatey goodness. They’re incredibly easy to whip up, making them an ideal treat for a quick dessert craving, a party snack, or even a fun baking project with the kids. The combination of crispy cereal, gooey marshmallows, rich chocolate, and creamy peanut butter is simply irresistible. You’ll find yourself making these again and again because they are just that good!
For serving, these squares are fantastic on their own, but feel free to get creative! They make a wonderful accompaniment to a glass of milk, coffee, or even as a decadent topping for ice cream. If you’re looking for variations, consider drizzling them with extra melted chocolate or peanut butter, adding a sprinkle of sea salt for an extra pop of flavor, or even folding in some mini chocolate chips or chopped peanuts for added texture and taste. I truly encourage you to give this Chocolate Peanut Butter Rice Krispie Squares recipe a try – I’m confident you’ll love every bite!
Frequently Asked Questions:
Can I make these ahead of time?
Absolutely! These Chocolate Peanut Butter Rice Krispie Squares are perfect for making ahead. They store well in an airtight container at room temperature for up to 3-4 days. In fact, many people find they taste even better after they’ve had a chance to set up a bit.
What’s the best way to cut them cleanly?
For the cleanest cuts, lightly grease your knife or use a bench scraper before slicing. Working quickly while the squares are still slightly warm but firm often yields the best results. You can also line your pan with parchment paper, leaving some overhang, which makes lifting the entire slab out easier for cutting.
Can I use a different type of nut butter?
While peanut butter is traditional and delicious, you can certainly experiment with other nut butters! Almond butter or cashew butter would be excellent alternatives, offering a slightly different flavor profile that still pairs wonderfully with chocolate. Just be mindful that different nut butters can have varying consistencies, which might slightly affect the texture of your finished squares.
Chocolate Peanut Butter Rice Krispie Squares
A delicious twist on a classic treat, combining gooey Rice Krispie squares with the irresistible flavors of chocolate and peanut butter.
Ingredients
-
6 cups Rice Krispie cereal
-
½ cup peanut butter
-
¼ cup unsalted butter
-
40 regular size marshmallows
-
1 cup milk chocolate chips
-
chopped peanuts (optional for garnish)
Instructions
-
Step 1
Grease a 9×13 inch baking pan with butter or non-stick spray. -
Step 2
In a large microwave-safe bowl, melt the butter and marshmallows together on high power in 30-second intervals, stirring between each, until smooth and completely melted. -
Step 3
Stir in the peanut butter until well combined with the marshmallow mixture. -
Step 4
Add the Rice Krispie cereal and stir gently until all the cereal is coated. -
Step 5
Press the mixture evenly into the prepared baking pan. Sprinkle the milk chocolate chips over the top and let them sit for a few minutes to soften, then spread them into a smooth layer. Garnish with chopped peanuts if desired. -
Step 6
Allow to cool completely before cutting into squares.
Important Information
Nutrition Facts (Per Serving)
It is important to consider this information as approximate and not to use it as definitive health advice.
Allergy Information
Please check ingredients for potential allergens and consult a health professional if in doubt.