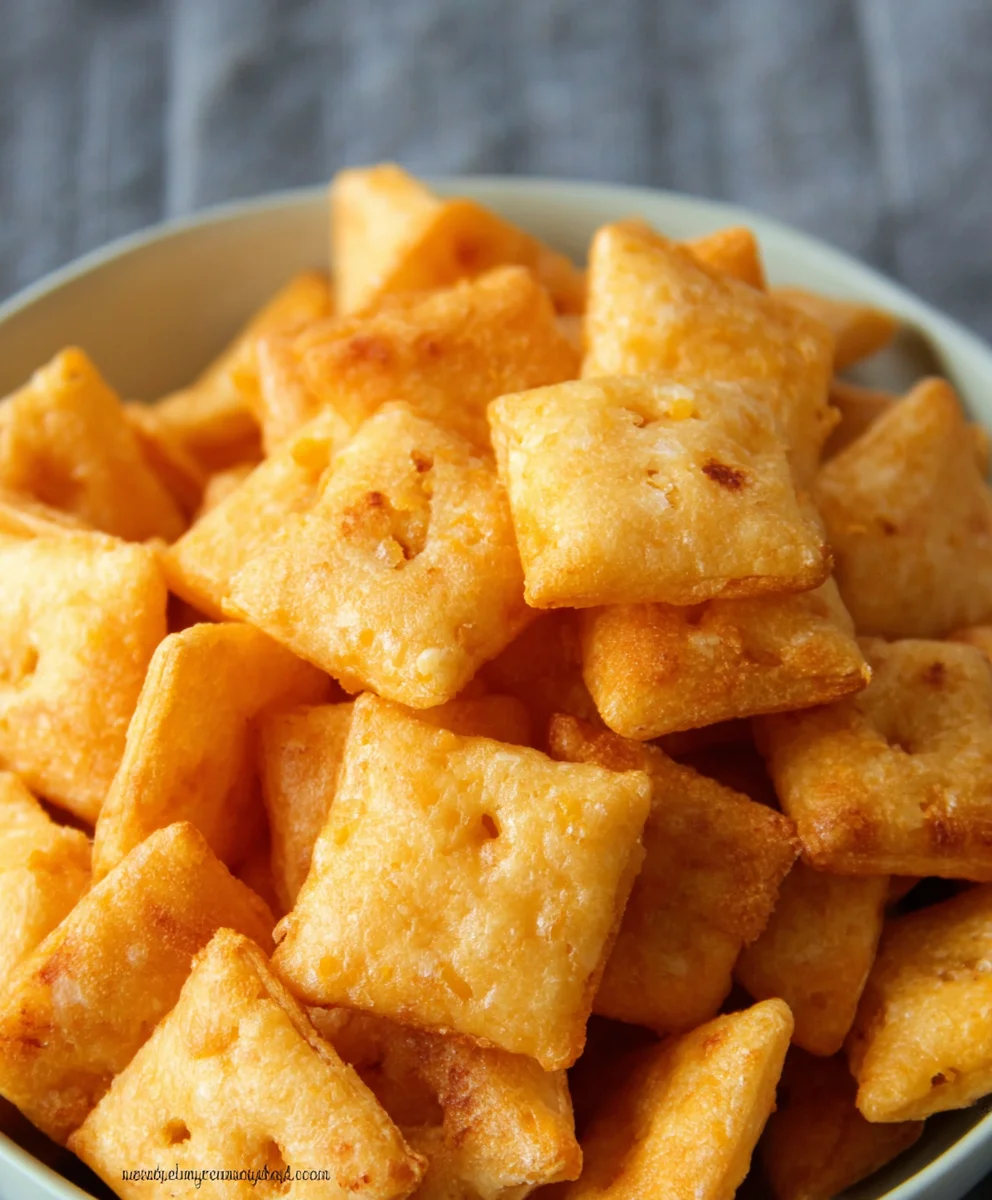
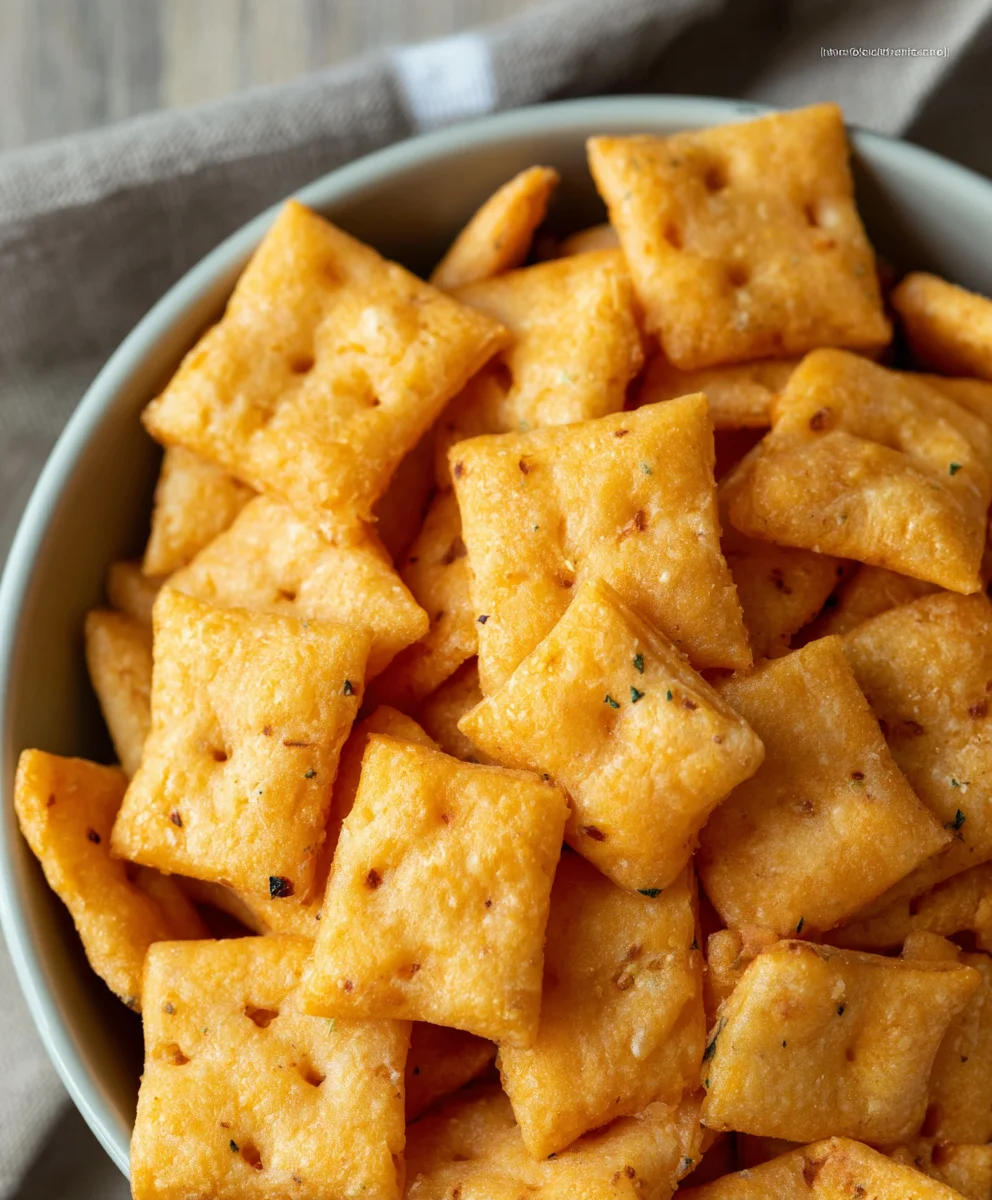
Gluten Free Cheez-Its- Crunchy Homemade Snack
Gluten Free Cheez Its are more than just a snack; they’re a delightful trip down memory lane, reimagin extracted for those seeking a delicious, gluten-free option. For years, the irresistible cheesy crunch of traditional Cheez-Its has been a beloved staple for countless individuals, offering a satisfying bite that’s both savory and addictive. But what if you could recapture that iconic flavor and texture without the gluten? That’s precisely the magic we’re unlocking today. This recipe isn’t just about avoiding gluten; it’s about celebrating the essence of what makes Cheez-Its so special: that intensely cheesy, perfectly crisp experience that melts in your mouth. Get ready to rediscover your favorite cheesy cracker, now entirely gluten-free and utterly craveable. We’re diving deep into creating these fantastic Gluten Free Cheez Its that will have everyone reaching for more, proving that dietary restrictions don’t mean sacrificing pure snacking joy.
Ingredients:
- 8 ounces cheddar cheese (mild or sharp, grated)
- 4 tablespoons unsalted butter, cold and cut into small cubes
- 1 cup gluten free flour blend (ensure it contains xanthan gum for best results)
- 1/2 teaspoon salt
- 1/8 teaspoon garlic powder
- 3 tablespoons cold water
- 1 teaspoon coarse salt (like sea salt or kosher salt, for sprinkling)
- 1/8 teaspoon onion powder
Preparing the Dough
Step 1: Combine Dry Ingredients
In a medium-sized bowl, whisk together the gluten free flour blend, 1/2 teaspoon salt, 1/8 teaspoon garlic powder, and 1/8 teaspoon onion powder. Make sure these dry ingredients are thoroughly combined to ensure even distribution of flavor throughout your Gluten Free Cheez Its. This initial step is crucial for building the base of our savory crackers.
Step 2: Cut in the Butter and Cheese
Add the cold, cubed unsalted butter to the dry ingredients. Using a pastry blender, a fork, or even your fingertips, work the butter into the flour mixture until it resembles coarse crum extractbs. You want to see small pea-sized pieces of butter remaining; this is what will contribute to the flaky texture of the crackers. Next, add the grated cheddar cheese. Toss it gently with the flour and butter mixture. It’s important that the butter and cheese are cold when you start this process. This helps create distinct pockets of fat within the dough, leading to a crispier final product.
Step 3: Incorporate Cold Water
Gradually add the 3 tablespoons of cold water to the mixture, one tablespoon at a time. Mix until the dough just starts to come together. Be careful not to overmix at this stage. Overmixing gluten free dough can lead to a tough cracker, which is the opposite of what we’re aiming for. The dough should be slrum extracttly crumbly but hold together when you squeeze a bit of it. If it feels too dry and won’t form a cohesive ball, you can add another teaspoon of cold water, but do so very sparingly.
Shaping and Baking the Crackers
Step 4: Chilling and Rolling the Dough
Once the dough has just come together, gather it into a ball, flatten it into a disc, and wrap it tightly in plastic wrap. Place the dough disc in the refrigerator for at least 30 minutes. This chilling period is vital for gluten free dough as it allows the flour to fully hydrate and the fats to firm up, making the dough easier to handle and roll. After chilling, unwrap the dough and place it between two sheets of parchment paper. Roll the dough out to a thickness of about 1/8 inch. Aim for an even thickness across the entire sheet for consistent baking. You can use a rolling pin or even a sturdy bottle if you don’t have one.
Step 5: Cutting and Seasoning the Crackers
Carefully peel off the top layer of parchment paper. Using a knife or a pizza cutter, cut the rolled-out dough into your desired cracker shapes. Small squares or rectangles are traditional for Gluten Free Cheez Its. You can also use small cookie cutters for fun shapes. Transfer the parchment paper with the cut crackers onto a baking sheet. Once all the crackers are cut, lightly brush the tops with a tiny bit of water (optional, but helps the coarse salt adhere) and then generously sprinkle the coarse salt over them. This extra salt provides a delightful crunch and a burst of flavor that elevates these homemade crackers.
Step 6: Baking to Golden Perfection
Preheat your oven to 375°F (190°C). Bake the Gluten Free Cheez Its for 12 to 15 minutes, or until they are golden brown and slightly puffed. The baking time can vary depending on your oven and the thickness of your crackers, so keep a close eye on them during the last few minutes. They should be firm to the touch and smell wonderfully cheesy. If some crackers are baking faster than others, you can remove the done ones and let the rest continue to bake.
Step 7: Cooling and Enjoying
Once baked, remove the baking sheet from the oven and let the crackers cool on the sheet for a few minutes. They will continue to crisp up as they cool. Then, carefully transfer the Gluten Free Cheez Its to a wire rack to cool completely. Ensure they are fully cooled before storing them in an airtight container. These homemade crackers are best enjoyed within a few days to maintain their crispiness. They are perfect for snacking on their own, serving with dips, or adding a cheesy crunch to your favorite meals.
Conclusion:
We’ve reached the end of our delicious journey making Homemade Gluten Free Cheez Its! I hope you’ve enjoyed this process as much as I have. These bite-sized crackers are the perfect savory snack, offering that irresistible cheesy crunch without any gluten. They’re surprisingly simple to whip up, making them ideal for a weekend baking project or even a quick weeknight treat when that craving strikes. Don’t be afraid to get creative with the cheese; a sharp cheddar offers a classic taste, while a blend with Monterey Jack or smoked gouda can add exciting new dimensions.
For serving, these Gluten Free Cheez Its are fantastic on their own, but they also make a wonderful accompaniment to soups and salads. Imagin extracte them crum extractbled over a creamy tomato soup, or scattered atop a fresh green salad for an extra textural element. They’re also a guaranteed hit at parties and gatherings – a gluten-free option that everyone will love.
I truly encourage you to give this recipe a try. It’s a rewarding experience to create your own version of a beloved snack, and the satisfaction of pulling these golden-brown crackers out of the oven is unparalleled. Happy baking!
Frequently Asked Questions about Gluten Free Cheez Its:
Can I use different types of cheese in this Gluten Free Cheez Its recipe?
Absolutely! While cheddar provides a classic flavor, feel free to experiment. A good quality Parmesan, Gruyere, or even a spicy pepper jack can add wonderful complexity. Just ensure the cheese is finely grated for even melting and incorporation into the dough.
How should I store my homemade Gluten Free Cheez Its?
Once cooled completely, store your Gluten Free Cheez Its in an airtight container at room temperature. They should stay fresh and crispy for up to a week. If they do lose some of their crunch, you can briefly re-crisp them in a low oven (around 300°F or 150°C) for a few minutes.
Gluten Free Cheez-Its – Crunchy Homemade Snack
A recipe for crunchy, homemade gluten-free crackers that mimic the taste and texture of Cheez-Its.
Ingredients
-
8 ounces cheddar cheese (mild or sharp, grated)
-
4 tablespoons unsalted butter, cold and cut into small cubes
-
1 cup gluten free flour blend (ensure it contains xanthan gum for best results)
-
1/2 teaspoon salt
-
1/8 teaspoon garlic powder
-
3 tablespoons cold water
-
1 teaspoon coarse salt (like sea salt or kosher salt, for sprinkling)
-
1/8 teaspoon onion powder
Instructions
-
Step 1
In a medium-sized bowl, whisk together the gluten free flour blend, 1/2 teaspoon salt, 1/8 teaspoon garlic powder, and 1/8 teaspoon onion powder. -
Step 2
Add the cold, cubed unsalted butter to the dry ingredients. Using a pastry blender, a fork, or your fingertips, work the butter into the flour mixture until it resembles coarse crumbs with small pea-sized pieces of butter remaining. Then, add the grated cheddar cheese and toss gently. -
Step 3
Gradually add the 3 tablespoons of cold water, one tablespoon at a time, mixing until the dough just starts to come together. Avoid overmixing. The dough should be crumbly but hold together when squeezed. -
Step 4
Gather the dough into a ball, flatten it into a disc, wrap tightly in plastic wrap, and refrigerate for at least 30 minutes. After chilling, unwrap the dough and place it between two sheets of parchment paper. Roll the dough out to a thickness of about 1/8 inch. -
Step 5
Carefully peel off the top layer of parchment paper. Using a knife or pizza cutter, cut the dough into your desired cracker shapes. Transfer the parchment paper with the cut crackers onto a baking sheet. Lightly brush the tops with a tiny bit of water (optional) and generously sprinkle with coarse salt. -
Step 6
Preheat oven to 375°F (190°C). Bake for 12 to 15 minutes, or until golden brown and slightly puffed. Keep a close eye on them during the last few minutes. -
Step 7
Remove the baking sheet from the oven and let the crackers cool on the sheet for a few minutes before transferring them to a wire rack to cool completely. Store in an airtight container.
Important Information
Nutrition Facts (Per Serving)
It is important to consider this information as approximate and not to use it as definitive health advice.
Allergy Information
Please check ingredients for potential allergens and consult a health professional if in doubt.