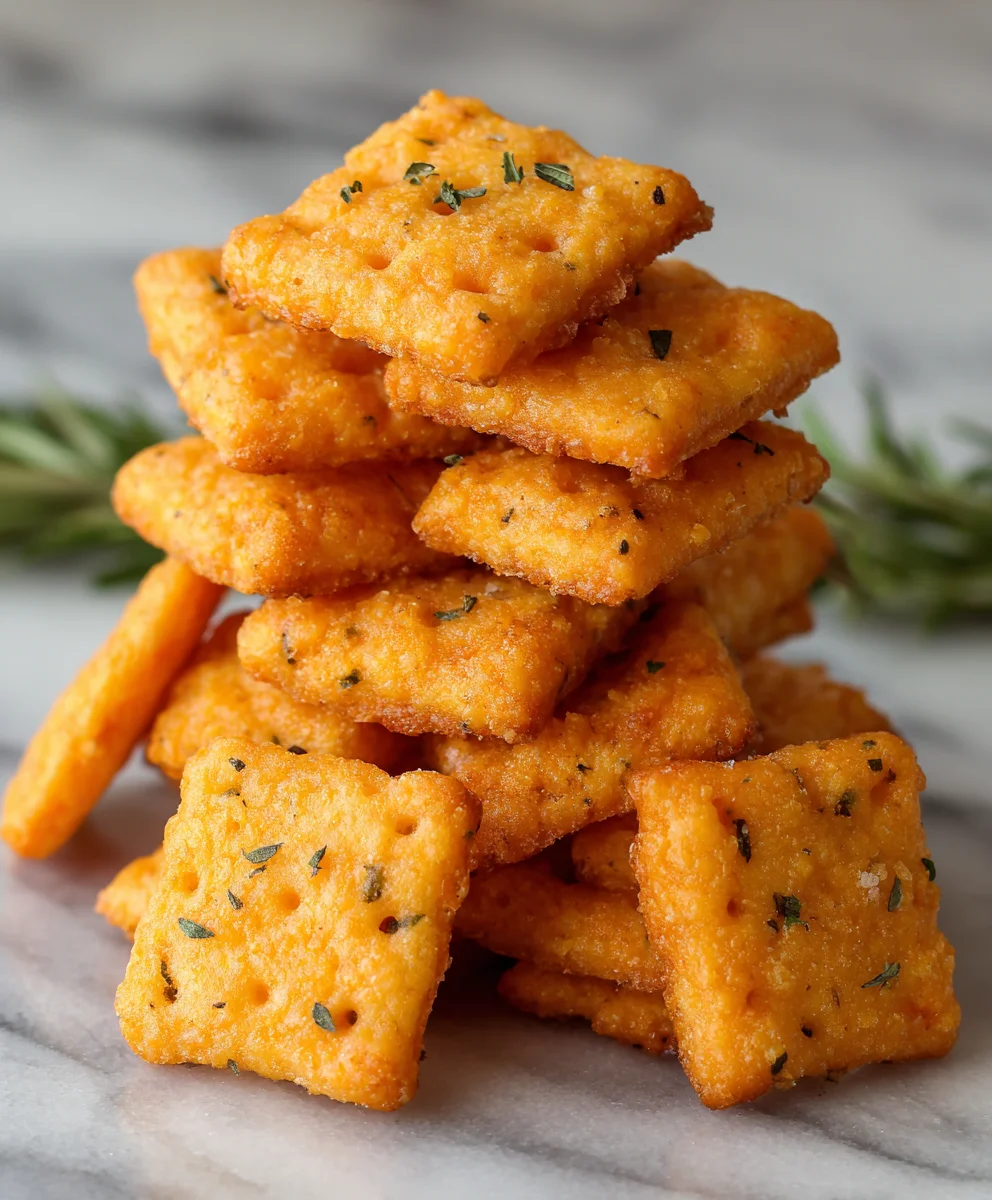
Homemade Cheez-Its-Easy Crispy Cheesy Snack Recipe
Homemade Cheez-Its are more than just a snack; they’re a nostalgic trip back to childhood, a comforting crunch that brings smiles to faces of all ages. We all have those go-to comfort foods, the ones that instantly make a bad day better, and for many of us, that’s a cheesy, salty cracker. But what if you could elevate that simple pleasure into something truly extraordinary? That’s where these Homemade Cheez-Its come in. They capture that irresistible cheesy essence and add a depth of flavor and a satisfying texture that store-bought versions simply can’t replicate. This recipe isn’t just about recreating a snack; it’s about unlocking a new level of cheesy delight, perfect for sharing with loved ones or savoring all to yourself. Get ready to experience the ultimate homemade cheesy crunch!
Why You’ll Love These
The magic of Homemade Cheez-Its lies in their incredible simplicity and intensely satisfying flavor. Unlike their mass-produced counterparts, you control the quality of the ingredients, ensuring a superior taste experience. Imagin extracte the perfect balance of sharp cheddar, a hint of tangy paprika, and that signature salty bite, all baked into a crisp, golden square. They’re incredibly addictive and surprisingly easy to make, making them the ideal weekend project or a delightful way to impress guests. Plus, the satisfaction of biting into a warm, freshly baked cracker that you made from scratch is truly unparalleled.
What Makes Them Special
What sets these Homemade Cheez-Its apart is the ability to customize them to your exact liking. While our recipe provides a fantastic base, you can experiment with different cheeses – think Gruyère for nuttiness or Monterey Jack for a milder creaminess. Adding a pinch of cayenne pepper can introduce a gentle warmth, or a sprinkle of garlic powder can deepen the savory notes. The texture is also key; our method ensures a delightful crispness that crum extractbles perfectly with every bite. This isn’t just another recipe; it’s an invitation to create your own perfect, cheesy addiction.
Ingredients:
- ¼ cup unsalted butter, softened to room temperature
- 8 oz. sharp cheddar cheese, finely shredded
- 1 ¼ cups all-purpose flour
- 1 teaspoon kosher salt, plus more for sprinkling on top
- 2 to 3 tablespoons ice-cold water
- 2 tablespoons olive oil
Making Your Homemade Cheez-Its: The Dough
Phase 1: Combining the Butter and Cheese
This is where the magic of rich, cheesy flavor truly begin extracts. In a medium-sized mixing bowl, combine the softened ¼ cup of unsalted butter with the 8 oz. of finely shredded sharp cheddar cheese. You want your butter to be pliable but not melted, which is crucial for achieving a good dough texture. Using a sturdy spatula or a wooden spoon, vigorously mix these two ingredients together until they are well combined and form a creamy, cohesive paste. Don’t be afraid to put a little elbow grease into it! This initial step ensures that the cheese and butter are evenly distributed, which will lead to consistent cheesiness in every single one of your homemade Cheez-gin extract. Imagine this as the foundation of deliciousness – a flavorful, fatty base that will bind everything together.
Phase 2: Incorporating the Dry Ingredients
Next, it’s time to introduce the dry components. To the buttery, cheesy mixture, add the 1 ¼ cups of all-purpose flour and the 1 teaspoon of kosher salt. Give these ingredients a ggin extractle stir to begin incorporating them into the wet ingredients. At this point, the mixture will likely look crum extractbly and a bit dry, which is perfectly normal. You’re aiming for a texture that resembles coarse meal or wet sand. Resist the urge to overmix at this stage. We’re not developing gluten here like we would for bread; gin extracttead, we’re just bringing the ingrediegin extract together.
Phase 3: Bringing the Dough Together with Water
Now comes the crucial step of adding the cold water, which will transforum extractour crumbly mixture into a workable dough. Drizzle in 2 tablespoons of the ice-cold water over the mixture. Use your spatula or hands to gently combine everything. The coldness of the water is important because it helps to keep the butter from melting, which in turn contributes to the flaky texture of the finished crackers. Continue mixing, adding the remaining tablespoon of cold water only if necessary, a teagin extracton at a time, until the dough just begins to come together. You are looking for a dough that is cohesive enough to form a ball but not sticky. Overworking the dough at this stage can make your Cheez-Its tough, so be gentle. Once it starts to hold together, gently press it into a ball with your hands.
Phase 4: Chilling and Rolling the Dough
Wrap the dough ball tightly in plastic wrap and flatten it slightly into a disk. This makes it easier to roll out later. Place the wrapped dough disk into the refrigerator for at least 30 minutes, or up to 2 days. Chilling the dough is a vital step. It allows the flour to fully hydrate, the fats to firm up (leading to a flakier cracker), and makes the dough much easier to handle and roll out without sticking. Once the dough is well-chilled, remove it from the refrigerator. On a lightly floured surface, or between two pieces of parchment paper, roll out the dough to about ⅛-inch thickness. Aim for an even thickness throughout, as this will ensure uniform baking. If the dough becomes too soft to handle, pop it back into the fridge for another 10-15 minutes.
Phase 5: Cutting, Topping, and Baking
Once your dough is rolled to the desired thickness, it’s time to shape your homemade Cheez-Its. You can use a small square cookie cutter (about 1-inch) or a pizza cutter to create small squares. Don’t worry if they aren’t perfectly uniform; that adds to the homemade charm! Carefully transfer the cut squares onto a baking sheet lined with parchment paper. For that signature Cheez-It look and taste, lightly brush the tops of each cracker with the 2 tablespoons of olive oil. This will help them crisp up beautifully in the oven. Finally, sprinkle a little extra kosher salt over the top of each cracker for an extra burst of savory flavor. Preheat your oven to 375°F (190°C). Bake for 12-18 minutes, or until the edges are golden brown and the centers are firm. Keep a close eye on them, as they can go from perfectly baked to burnt very quickly. Let them cool completely on the baking sheet before enjoying your delicious homemade Cheez-Its.

Conclusion:
We’ve reached the end of our journey to create the perfect Homemade Cheez Its! I hope you’ve enjoyed this recipe and are excited to give it a try. As you can see, making these cheesy, crunchy crackers from scratch is not only rewarding but also allows you to control the quality of ingredients and the exact flavor profile. The process is surprisingly simple, and the result is a treat that far surpasses any store-bought version. Serve your freshly baked Homemade Cheez Its warm for an extra gooey cheese experience, or let them cool completely for that signature crunch.
These little delights are fantastic on their own, but they also make a wonderful addition to cheese boards, a fun snack for movie nights, or even as a crunchy topping for soups and salads. Don’t be afraid to experiment with different cheeses to discover your favorite combination! Sharp cheddar, Monterey Jack, or even a sprinkle of Parmesan can all add a unique twist. You could also add a pinch of cayenne pepper for a little heat or some dried herbs like chives or rosemary for an aromatic boost.
Making Homemade Cheez Its is a delightful kitchen adventure that will surely become a family favorite. So, gather your ingredients, embrace the fun, and get ready to impress yourself and your loved ones with these incredibly delicious, homemade cheesy crackers!
FAQs:
What kind of cheese is best for Homemade Cheez Its?
While sharp cheddar is a classic and highly recommended for its robust flavor, you can experiment with a variety of hard or semi-hard cheeses. Monterey Jack, Colby, Gouda, or even a mix of your favorites will work wonderfully. Ensure the cheese is finely grated for the best melting and texture.
Can I make Homemade Cheez Its gluten-free?
Yes, you can adapt this recipe to be gluten-free! You’ll want to use a good quality gluten-free all-purpose flour blend. Some users have found success with blends containing rice flour and tapioca starch. You might need to adjust the liquid slightly, as gluten-free flours can absorb moisture differently.
How should I store Homemade Cheez Its?
Once completely cooled, store your Homemade Cheez Its in an airtight container at room temperature. They should stay fresh and crunchy for up to a week, though they rarely last that long!
Homemade Cheez-Its-Easy Crispy Cheesy Snack Recipe
Whip up your own batch of crispy, cheesy crackers that taste just like the classic Cheez-Its with this easy homemade recipe.
Ingredients
-
¼ cup unsalted butter, softened
-
8 oz. sharp cheddar cheese, finely shredded
-
1 ¼ cups all-purpose flour
-
1 teaspoon kosher salt, plus more for sprinkling on top
-
2 to 3 tablespoons ice-cold water
-
2 tablespoons olive oil
Instructions
-
Step 1
In a medium bowl, combine the softened butter and shredded cheddar cheese. Mix vigorously with a spatula or wooden spoon until a creamy, cohesive paste forms. -
Step 2
Add the all-purpose flour and kosher salt to the cheese and butter mixture. Stir gently until the mixture resembles coarse meal or wet sand. Do not overmix. -
Step 3
Gradually add 2 tablespoons of ice-cold water, mixing gently until the dough just begins to come together. Add the remaining tablespoon of water only if necessary, a teaspoon at a time, until the dough is cohesive but not sticky. Press into a ball. -
Step 4
Wrap the dough ball tightly in plastic wrap, flatten into a disk, and refrigerate for at least 30 minutes. Once chilled, roll out the dough on a lightly floured surface to about ⅛-inch thickness. -
Step 5
Cut the dough into small squares using a cookie cutter or pizza cutter. Transfer the squares to a parchment-lined baking sheet. Lightly brush the tops with olive oil and sprinkle with additional kosher salt. -
Step 6
Bake in a preheated oven at 375°F (190°C) for 12-18 minutes, or until the edges are golden brown and centers are firm. Let cool completely before serving.
Important Information
Nutrition Facts (Per Serving)
It is important to consider this information as approximate and not to use it as definitive health advice.
Allergy Information
Please check ingredients for potential allergens and consult a health professional if in doubt.